This guide will show power users how to add users to restrictive groups so they can specify what data they can and can’t see. This helps to focus team members on the accounts, fields and areas specific to them, only data that’s key to their job role.
Desktop
Download a PDF version
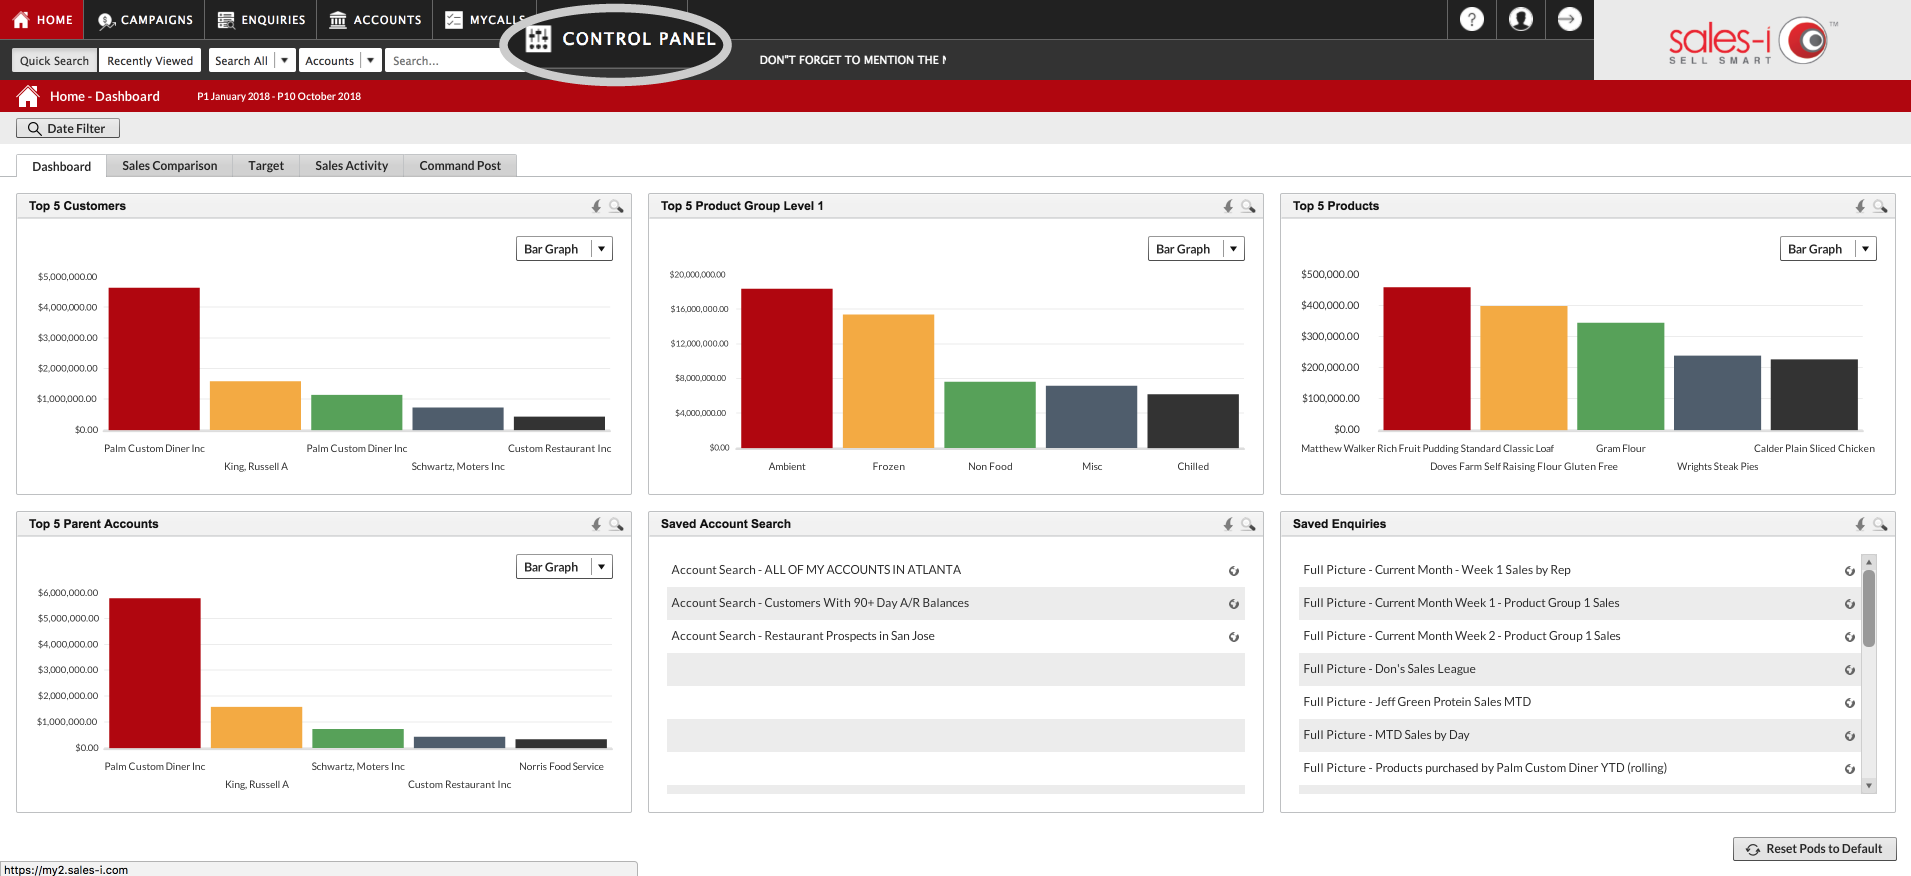
Step 1: Go to Control Panel
From the black navigation bar at the top of the screen, click Control Panel.
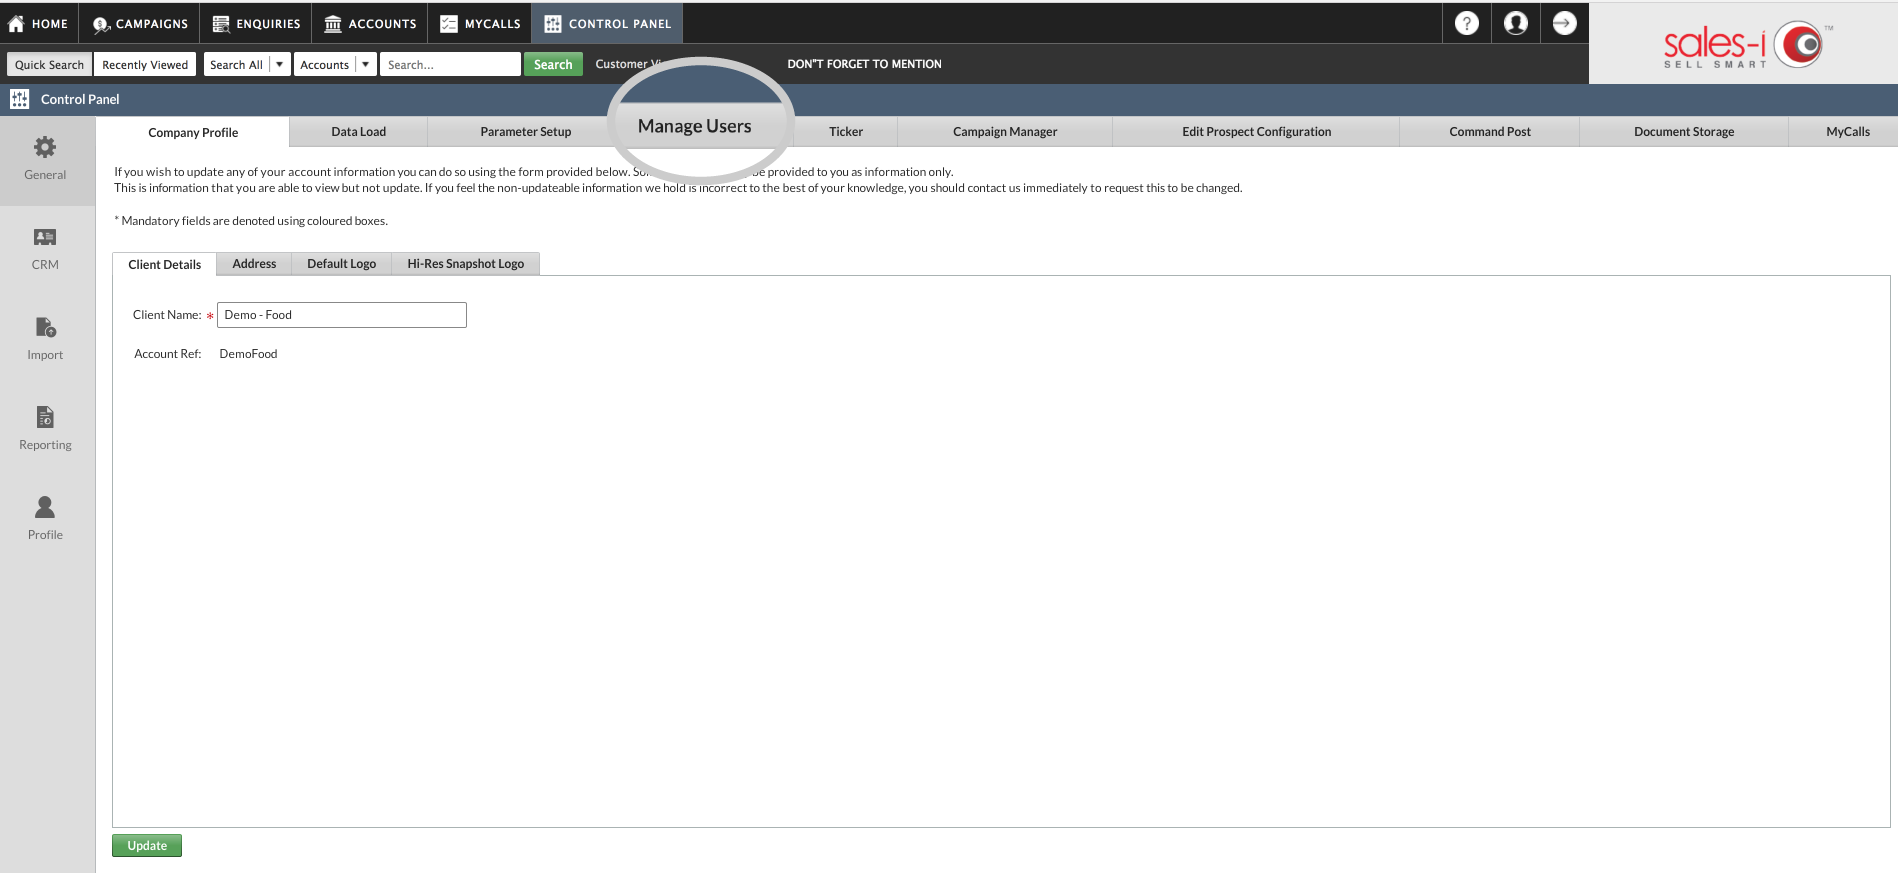
Step 2: Click Manage Users
Click the Manage Users tab.
Step 3: Select and Edit User
Select the User you want to restrict, then click Edit User.

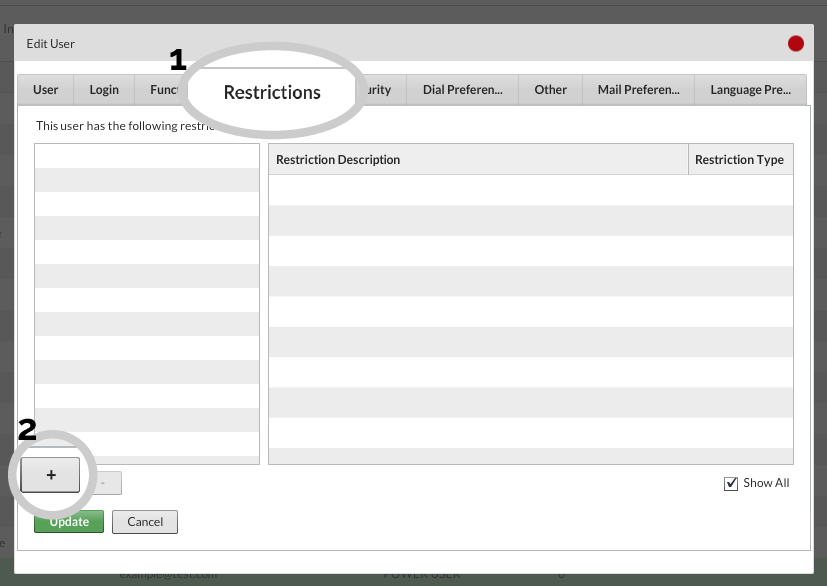
Step 4: Click Restrictions
Select the Restrictions tab and then click the + icon.
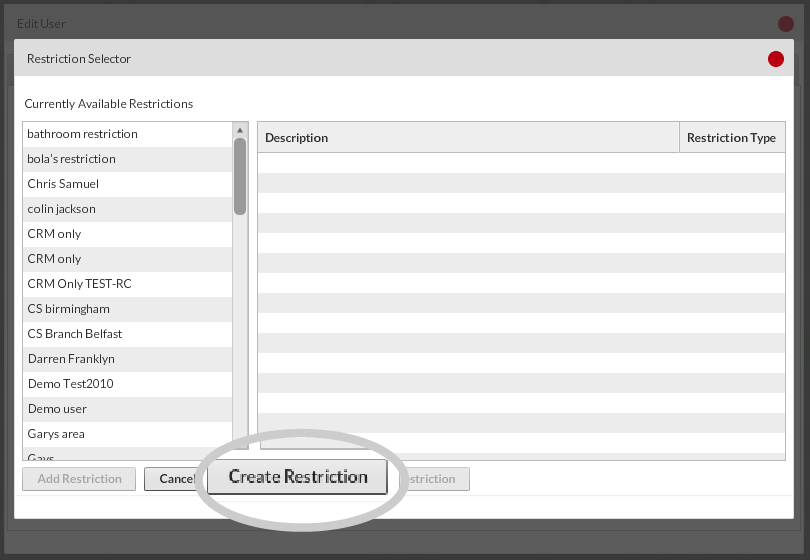
Step 5: Click Create Restriction.
Click Create Restriction.
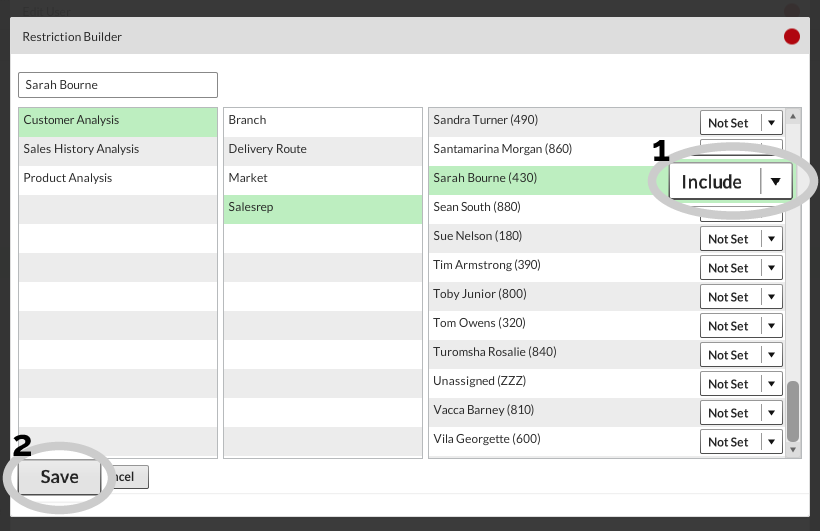
Step 6: Build your restriction
Now it’s time to build your restriction:
a) Name the Group Restriction (Note: We recommend naming the restriction after the Sales Rep)
b) Select Customer Analysis
c) Select Sales Rep
d) Scroll through the list, select the sales rep code(s) this user should have access to and change the drop down from Not Set to Include.
e) Click Save to create this restriction.
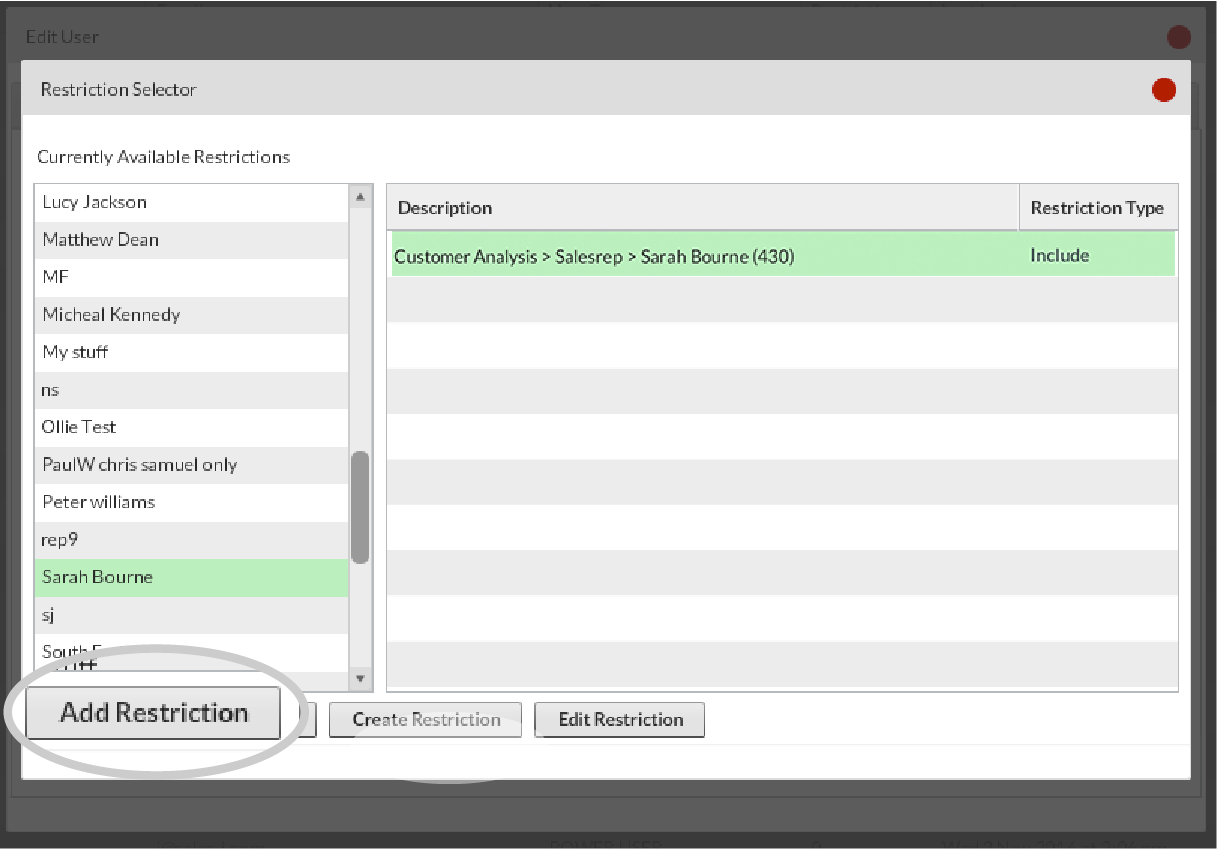
Step 7: Click Add Restriction
Select the newly created group from the list on the left-hand side and click Add Restriction.
Finally, click Update.
The user you selected will now be restricted to see only the data you have allowed.