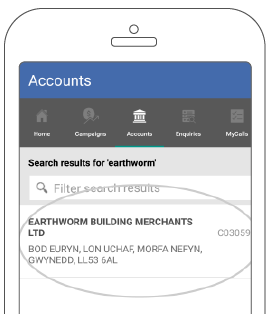
This guide will show you how to use the accounts search facility so you can quickly find relevant information you may need.
Desktop
Download a PDF version
Step 1: Go to Accounts
From the sales-i home screen, click on Accounts.
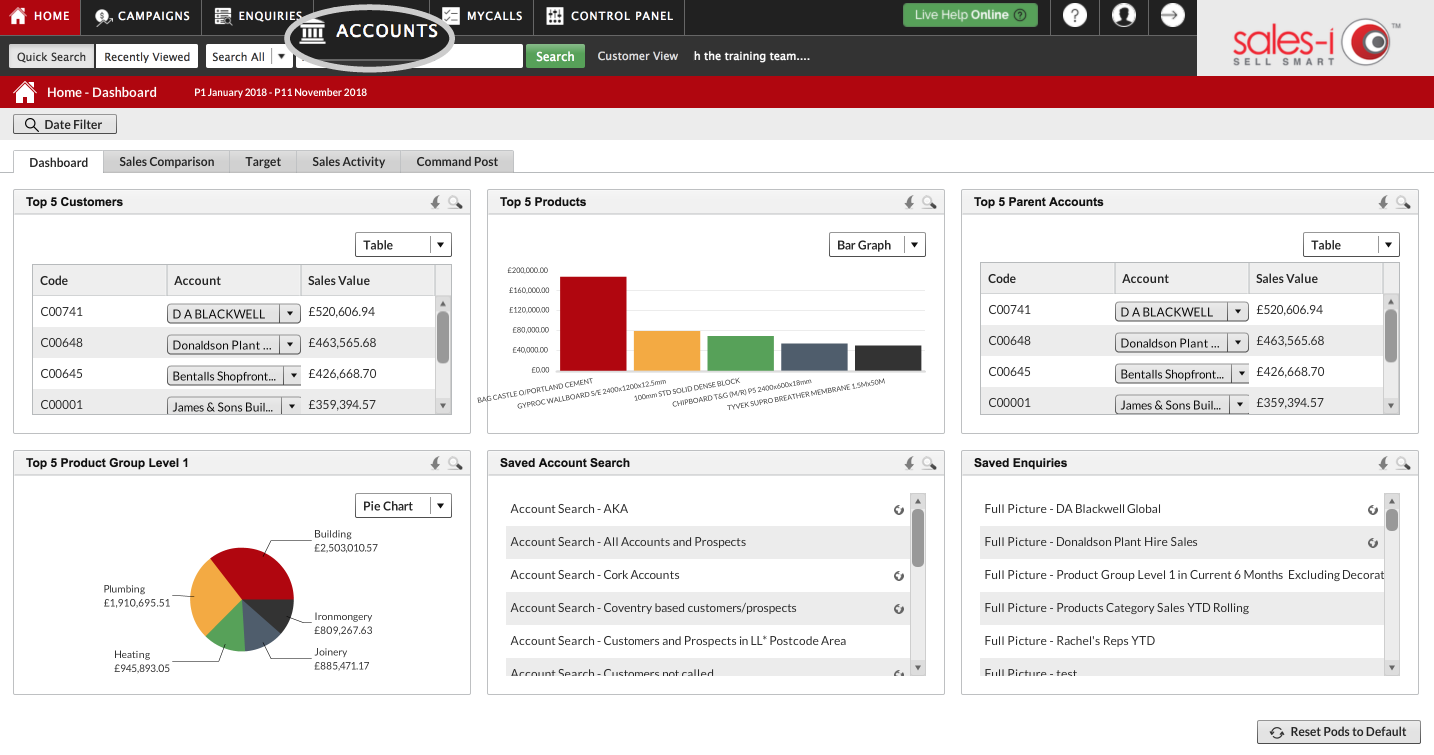
Step 2: Search options
Now, you can decide if you would like to search for Accounts, Contacts or both. To Select both tick ALL.
You can also decide whether you would like to select Customers or Prospects too. Tick the box next to whichever option you'd like to search for.

Step 3: Type and Search
Once you are happy with your search criteria, type the name of the Account/Contact you would like to search for in the Search for: box and then select the green Search button.

Apple
Download a PDF version
Step 1: Go to Accounts
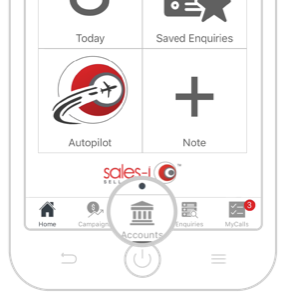
Tap Accounts from the menu at the bottom of the screen.
Step 2: Start a New Search
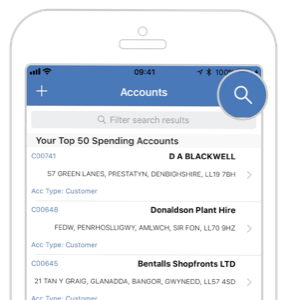
Accounts in the sales-i app will default to show you a list of your Top 50 Spending Accounts. To start a new search tap the magnifying glass icon in the top right corner of the screen.
Note: Filter search results allows you to filter the results list of a search – this does not conduct a new search.
Step 3: Search For Bar
This will bring you to the Accounts Search screen.
If you wish to search for Contacts instead of Accounts. Tap Contacts at the top of the screen. For this how to guide, we will search for Accounts.
From here, tap on the Search For bar.
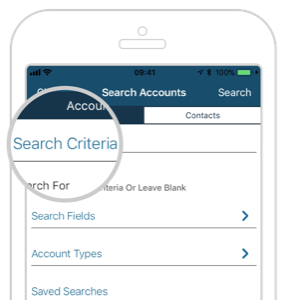
Step 4: Apply a Search
Enter your search criteria and tap Apply.
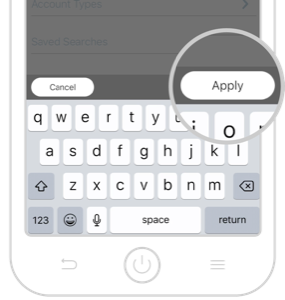
Step 5: Change Search Criteria
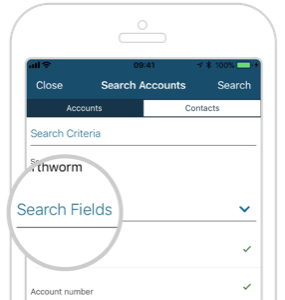
By default, the Account Search is set to search by Name and Account Number.
If you want to change this, tap Search Fields and choose the criteria you want to search by.
Step 6: Apply a Search
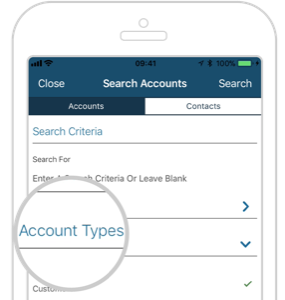
You can also specify the type of account you want to search for under Account Types. You can choose to search by Customers, Prospects or to Group by Parent Accounts.
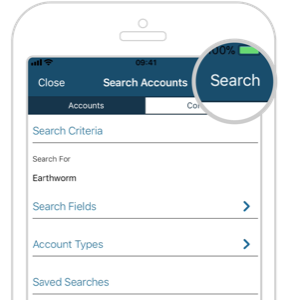
Step 7: Search
When you’re happy with your search criteria, tap Search in the top right corner of the screen to view your results.
Step 8: Apply a Search
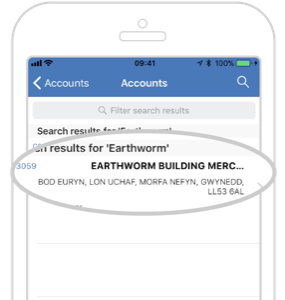
Tap on a Customer to access their Account Card.
Android
Download a PDF version
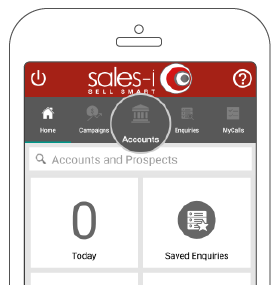
Step 1: Go to Accounts
Tap Accounts from the menu at the top of the screen.
Step 2: Start a New Search
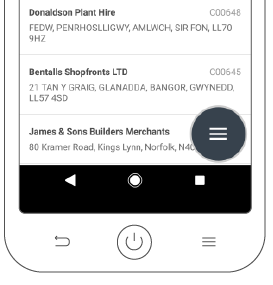
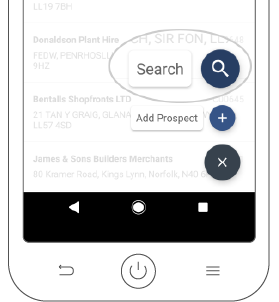
Accounts in the sales-i app will default to show you a list of your Top 50 Spending Accounts. To start a new search tap the three lined action button in the bottom right corner of the screen.
Note: Filter search results allows you to filter the results list of a search – this does not conduct a new search.
Step 3: Search For Bar
Tap the magnifying glass Search icon.
Step 4: Apply a Search
This will bring you to the Accounts Search screen.
If you wish to search for Contacts instead of Accounts. Tap Contacts at the top of the screen. For this how to guide, we will search for Accounts.
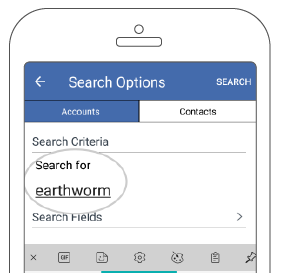
So, tap on the Search For bar, enter your search criteria and tap your keyboards Enter key.
Step 5: Change Search Criteria
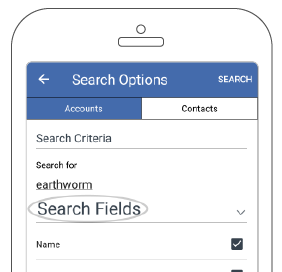
By default, the Account Search is set to search by Name and Account Number. If you want to change this, tap Search Fields and choose the criteria you want to search by.
Step 6: Apply a Search
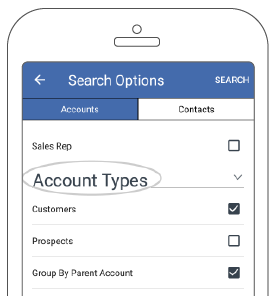
You can also specify the type of account you want to search for under Account Types. You can choose to search by Customers, Prospects or to Group by Parent Accounts.
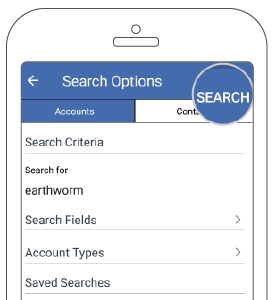
Step 7: Search
When you’re happy with your search criteria, tap Search in the top right corner of the screen to view your results.
Step 8: Apply a Search
Tap on a Customer to access their Account Card.
