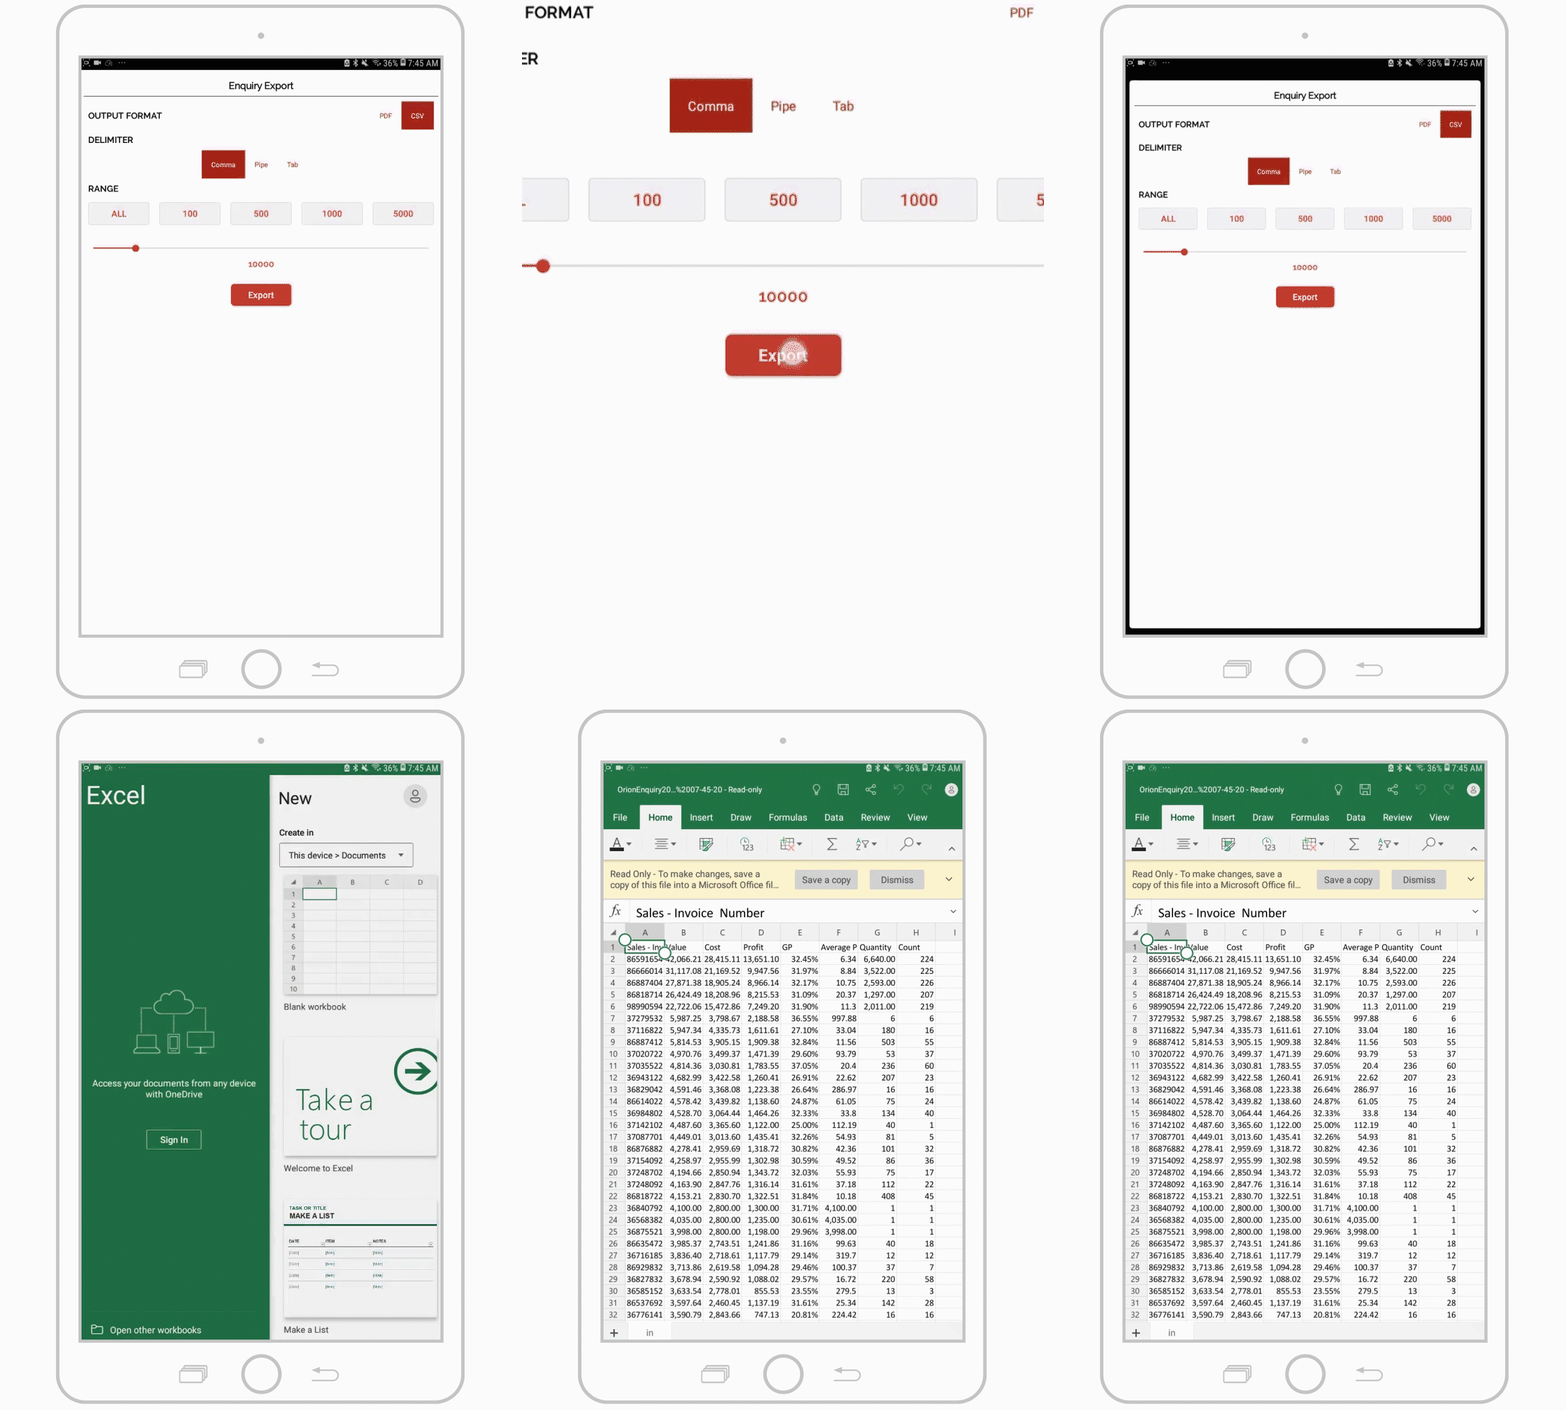
If invoice numbers are included as part of the data extracted from your back-office system, you will see a corresponding bubble in Enquiries. This can be useful to help identify products on a specific invoice, or pinpoint any data discrepancies.
Select your device:
Desktop
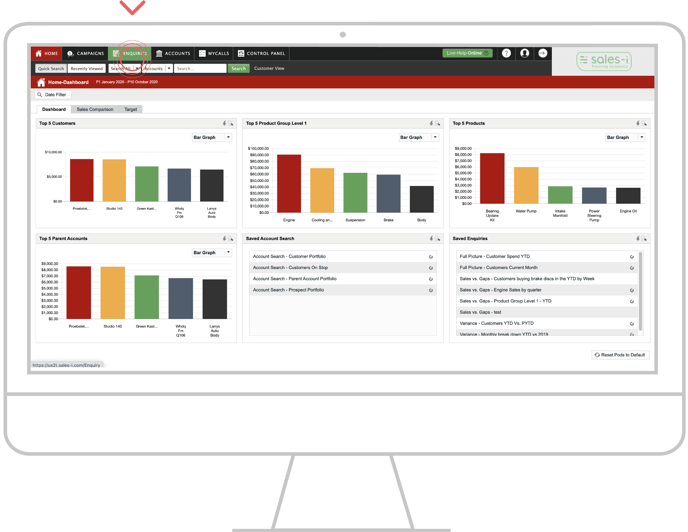
Step 01: Navigate to Enquiries
Navigate to Enquiries via the navigation menu at the top of the screen.
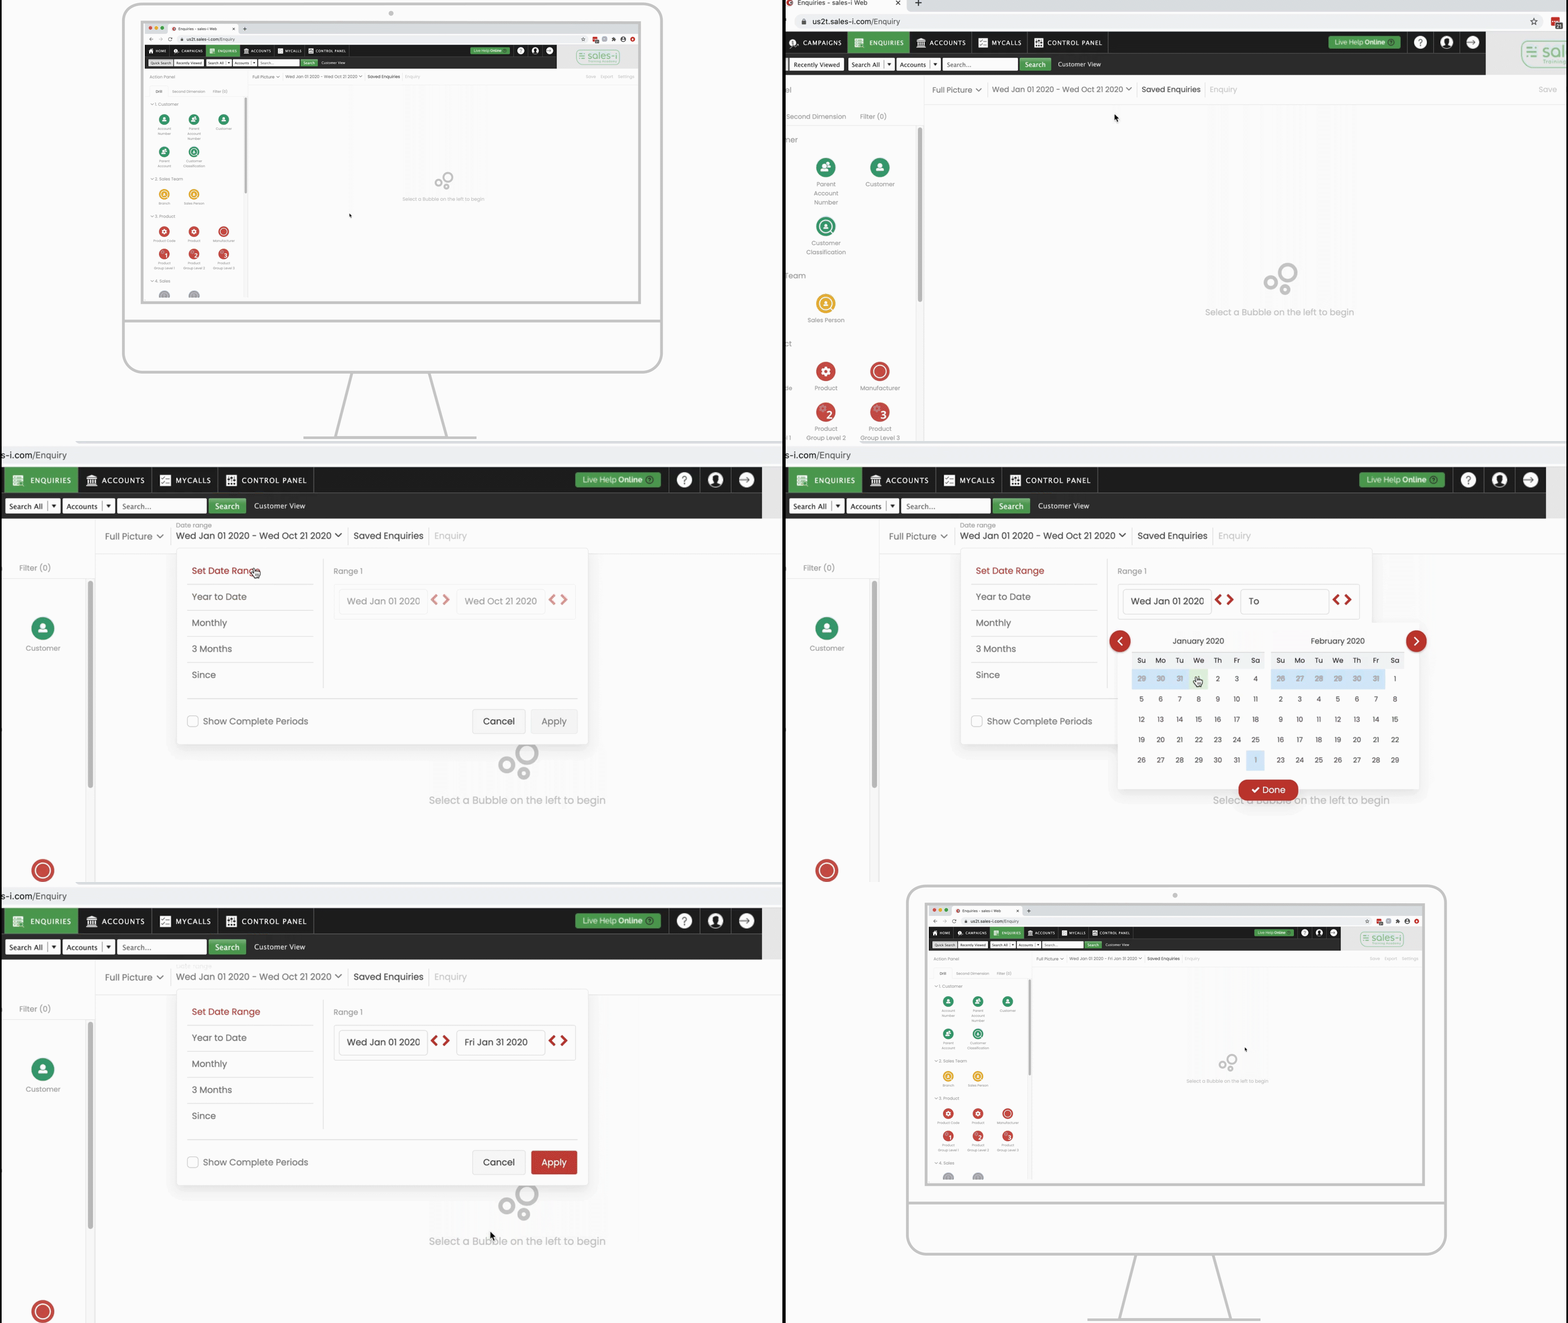
Step 02: Update date range (optional)
Select the date range towards the top of the screen to open the date selector.
Select your preferred date range and then click Apply.
Step 03: Select the Invoice bubble
Locate and select the Invoice bubble from bubbles on the left.
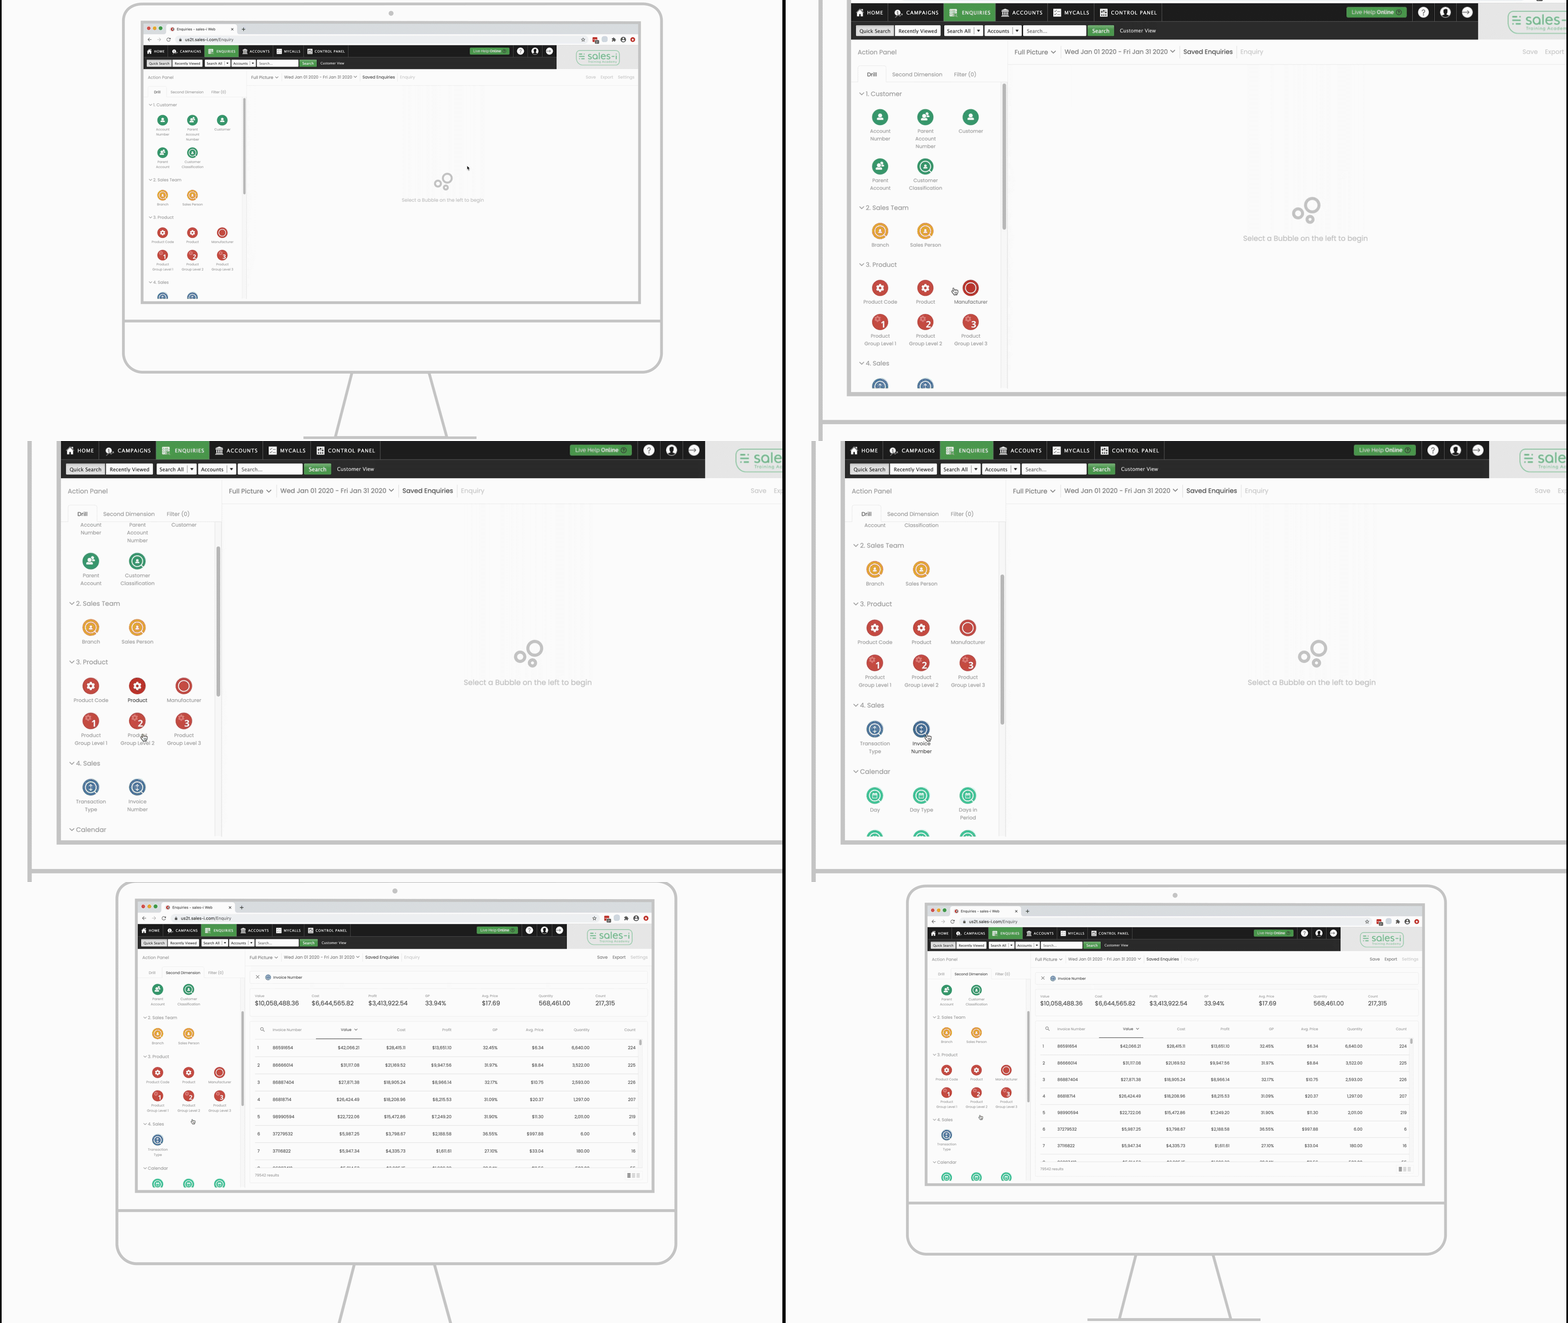
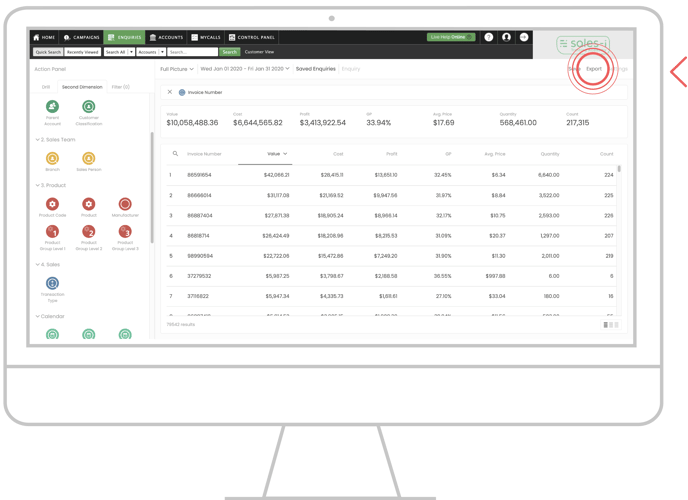
Step 04: Click Export
You will now see all invoices for the selected date range sorted by sales Value.
To export these results, click Export in the top right.
Step 05: Choose your Output Format
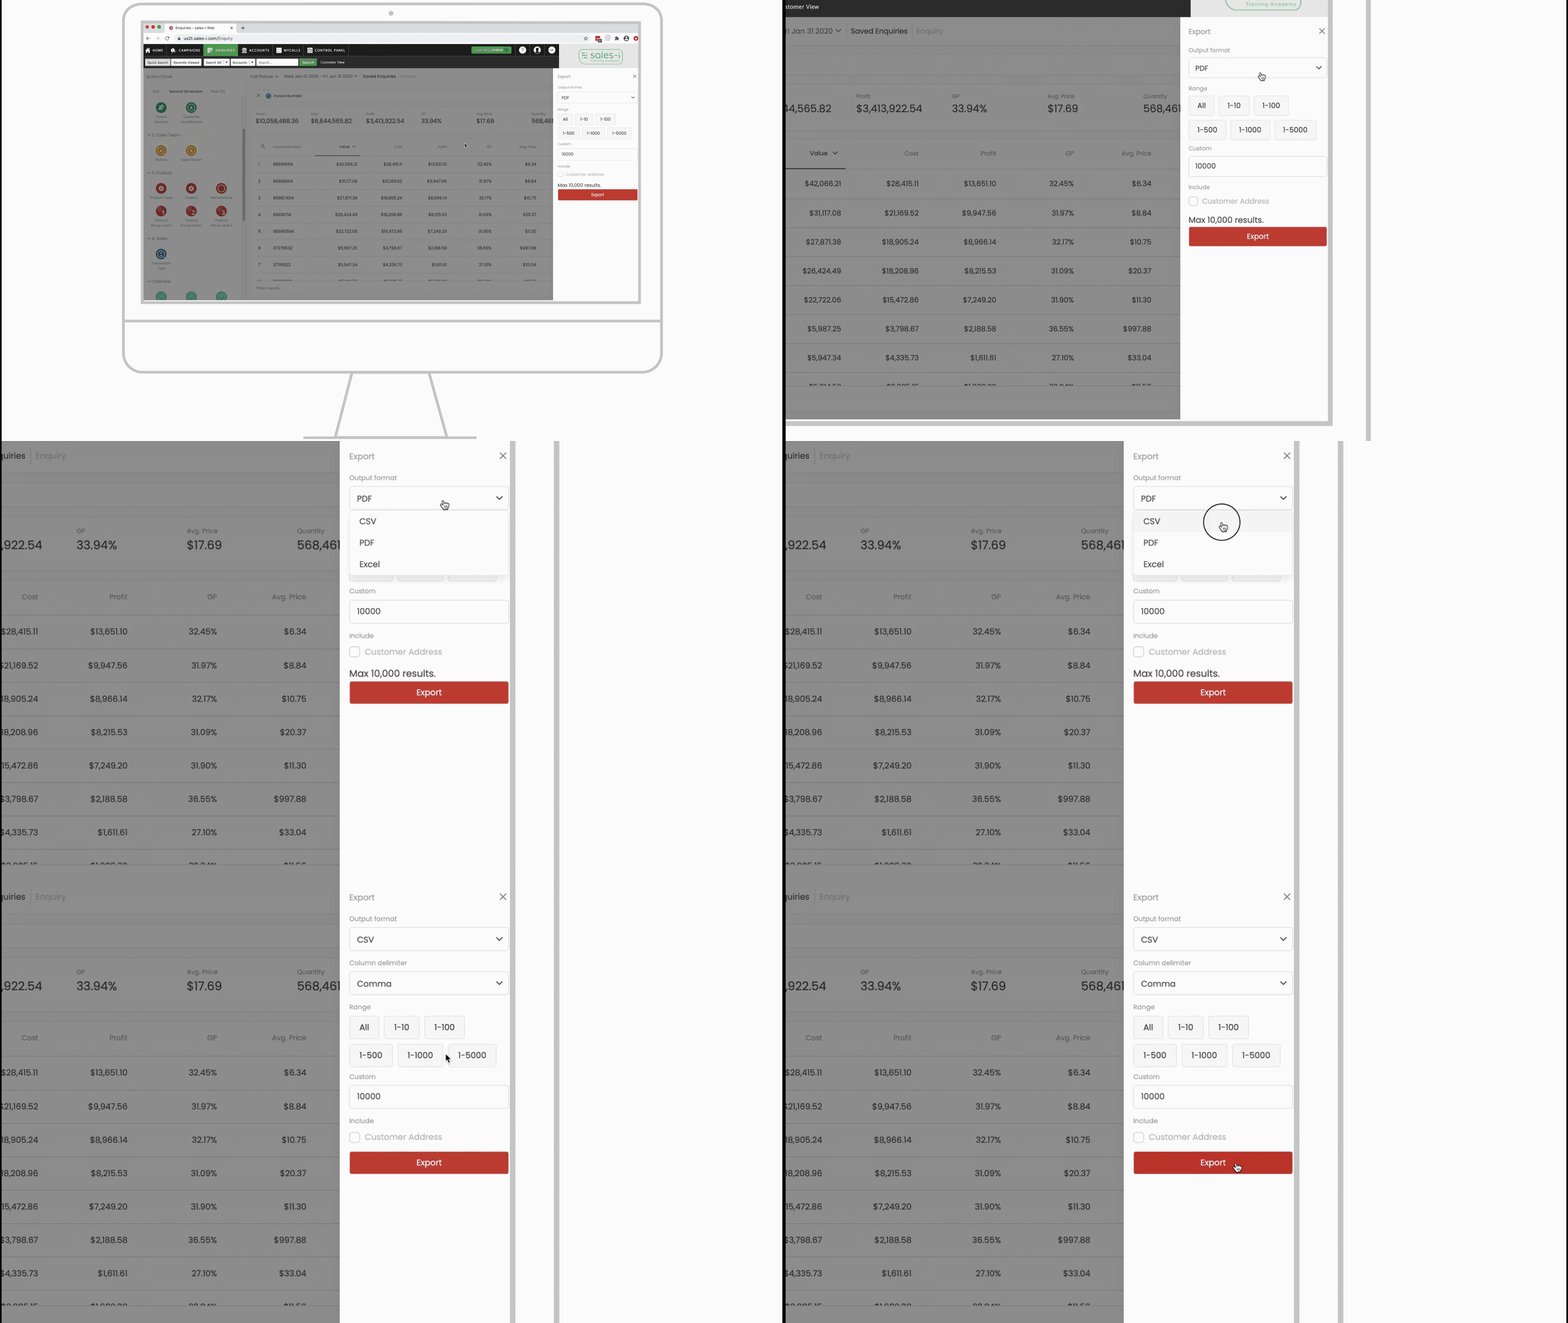
Select the desired Output Format from the available options.
Please note: if you are sharing this information with our support team, please select CSV.
Step 06: Export
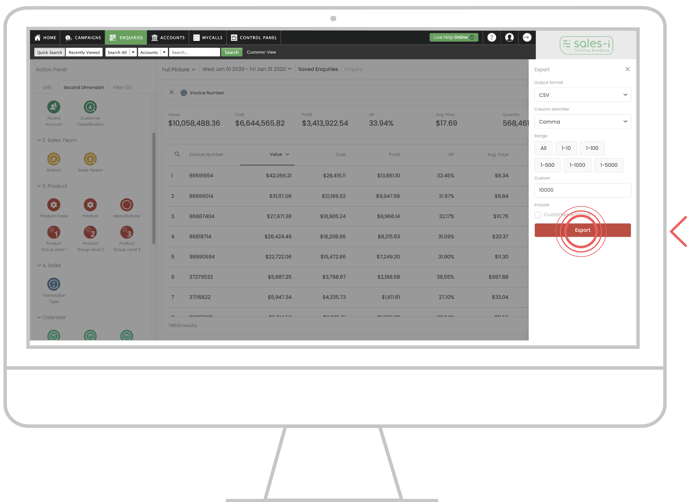
Finally, select Export.
Your results may take a moment to download and will appear as a pop-up when ready.
Can't see the download? Please ensure your browser does not block pop-up windows.
Apple
Step 01: Navigate to Enquiries
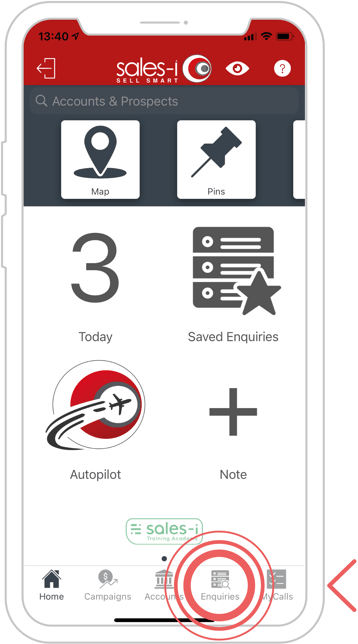
Navigate to Enquiries via the navigation menu at the bottom of the screen.
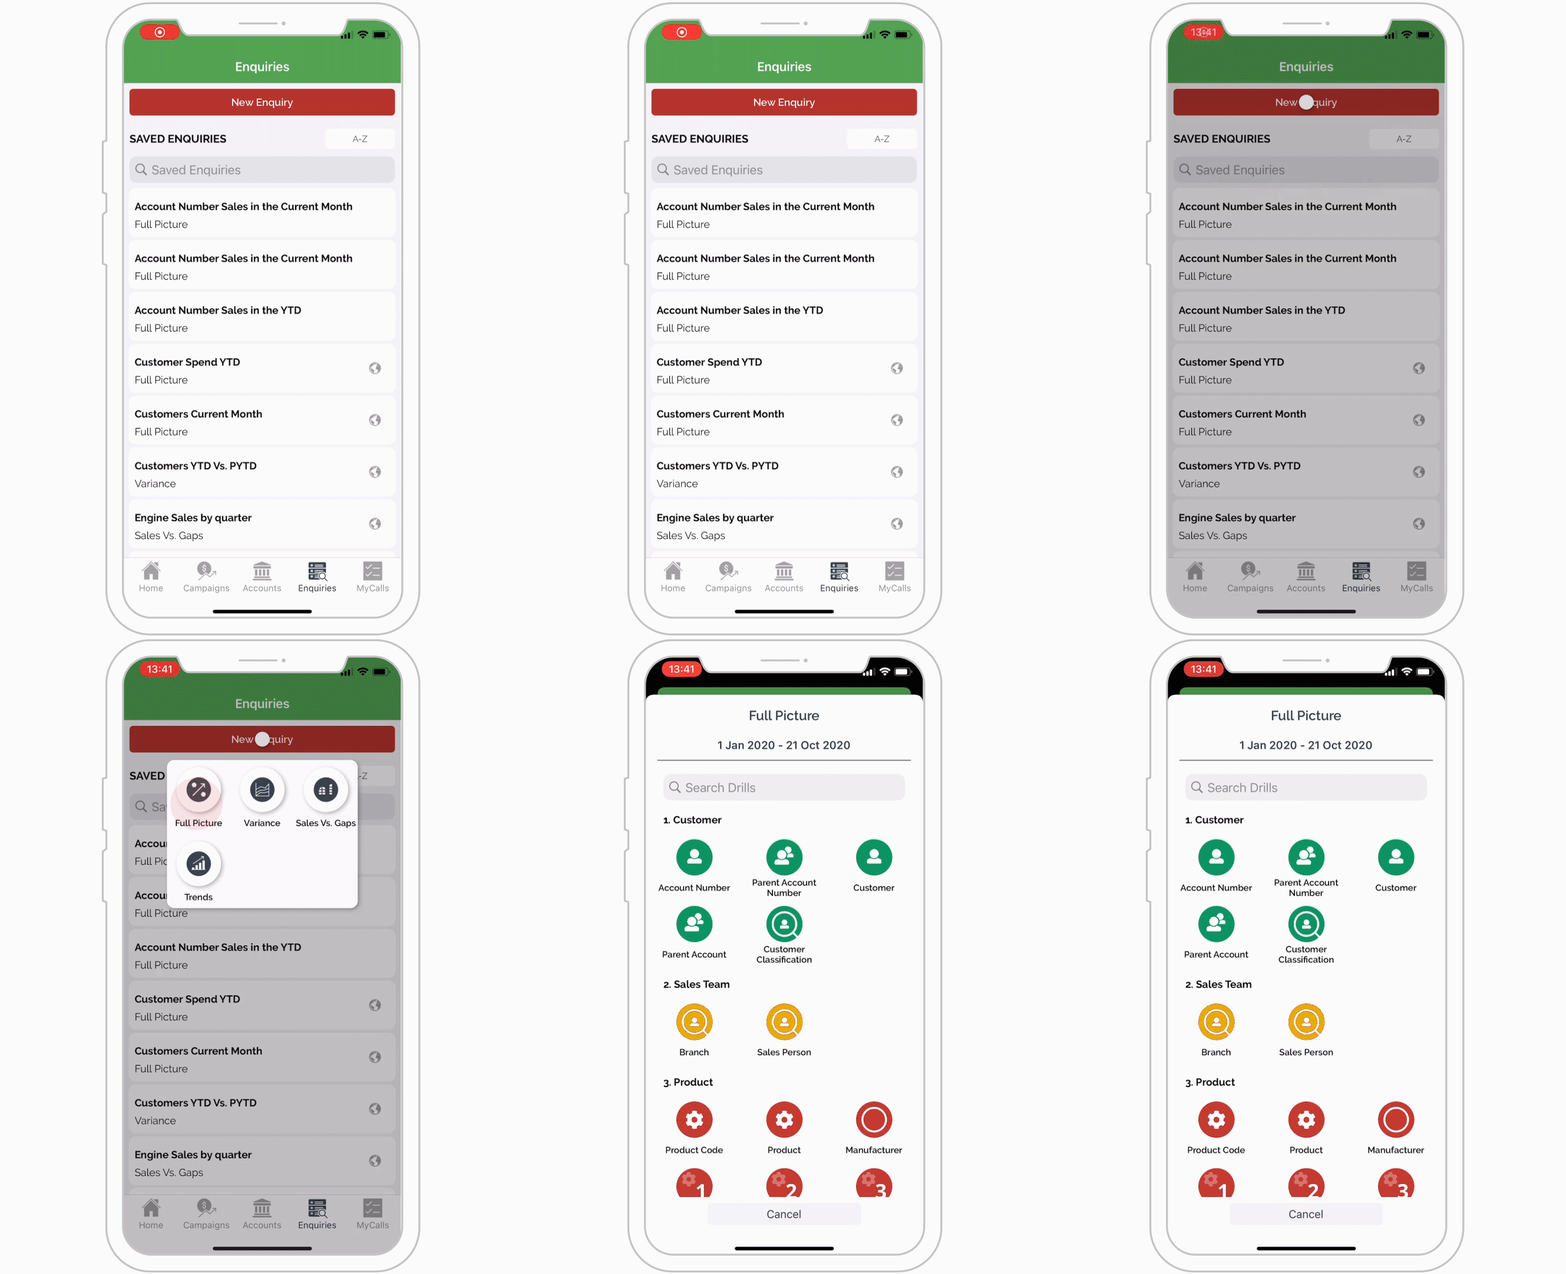
Step 02: Select Enquiry
Tap New Enquiry at the top of the screen. Then select your desired Enquiry type, for this example we will select Full Picture.
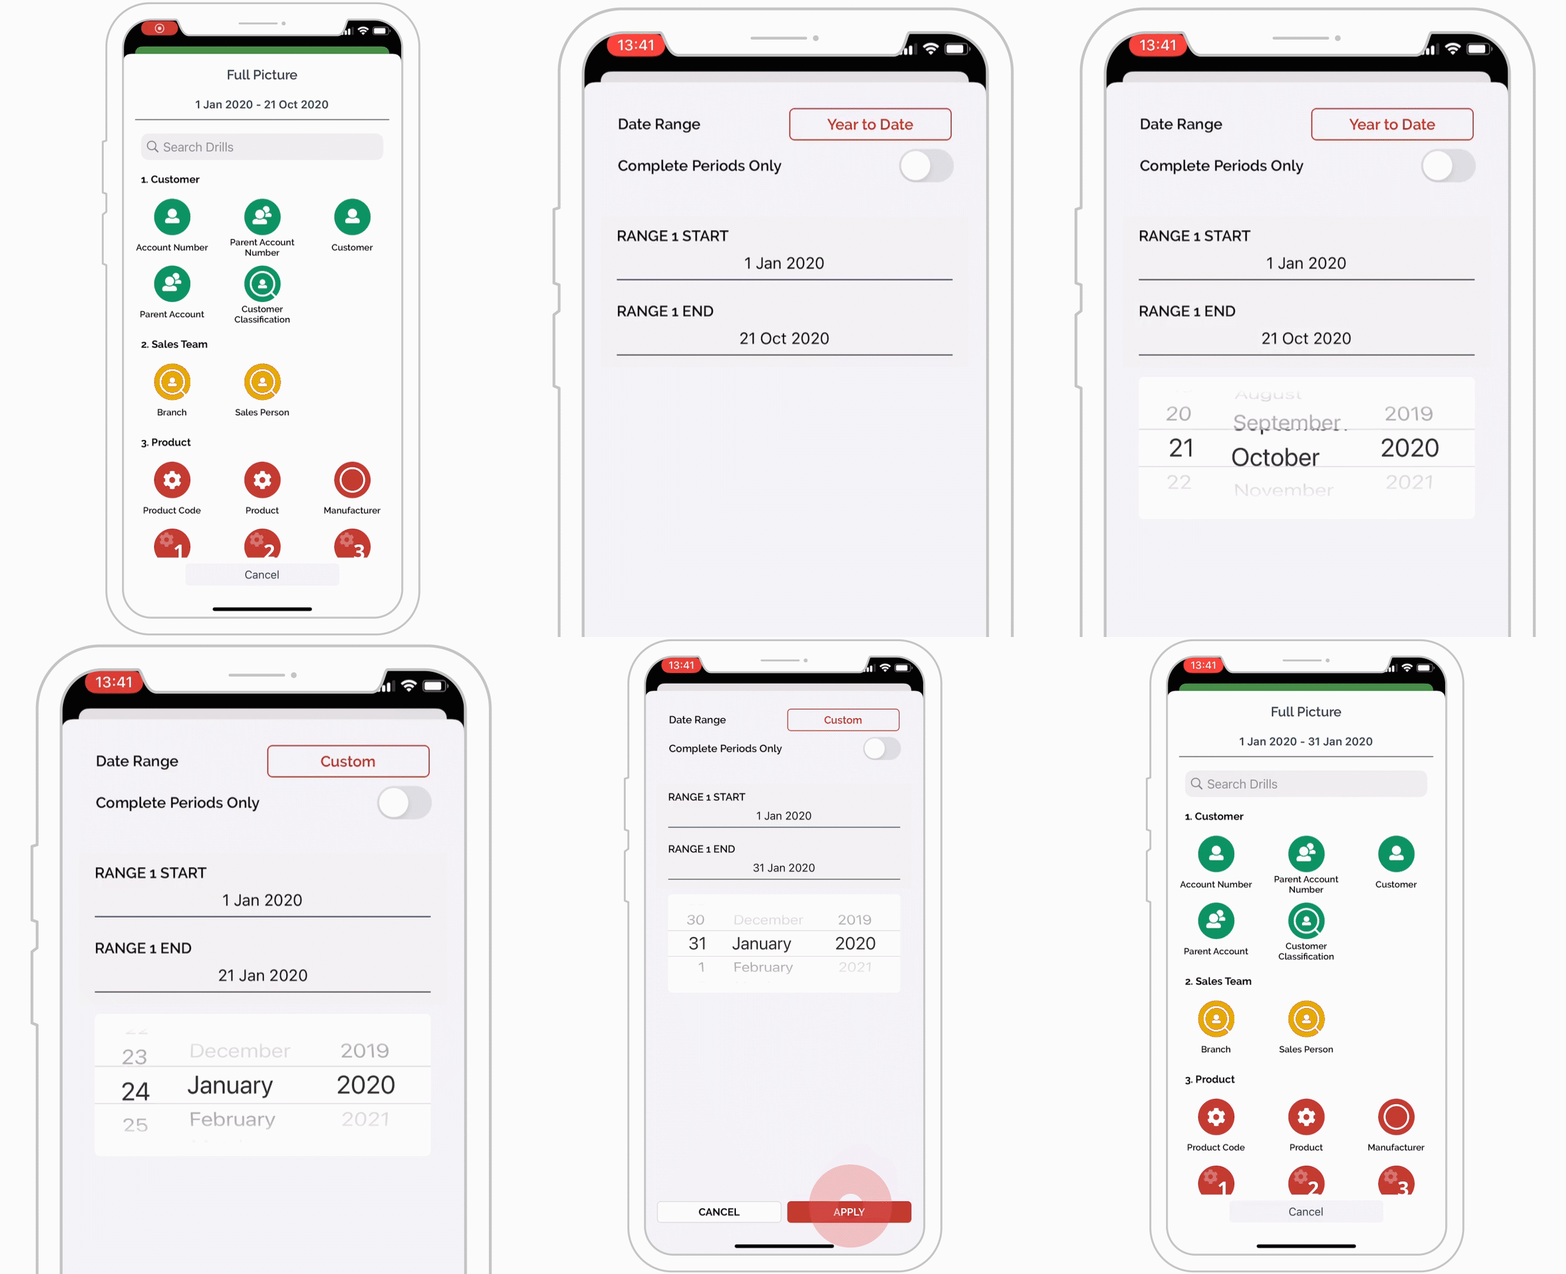
Step 03: Update date range (optional)
Select the date range towards the top of the screen to open the date selector.
Select your preferred date range and then tap Apply.
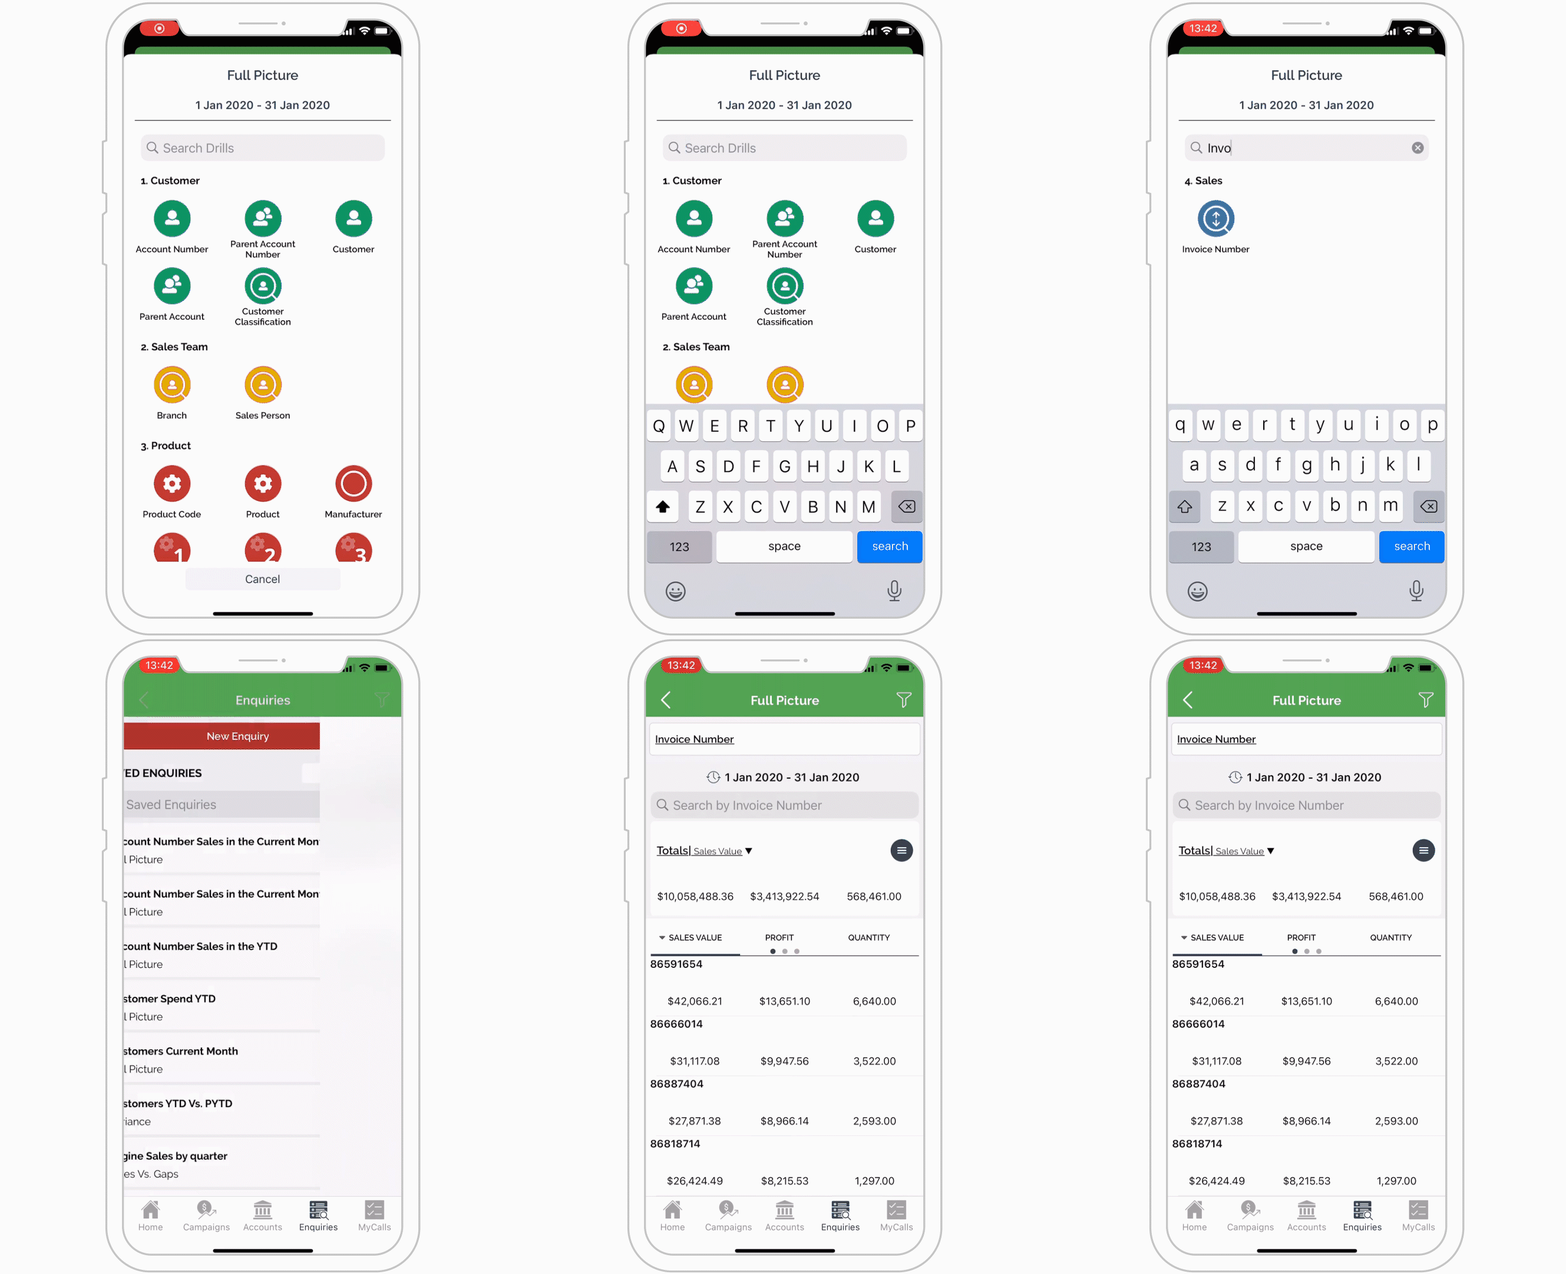
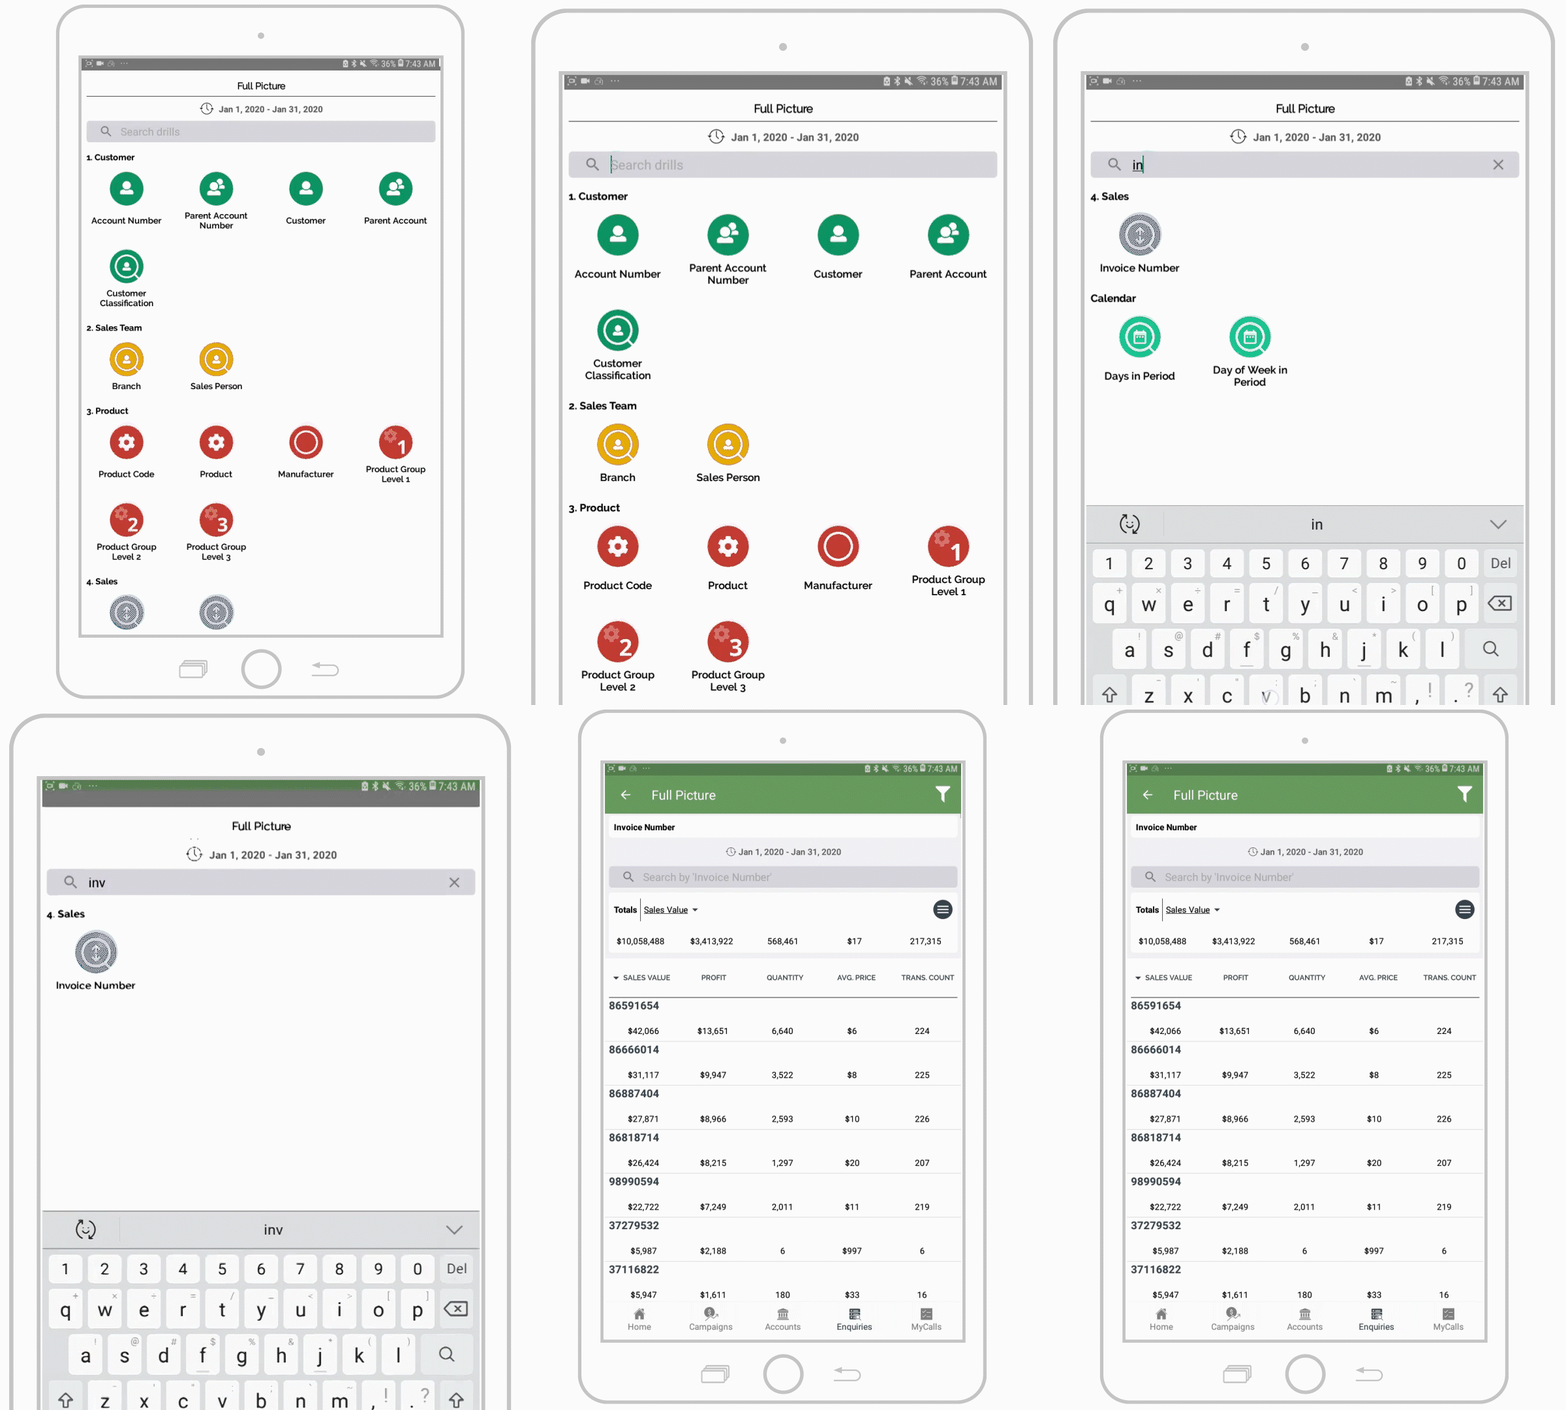
Step 04: Select the Invoice bubble
Locate and select the Invoice bubble.
Note: use the search bar at the top to save time and quickly locate this bubble
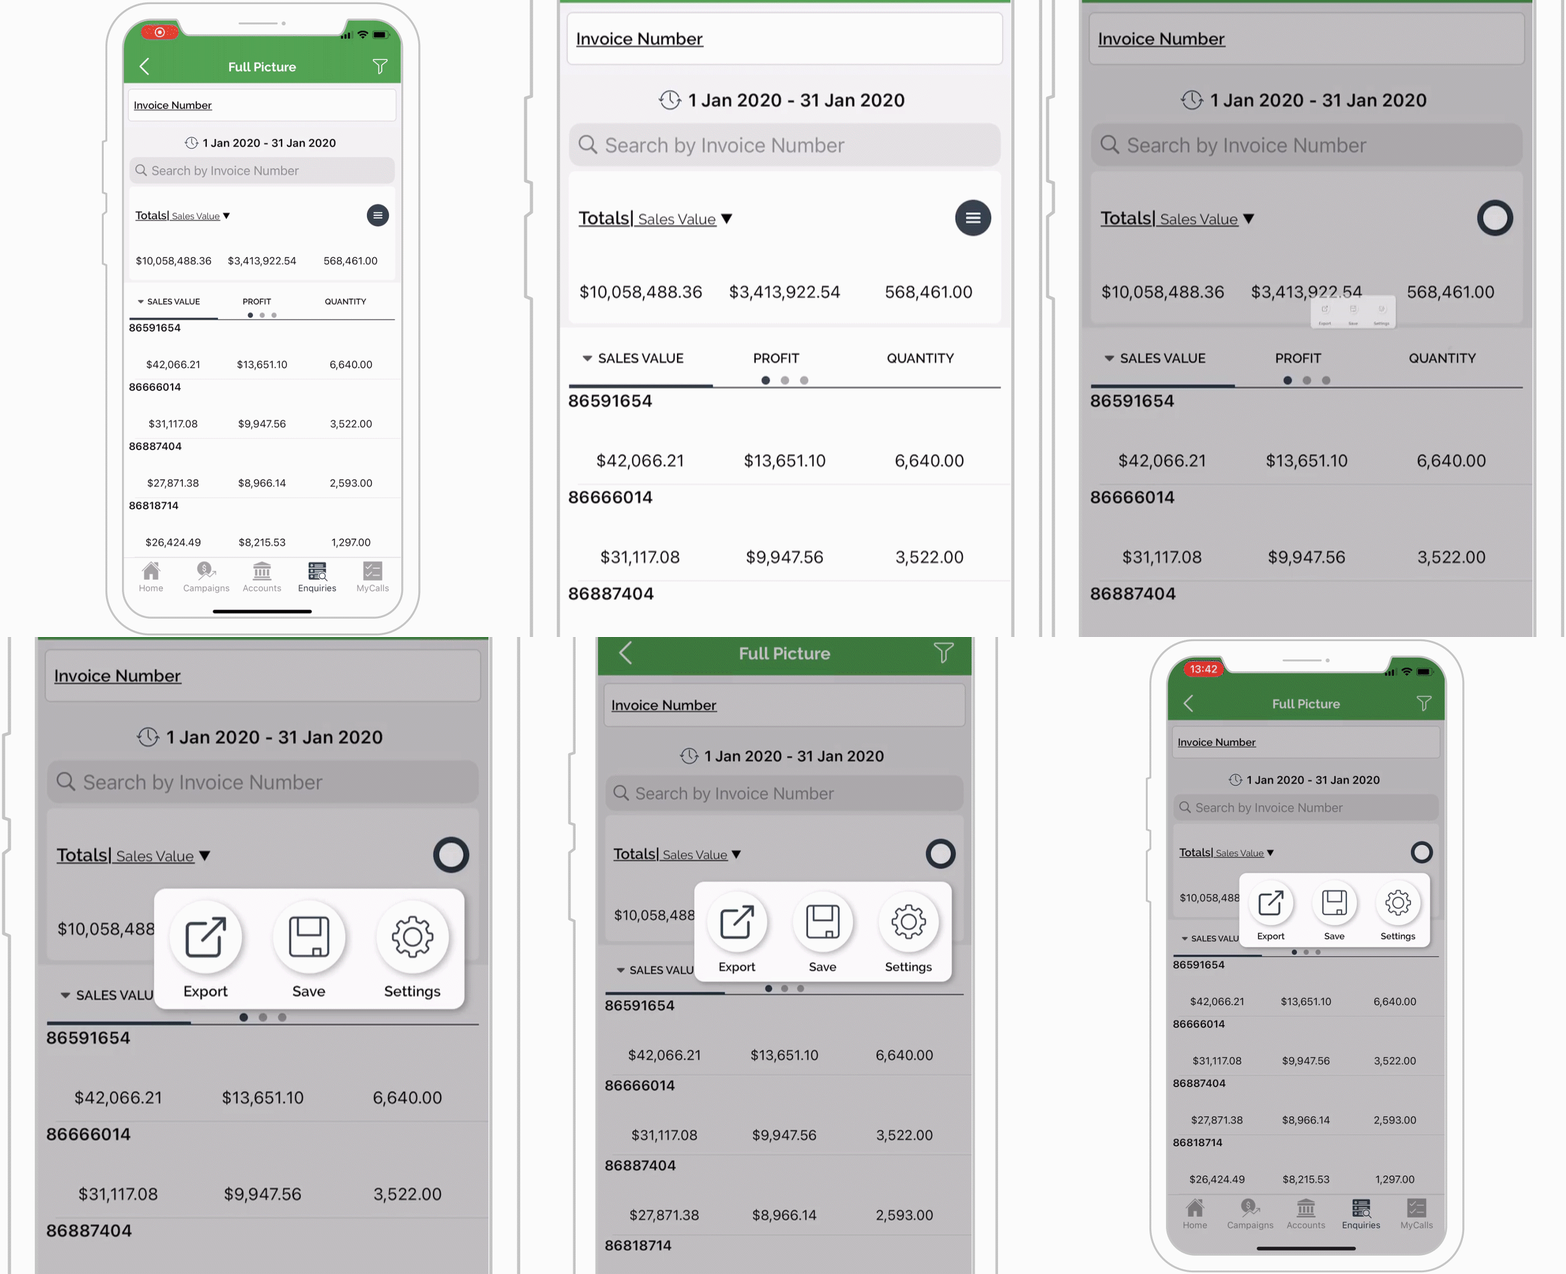
Step 05: Select Export
You will now see all invoices for the selected date range sorted by sales Value.
To export these results, tap the hamburger menu near the top right. Then select Export.
Step 06: Choose your Output Format
Select the desired Output Format from the available options.
Please note: if you are sharing this information with our support team, please select CSV.
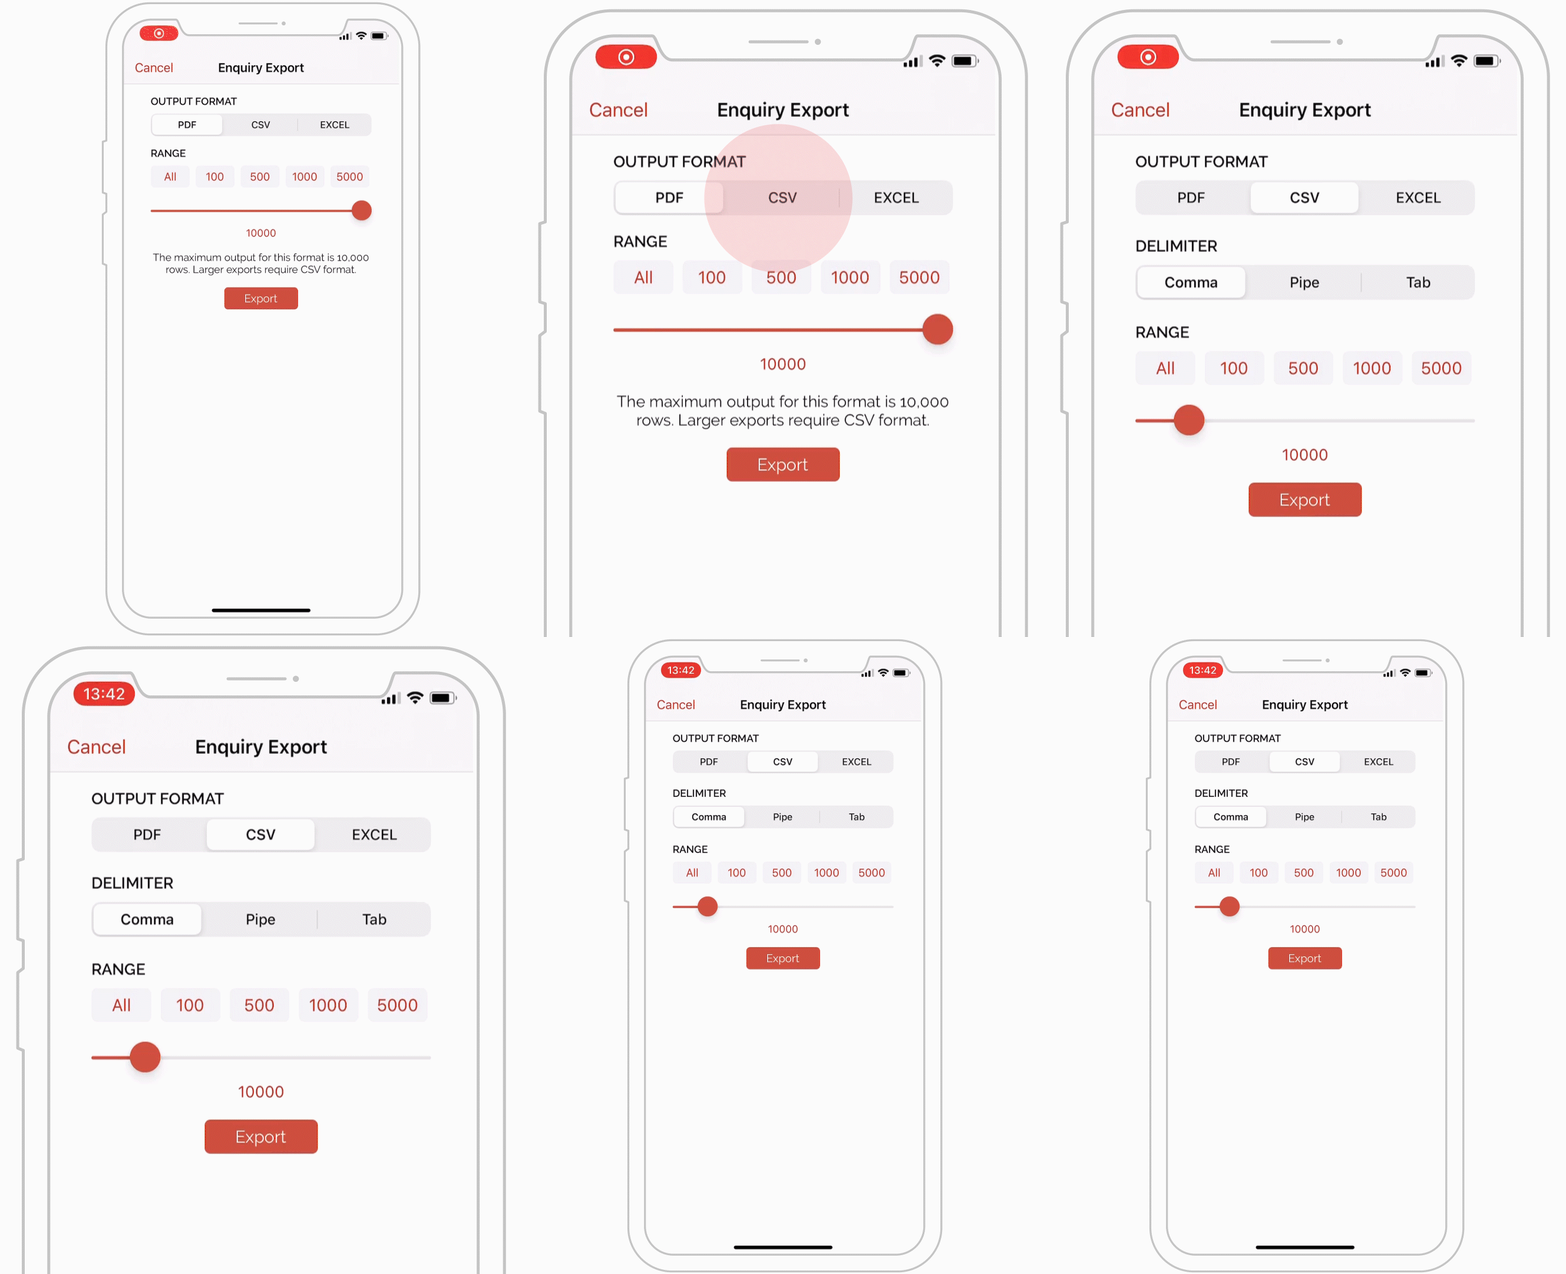
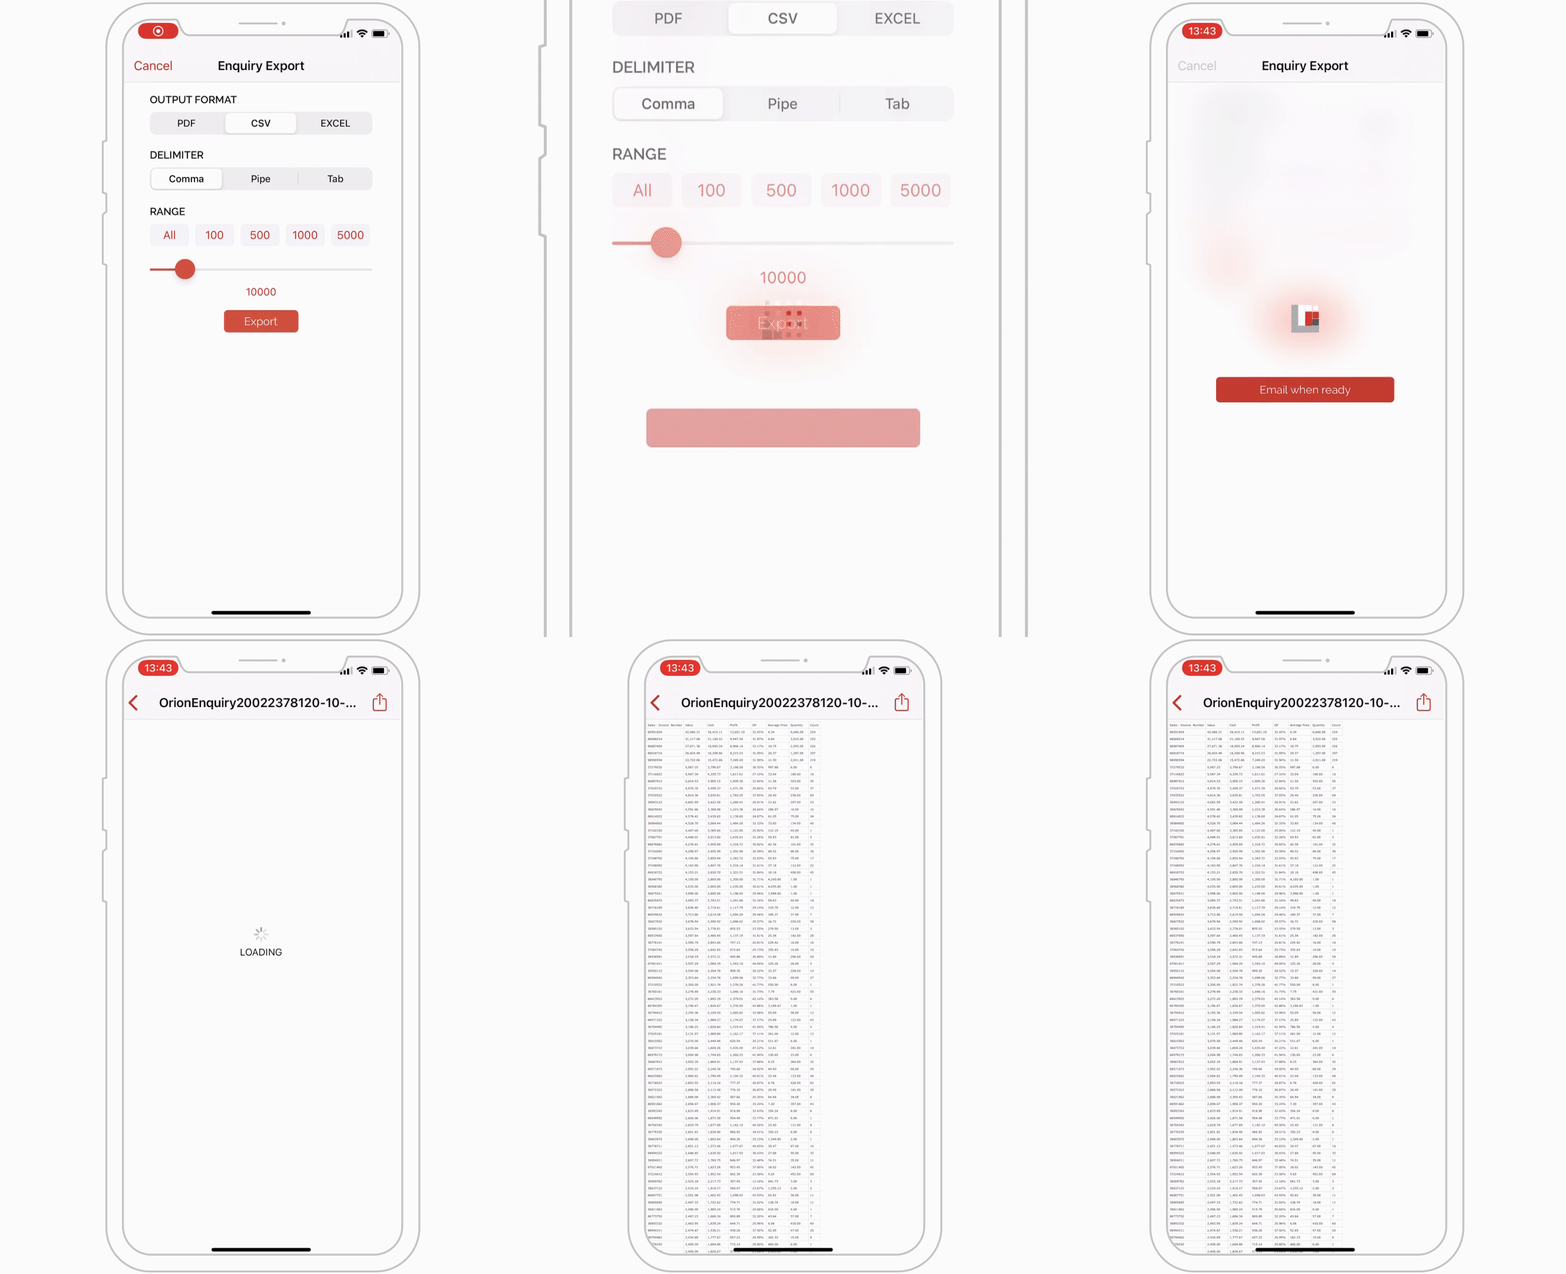
Step 07: Export
Finally, select Export.
Your results may take a moment to download and will appear as a pop-up when ready.
Android
Step 01: Navigate to Enquiries
Navigate to Enquiries via the navigation menu at the bottom of the screen.

Step 02: Select Enquiry
Tap New Enquiry at the top of the screen. Then select your desired Enquiry type, for this example we will select Full Picture.
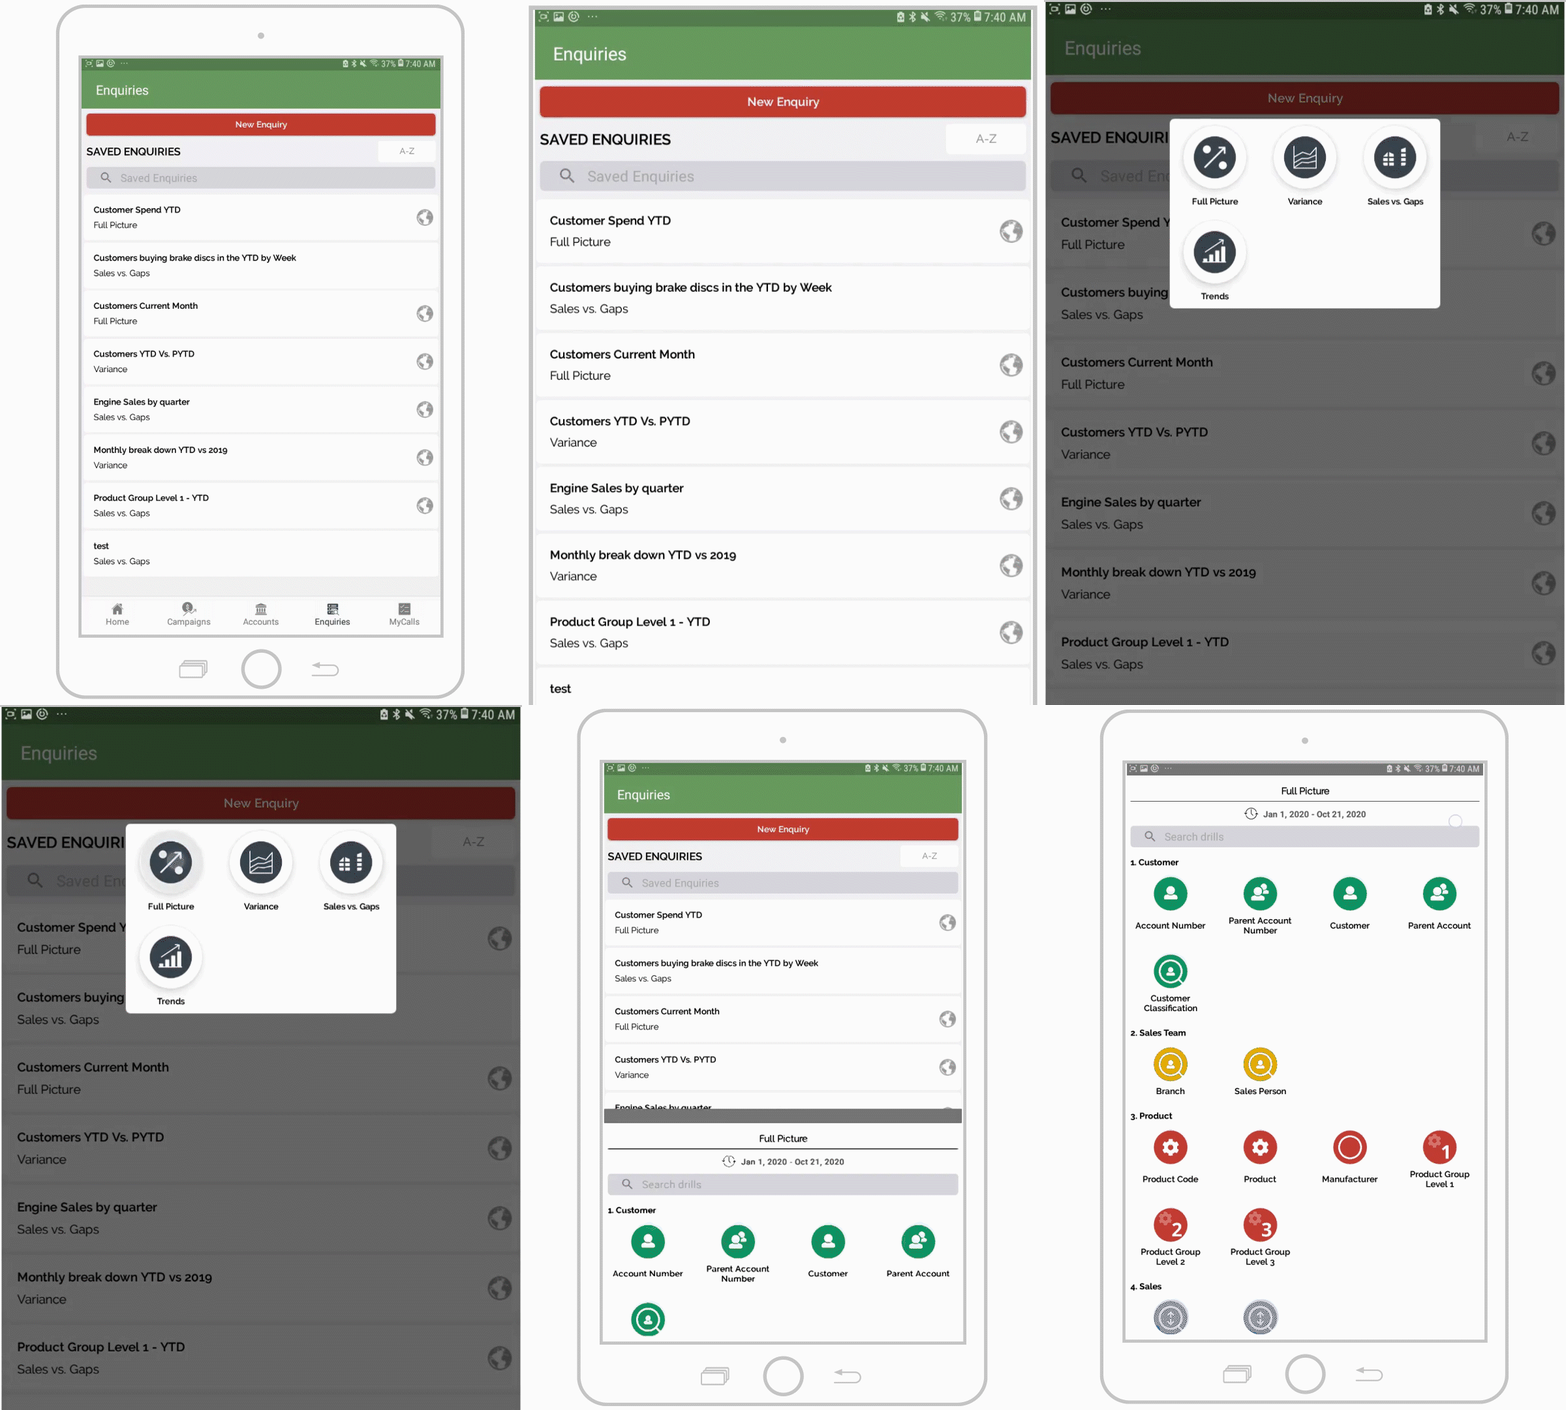
Step 03: Update date range (optional)
Select the date range towards the top of the screen to open the date selector.
Select your preferred date range and then tap Apply.
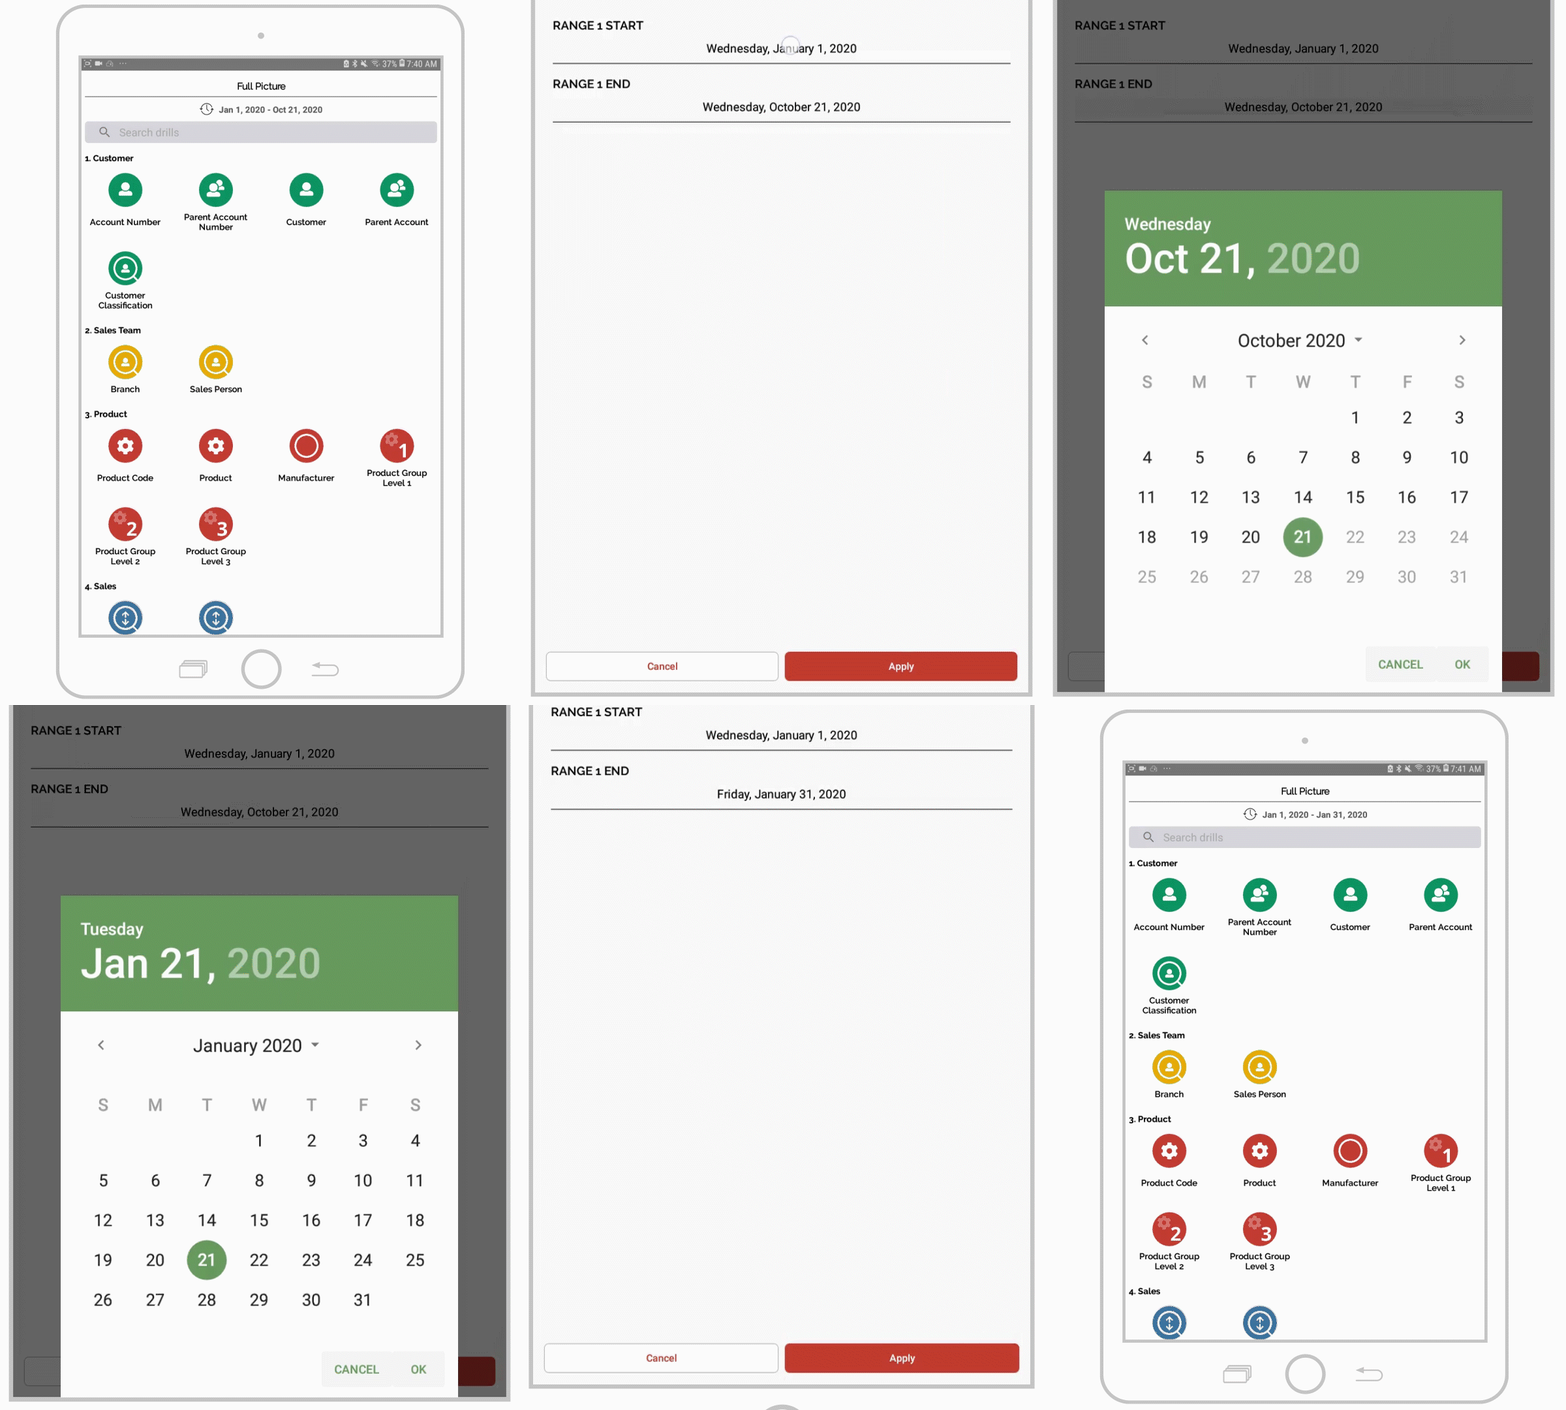
Step 04: Select the Invoice bubble
Locate and select the Invoice bubble.
Note: use the search bar at the top to save time and quickly locate this bubble
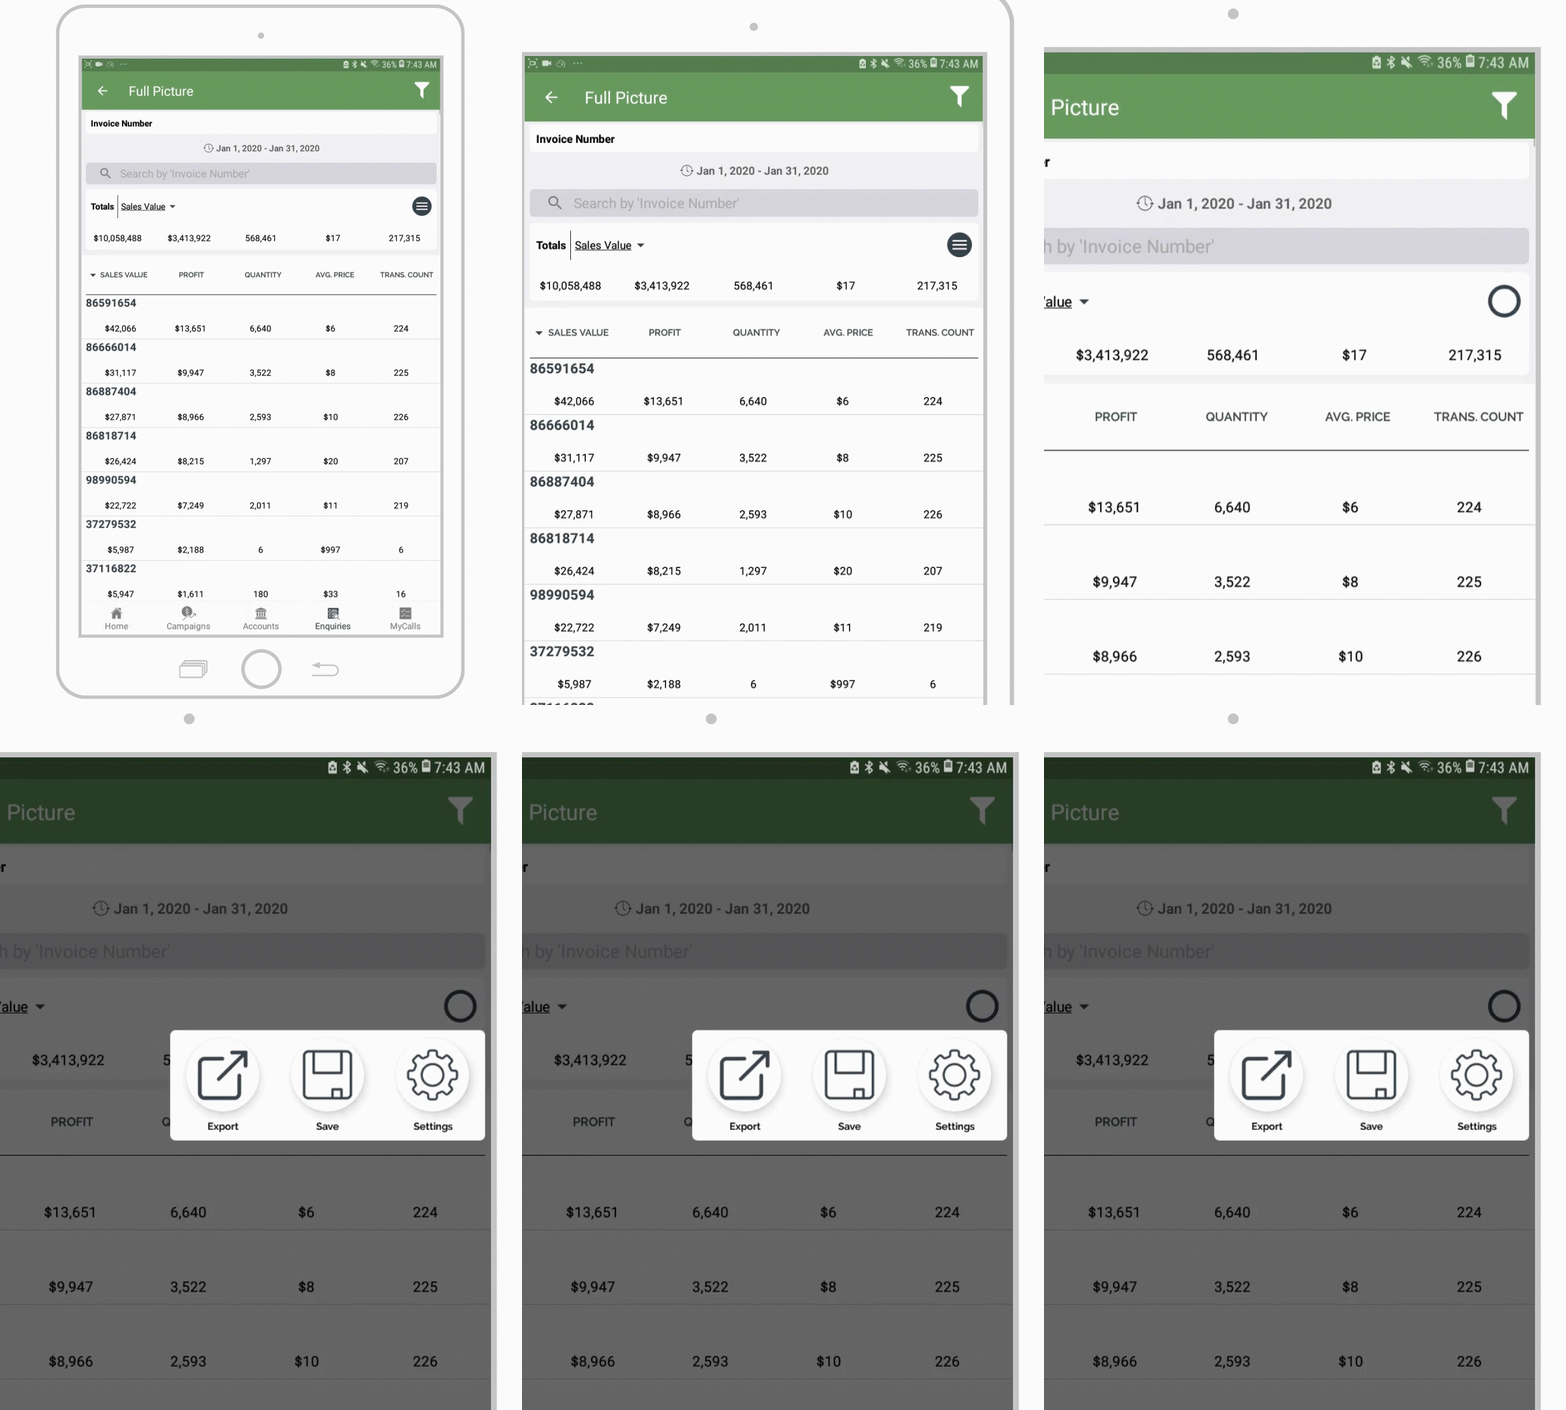
Step 05: Select Export
You will now see all invoices for the selected date range sorted by sales Value.
To export these results, tap the hamburger menu near the top right. Then select Export.
Step 06: Choose your Output Format
Select the desired Output Format from the available options.
Please note: if you are sharing this information with our support team, please select CSV.
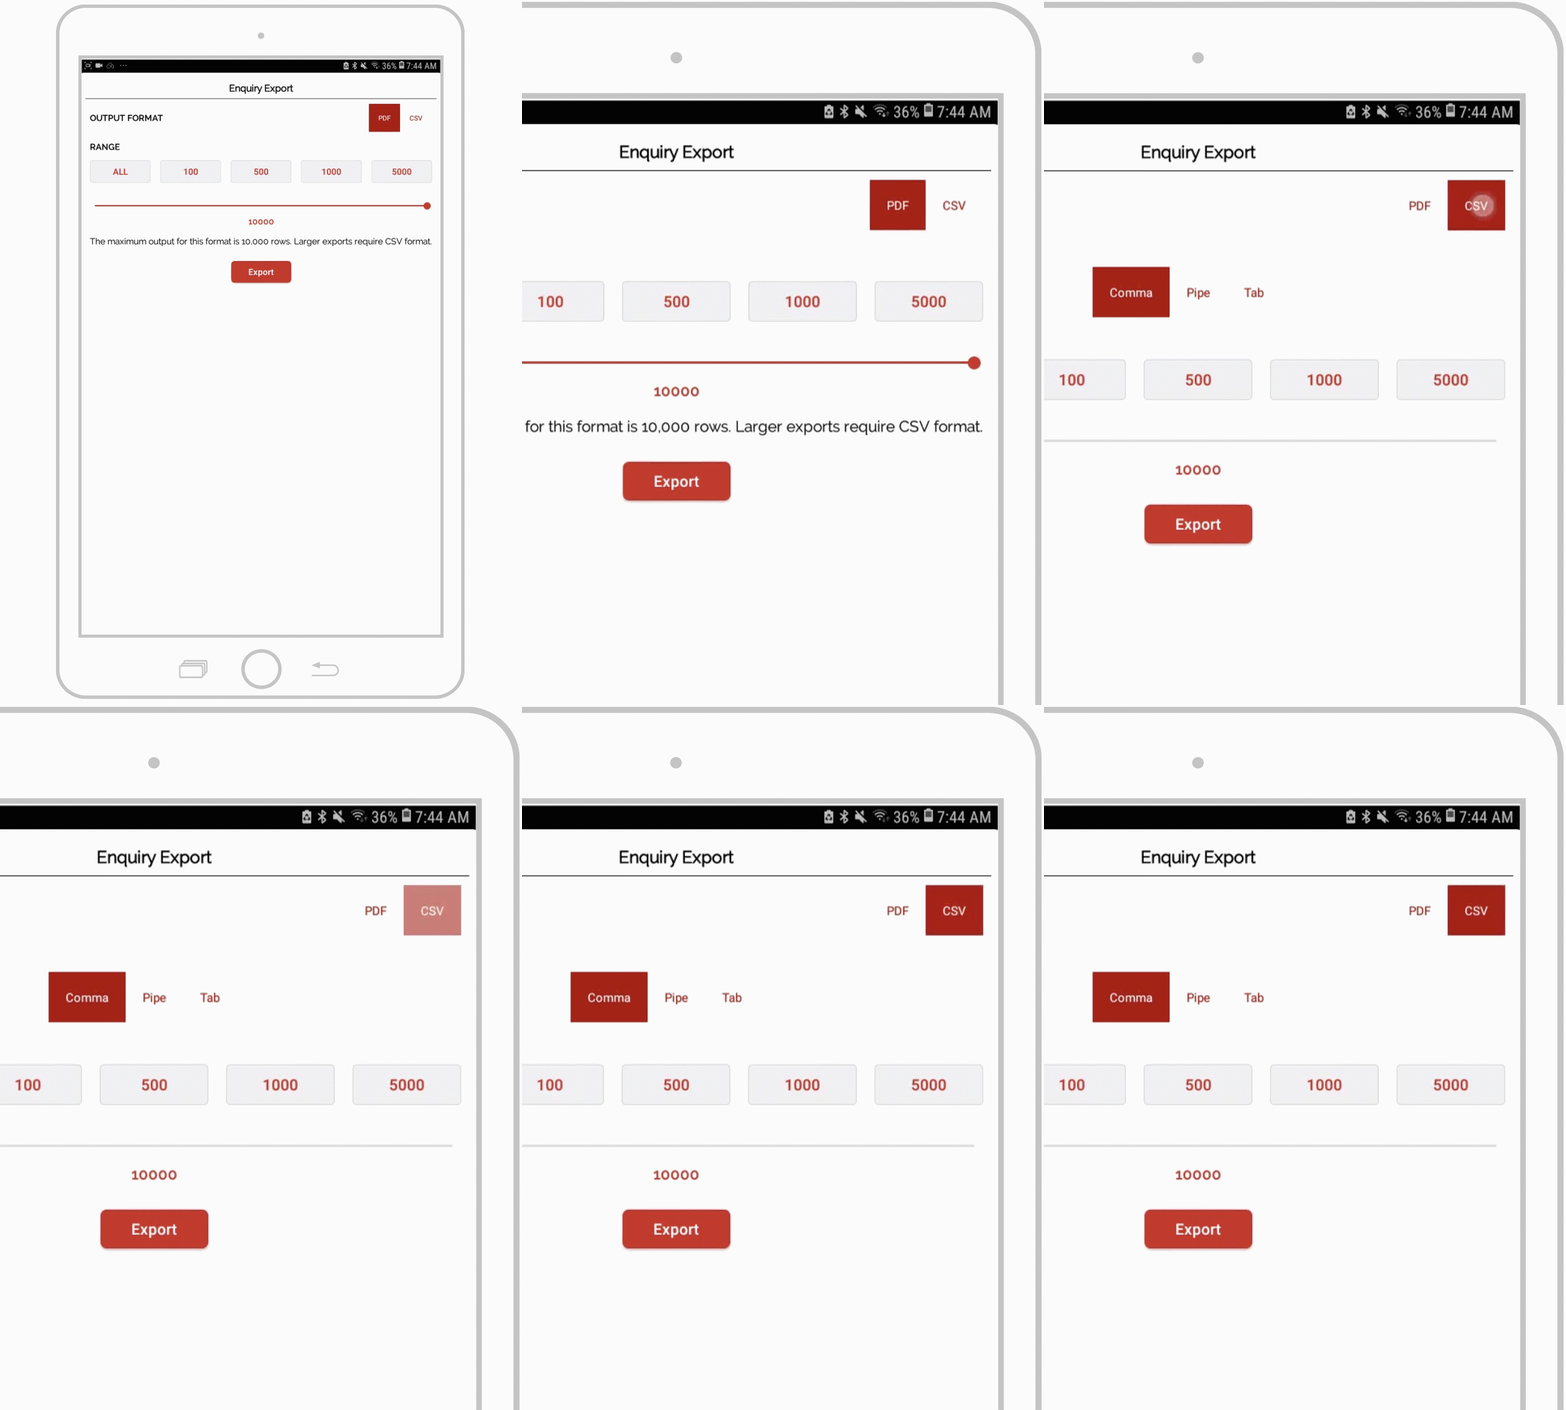
Step 07: Export
Finally, select Export.
Your results may take a moment to download and will appear as a pop-up when ready.
