Some of our customers get nothing but a spinning wheel when signing into sales-i or exporting something from the system. If this has happened to you, it could be due to your pop-up settings. This guide will show you how to rectify this.
There are two things you’ll need to know.
1) Which browser you’re using. It’s probably Internet Explorer, Google Chrome, Firefox or Safari.
2) Your server domain, which is what you type into your browser to log into sales-i. It will be something along the lines of login.sales-i.com. If you’re not sure of this, just ask your sales-i champion.
Once you know these two things, find the tutorial below to match your browser and follow the steps. If for some reason that doesn’t work or your browser isn’t listed, get in touch with our support team and they’ll be happy to help you out.
Internet Explorer
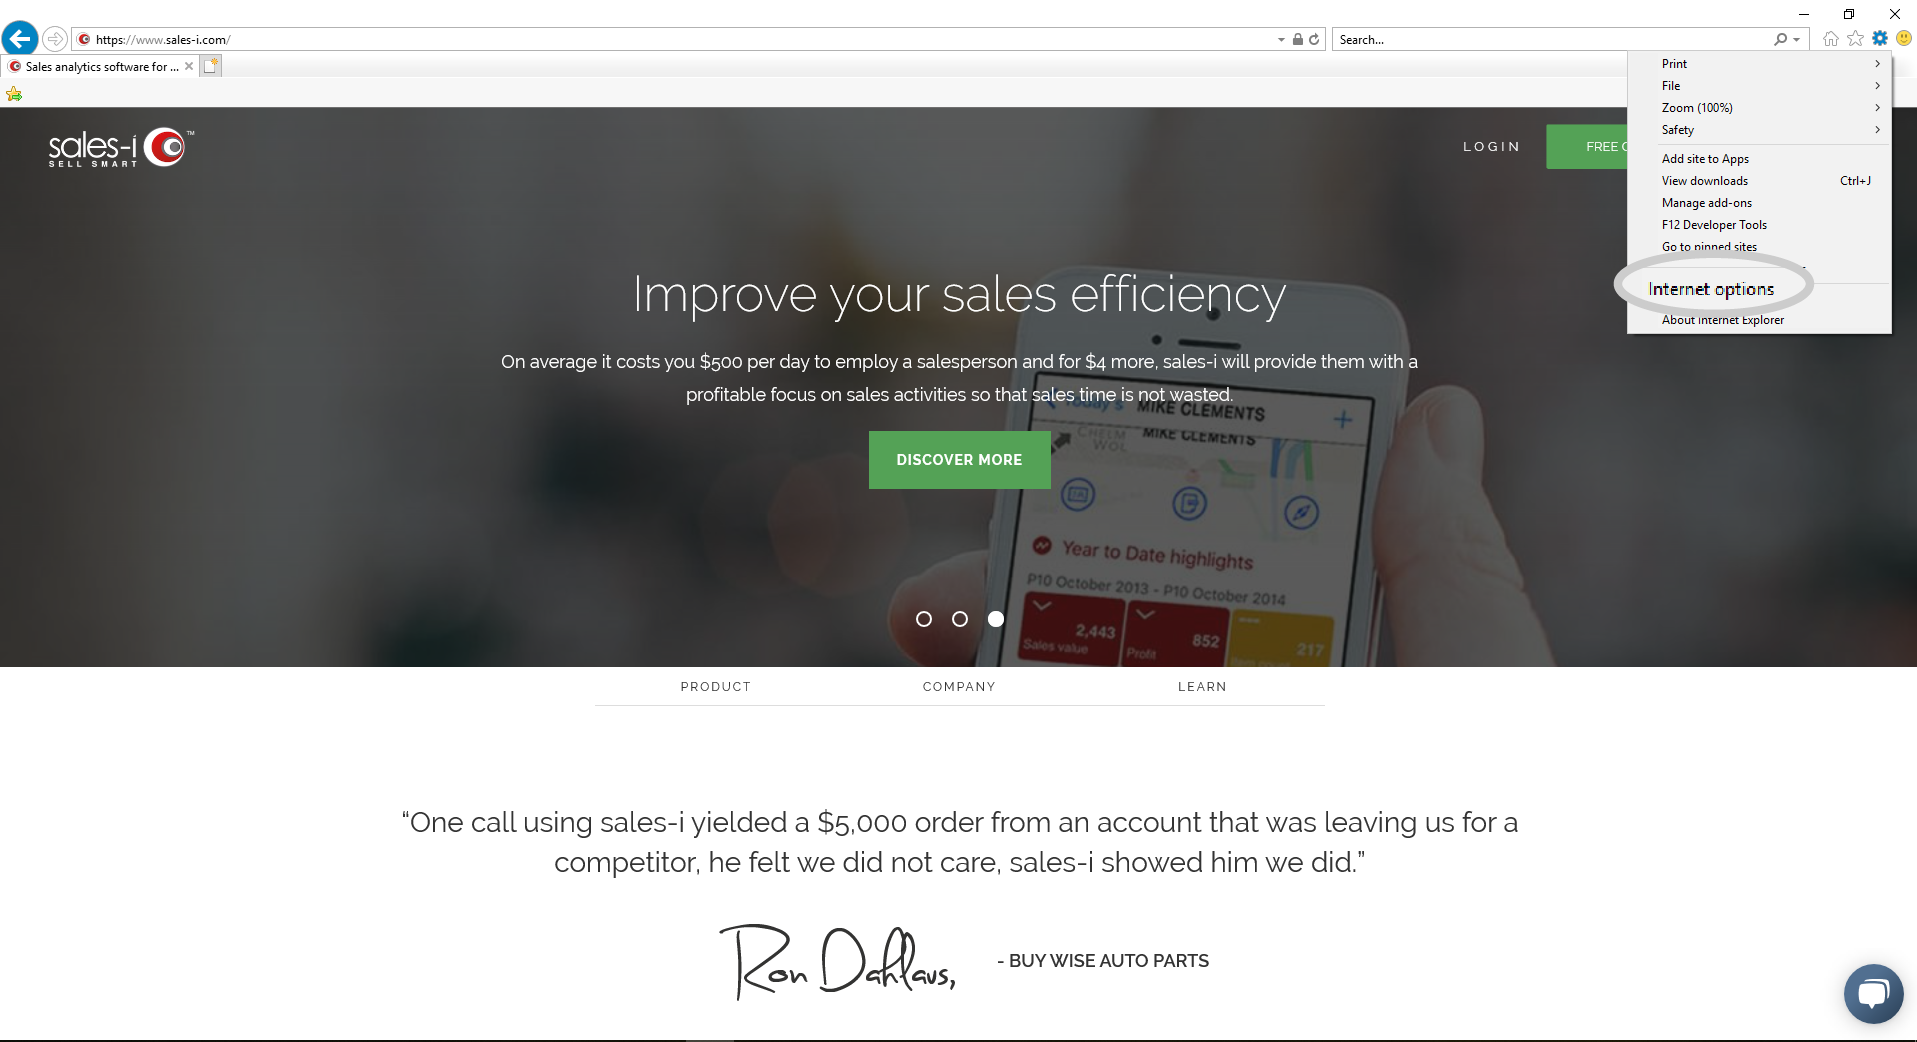
Step 1
Open your browser and, from the bar at the top, click the settings wheel in the top right-hand corner.
Step 2
Click Internet Options from the menu that comes down.
Step 3
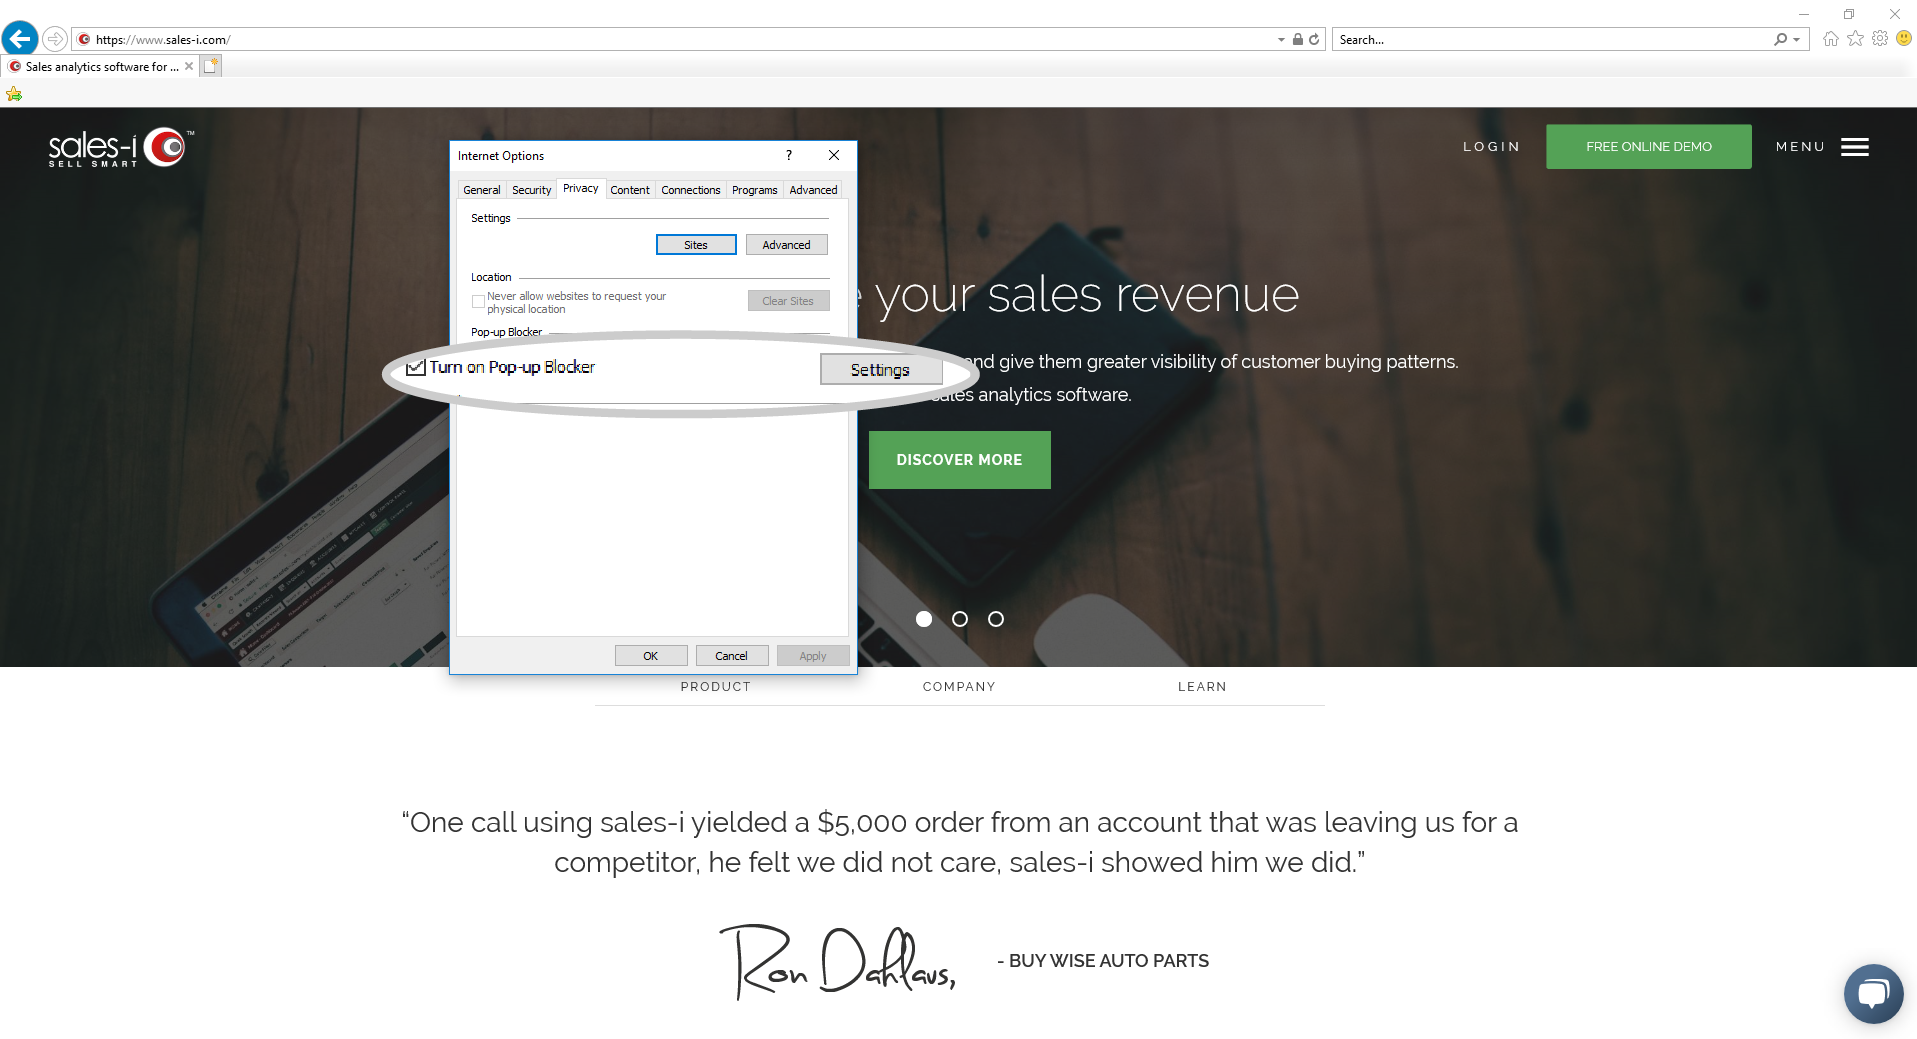
Click the privacy tab.
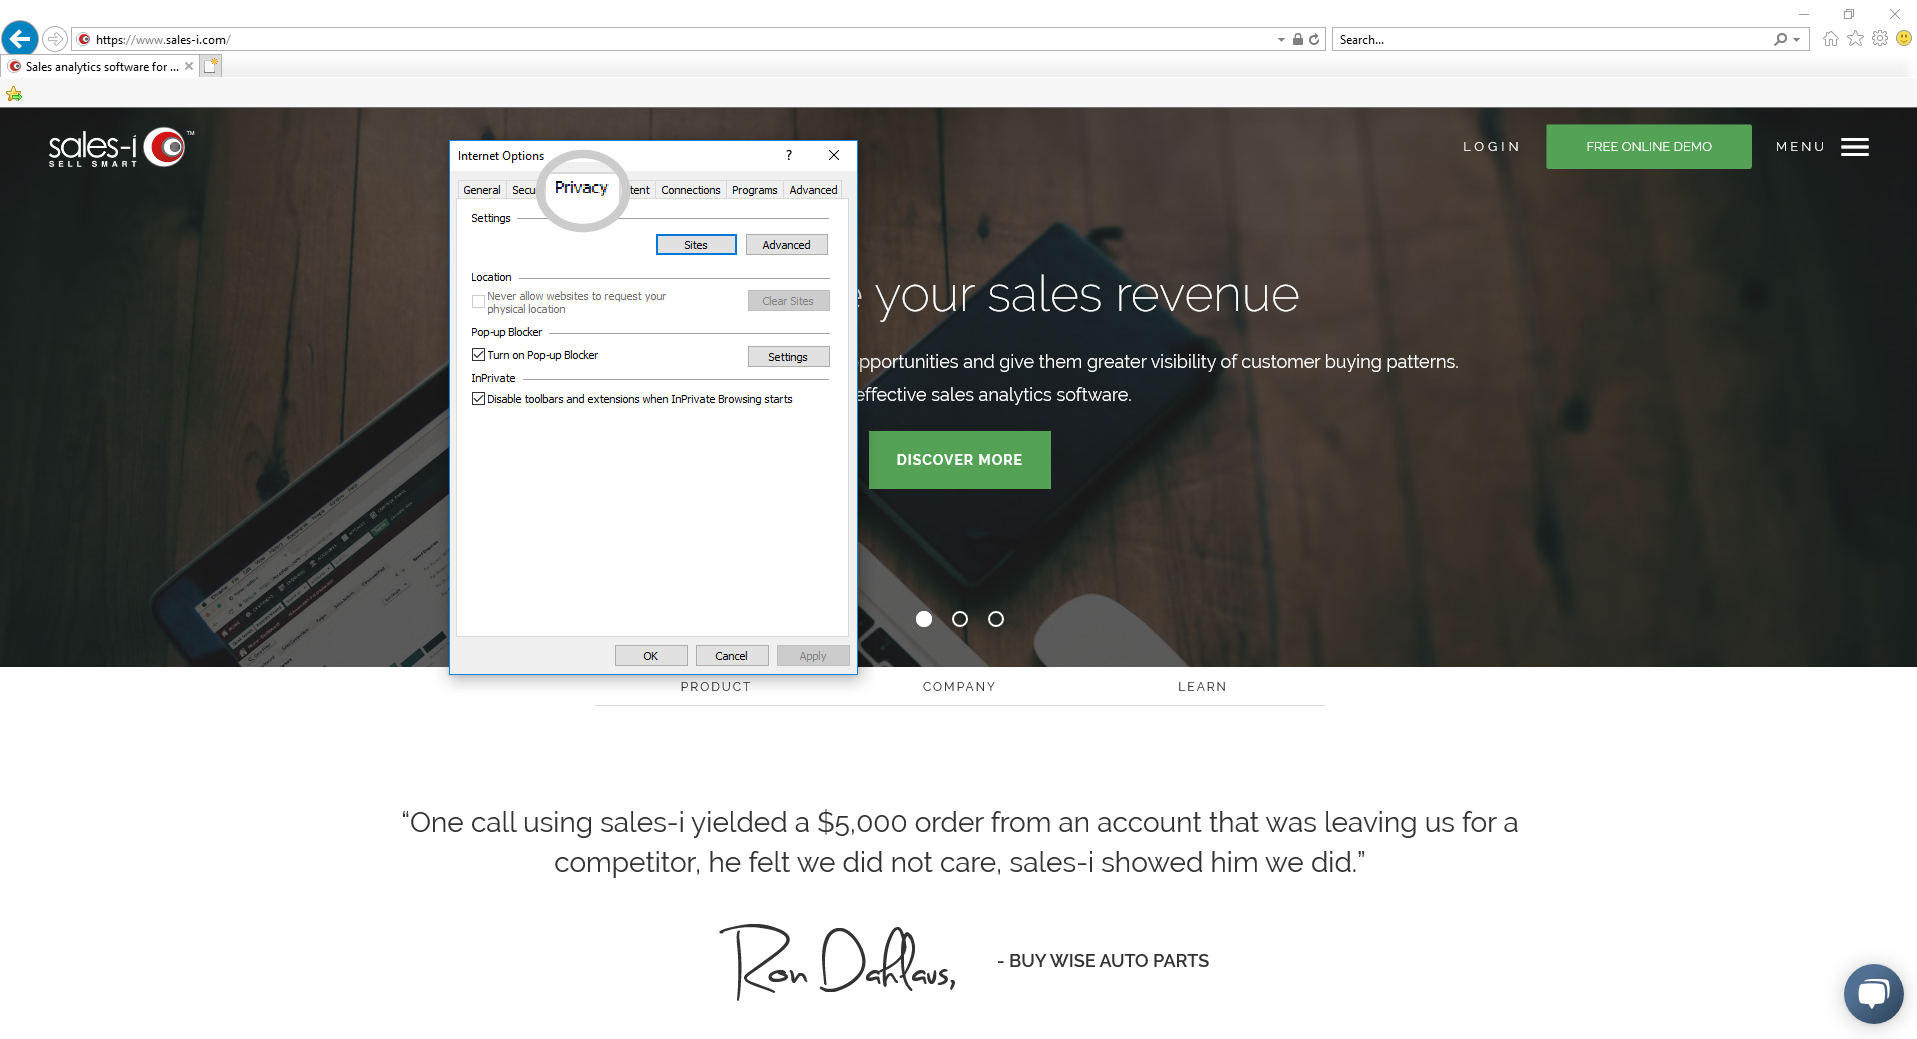
Step 4
You should now see a check box for Pop-up blocker. This will allow you to enable or disable pop-ups altogether. If this is what you’re after, then the tutorial finishes here for you. If, however, you wish to allow certain websites but not others, untick this box and then click into Settings.
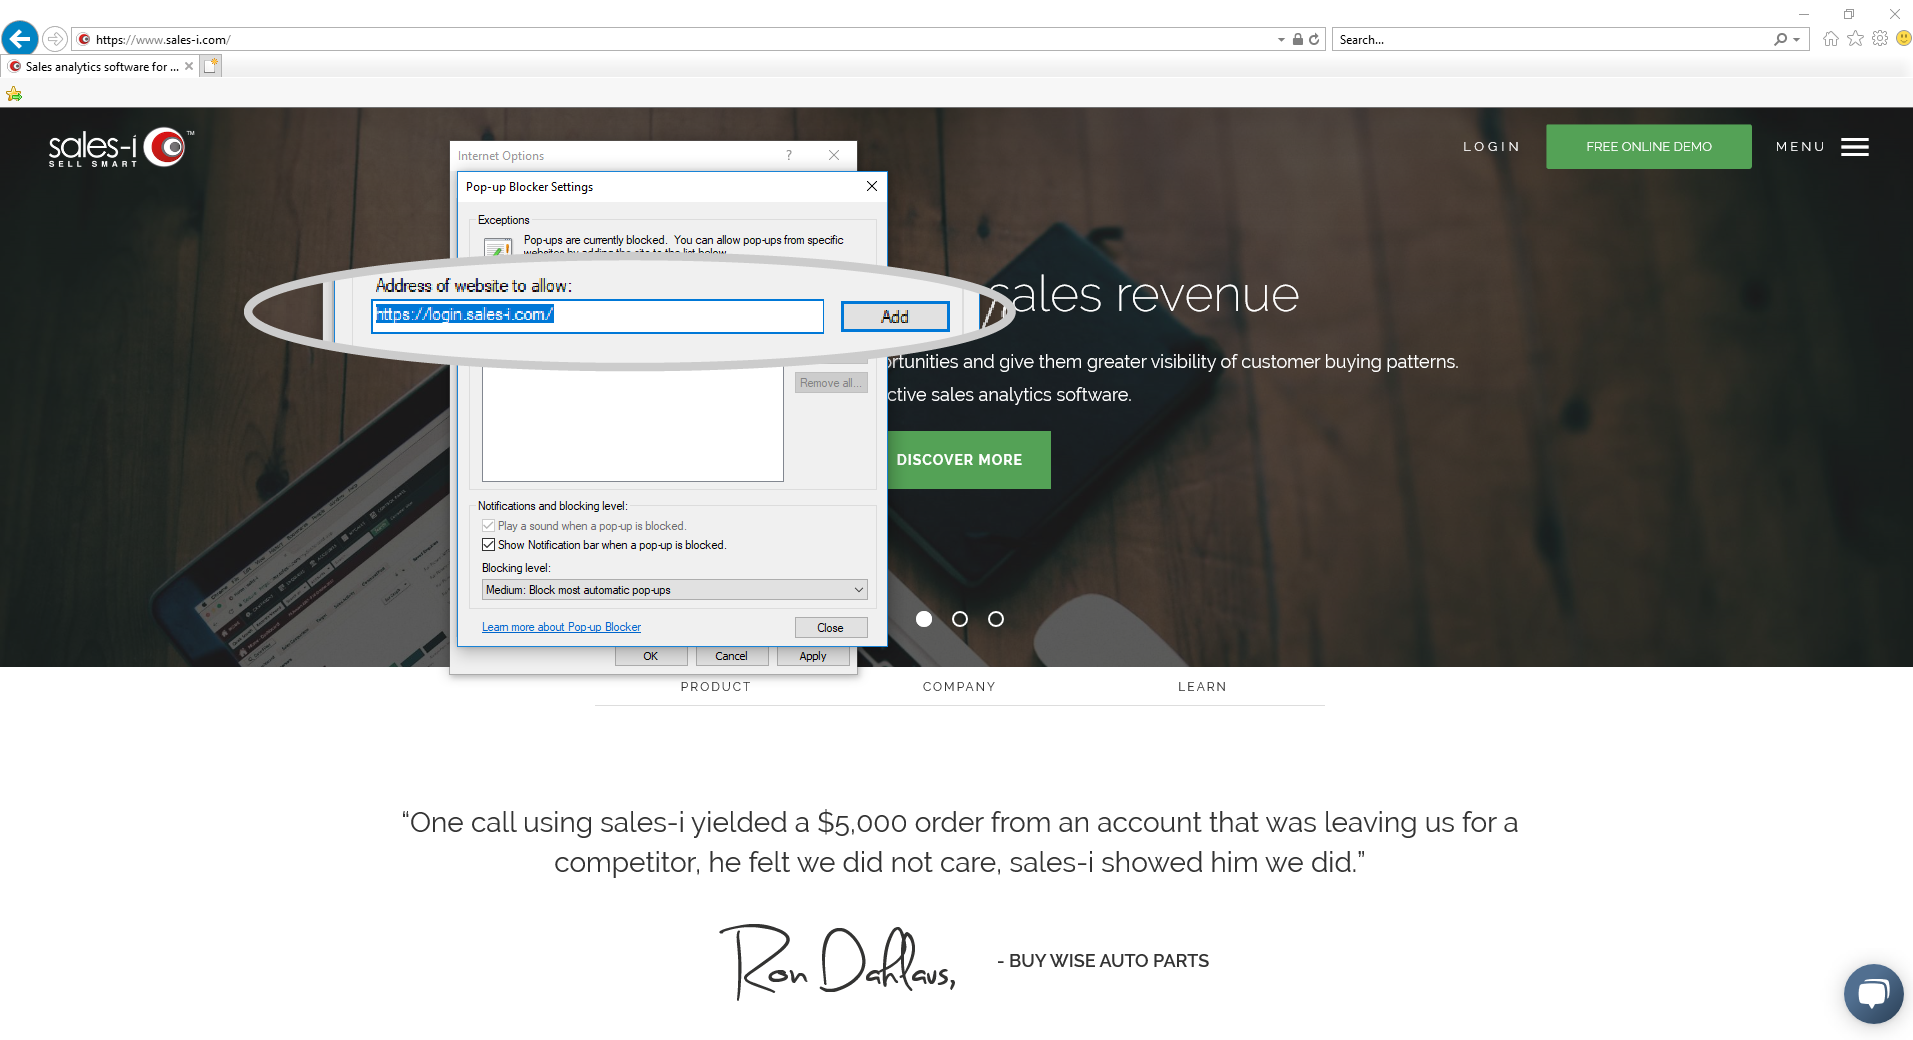
Step 5
In the bar at the top, you can now enter any site you want to allow pop-ups from. In here, enter your sales-i server domain hit enter or click Add.
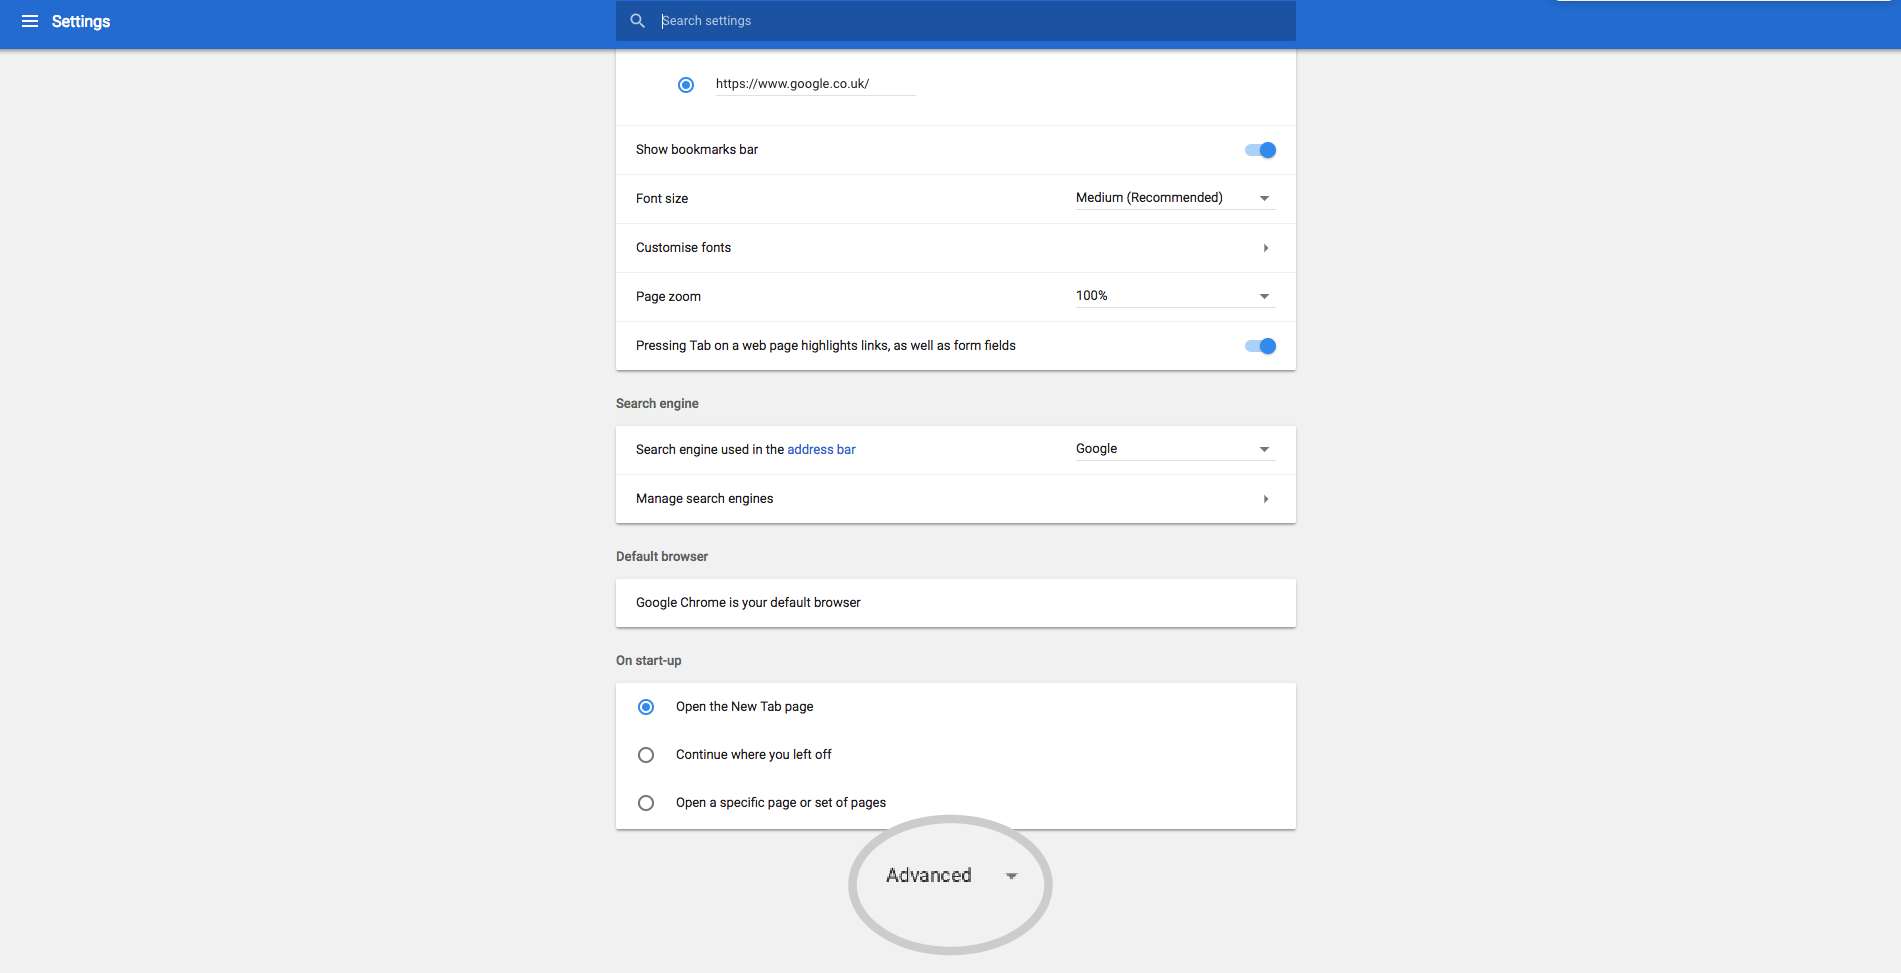
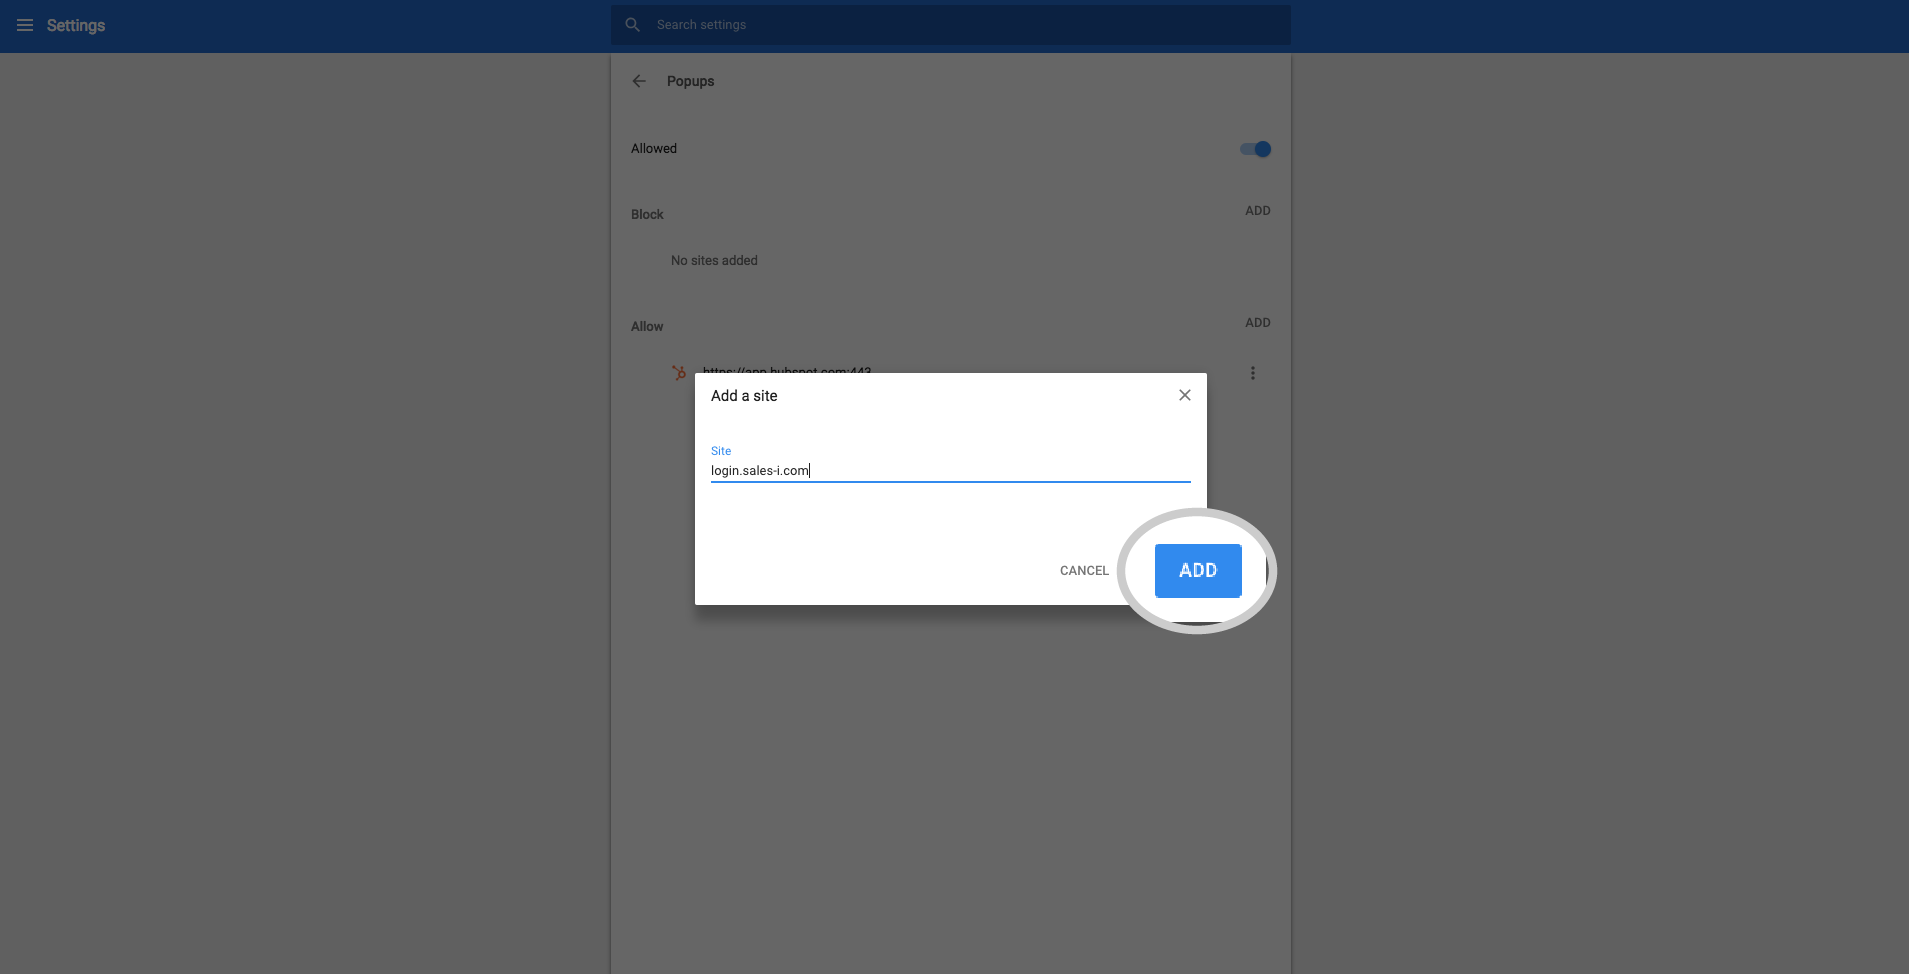
Google Chrome
Step 1
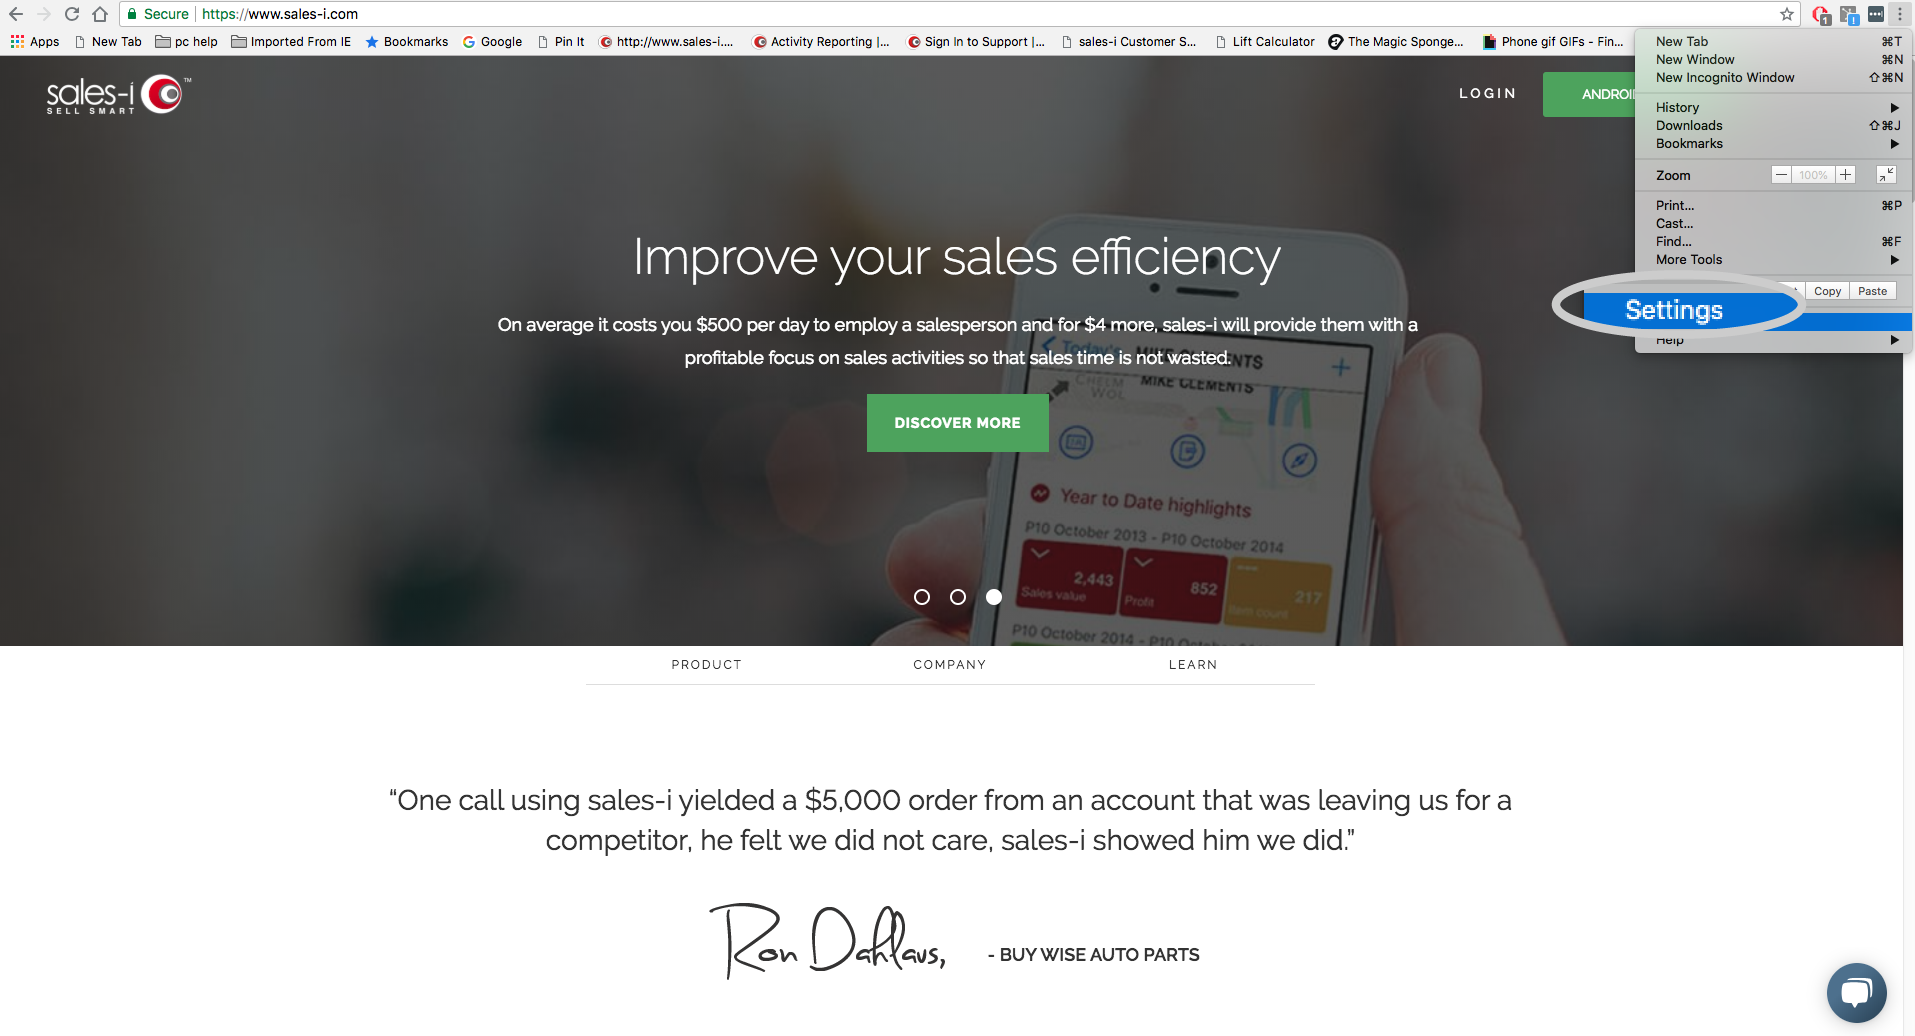
Open Google Chrome and click on the three lines in the top right corner.
Step 2
From the menu that opens, choose settings.
Step 3
Scroll down and click Advanced.
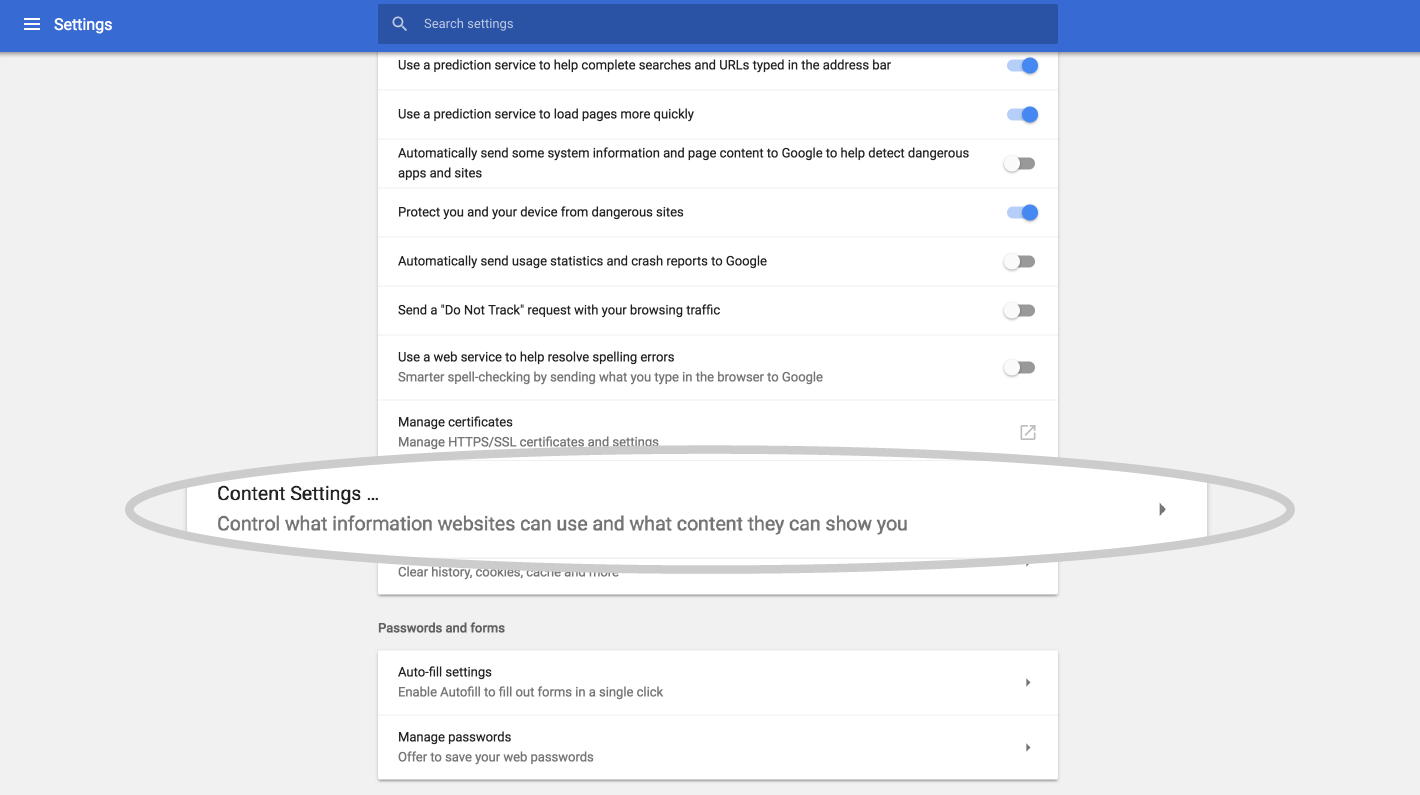
Step 4
Now, scroll down again until you reach Content Settings. Click it.
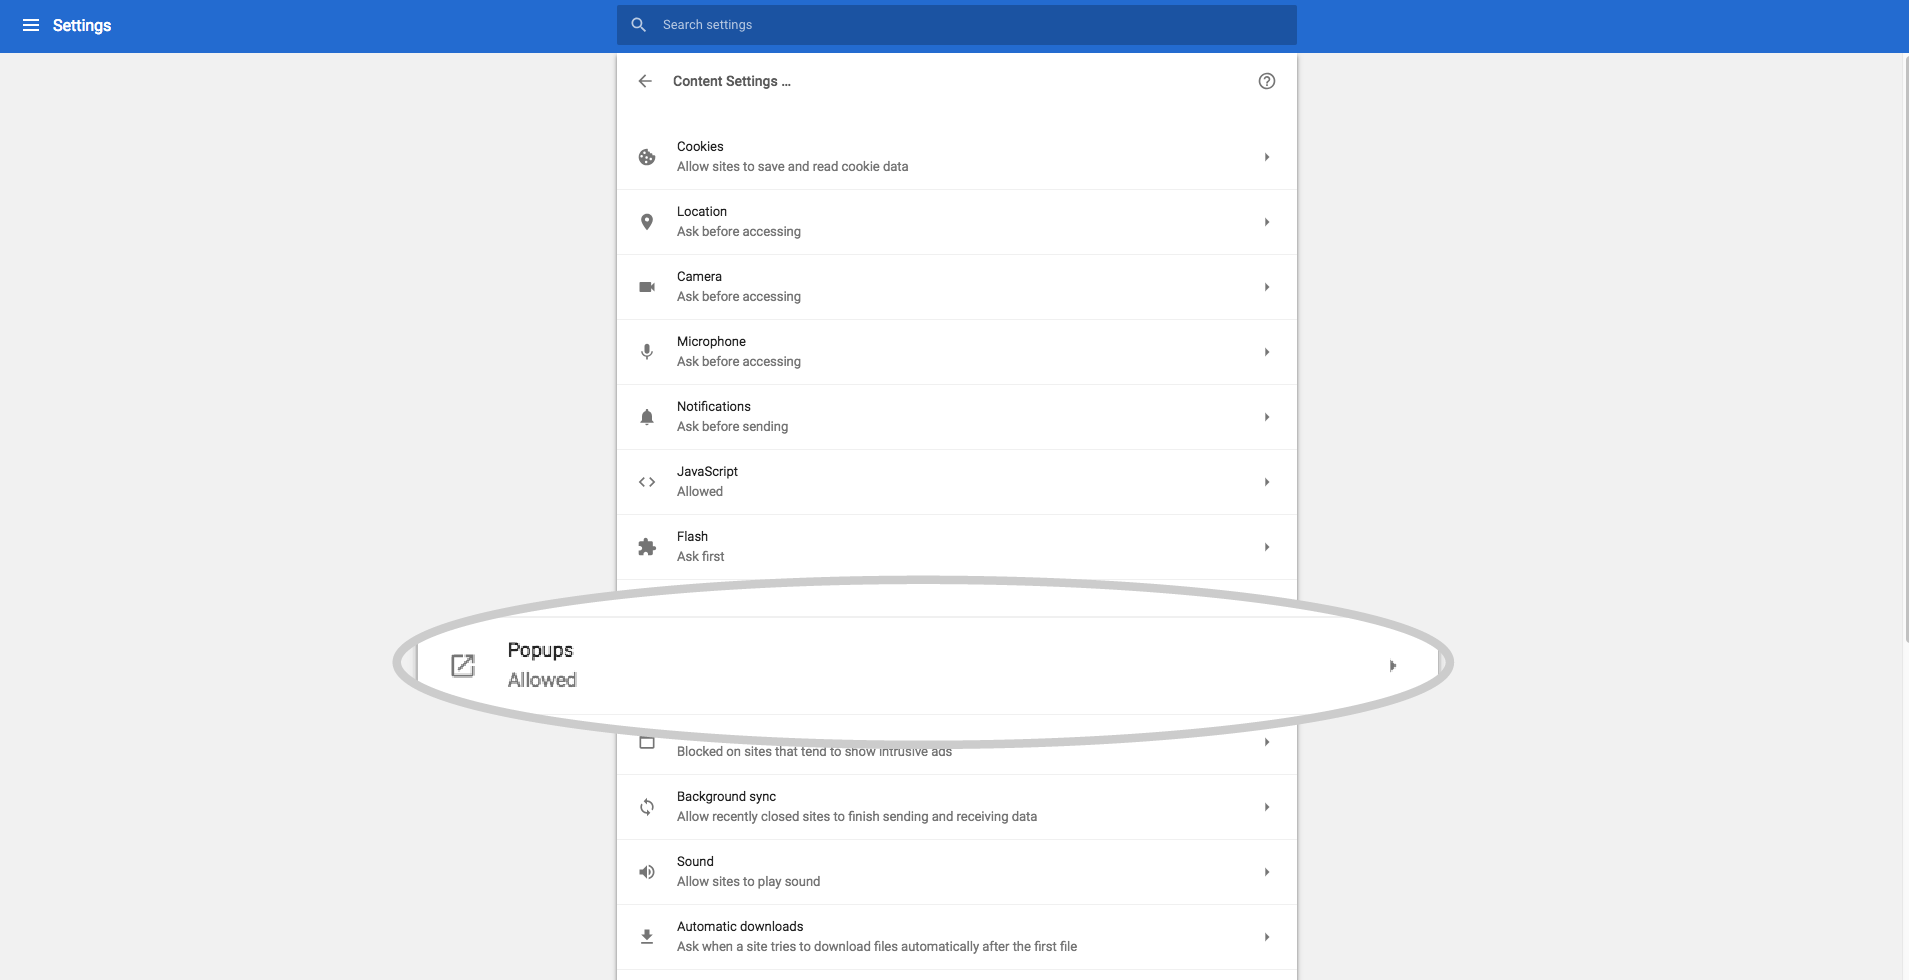
Step 5
Scroll down and click Pop-ups.
Step 6
Click ADD under the Allow section.
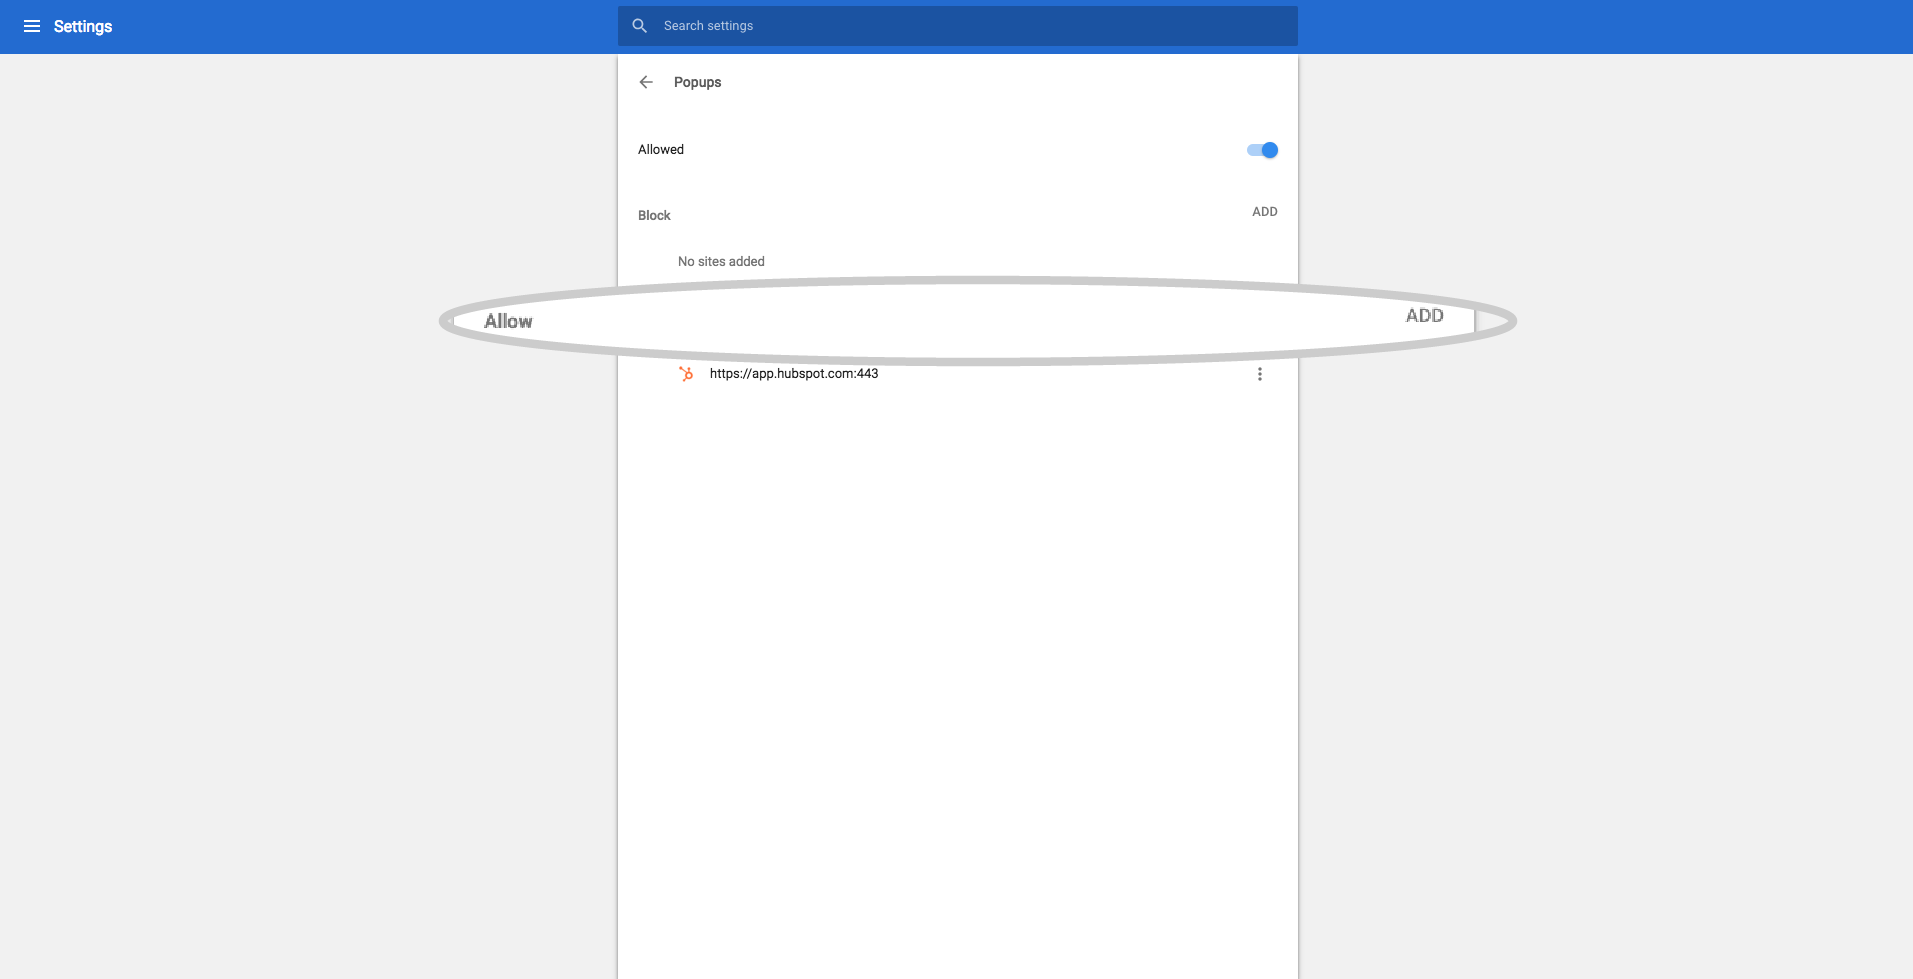
Step 7
Now add the domain name you would like to allow pop ups for - login.sales-i.com and click Add.
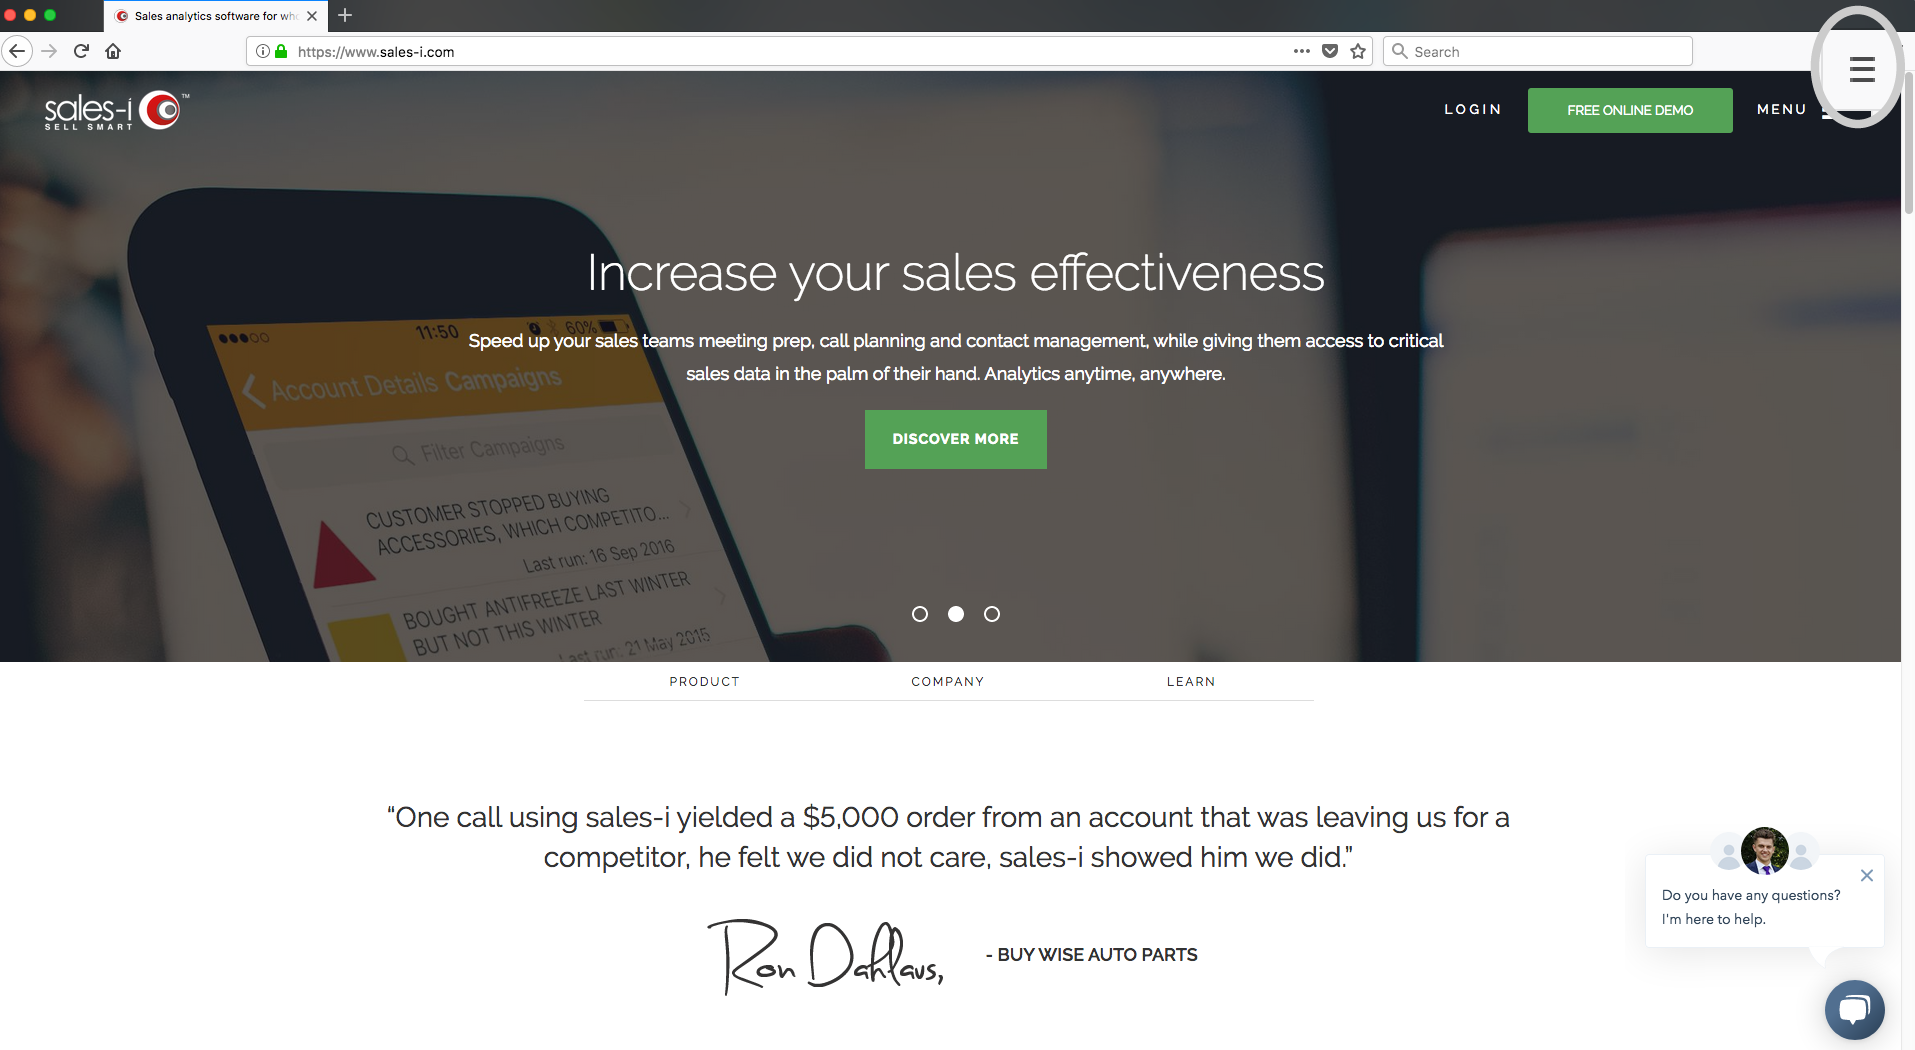
Firefox
Step 1
Open Firefox and click on the three lines in the top right corner.
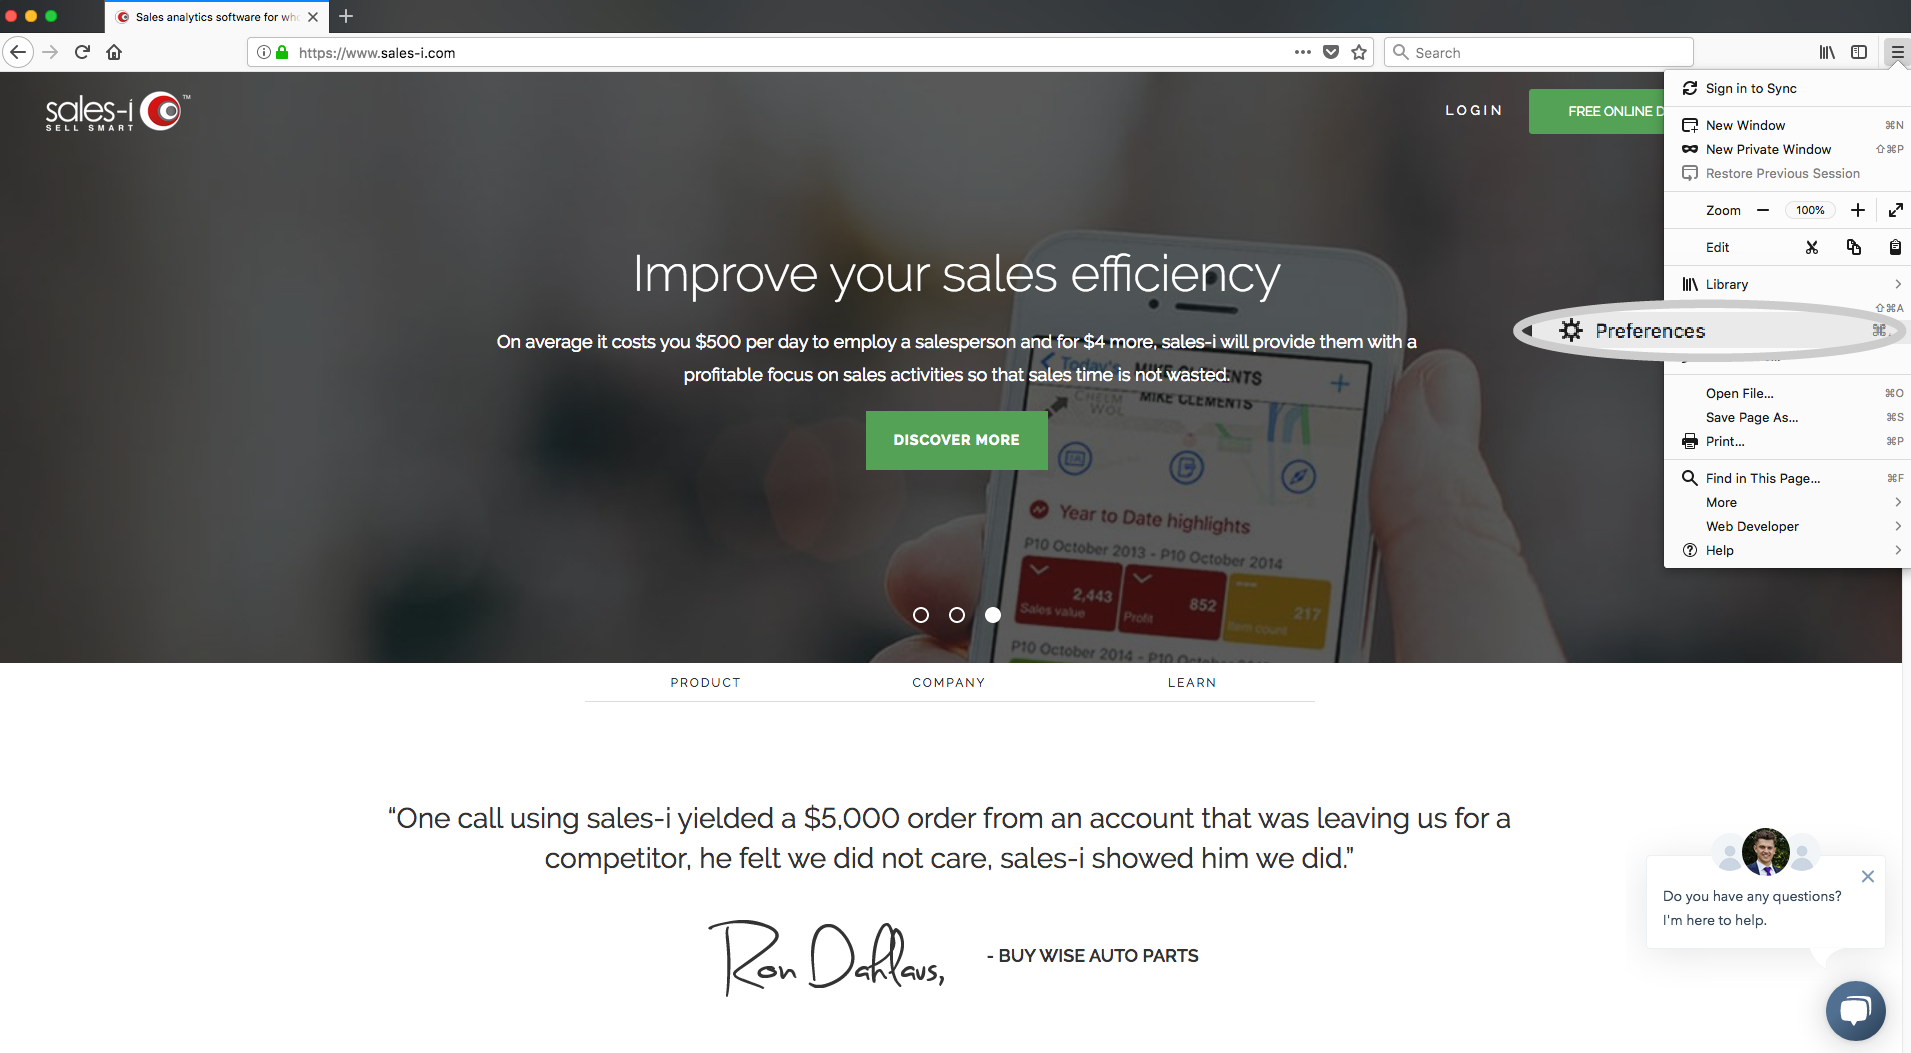
Step 2
On the menu that opens next, click Preferences.
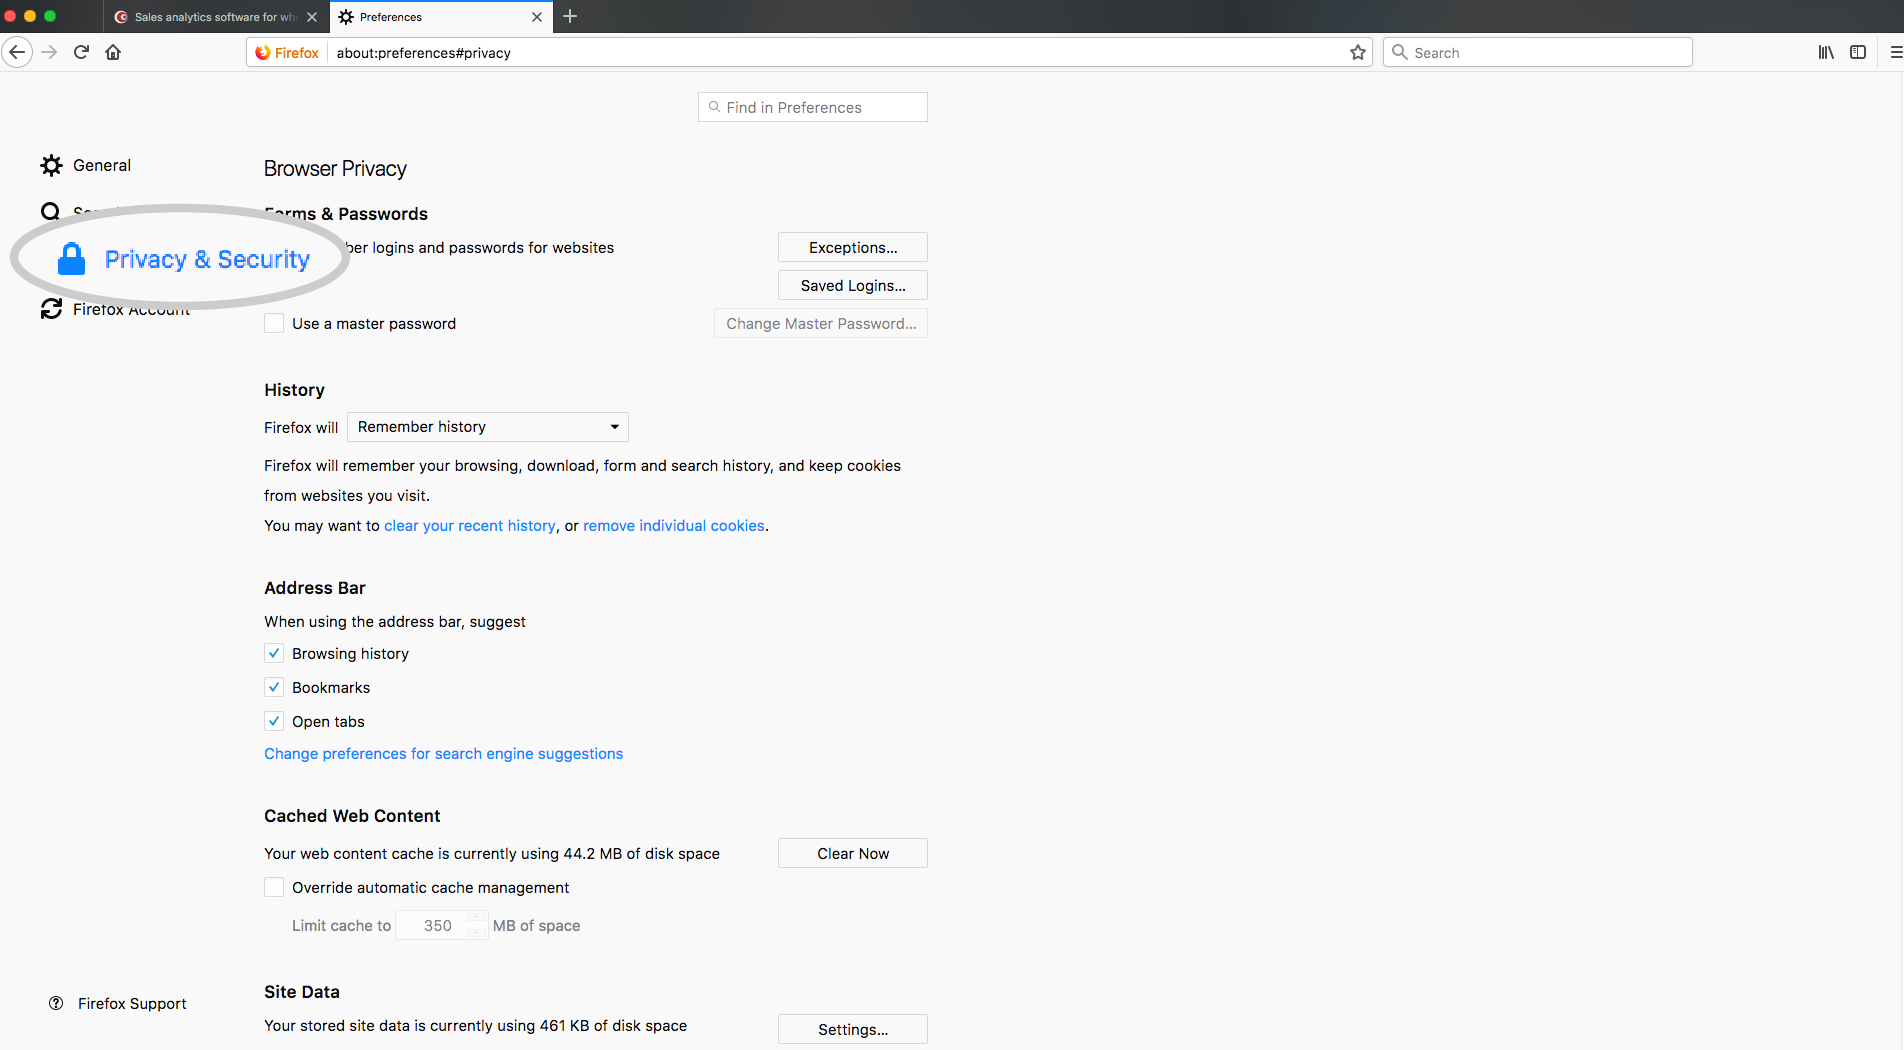
Step 3
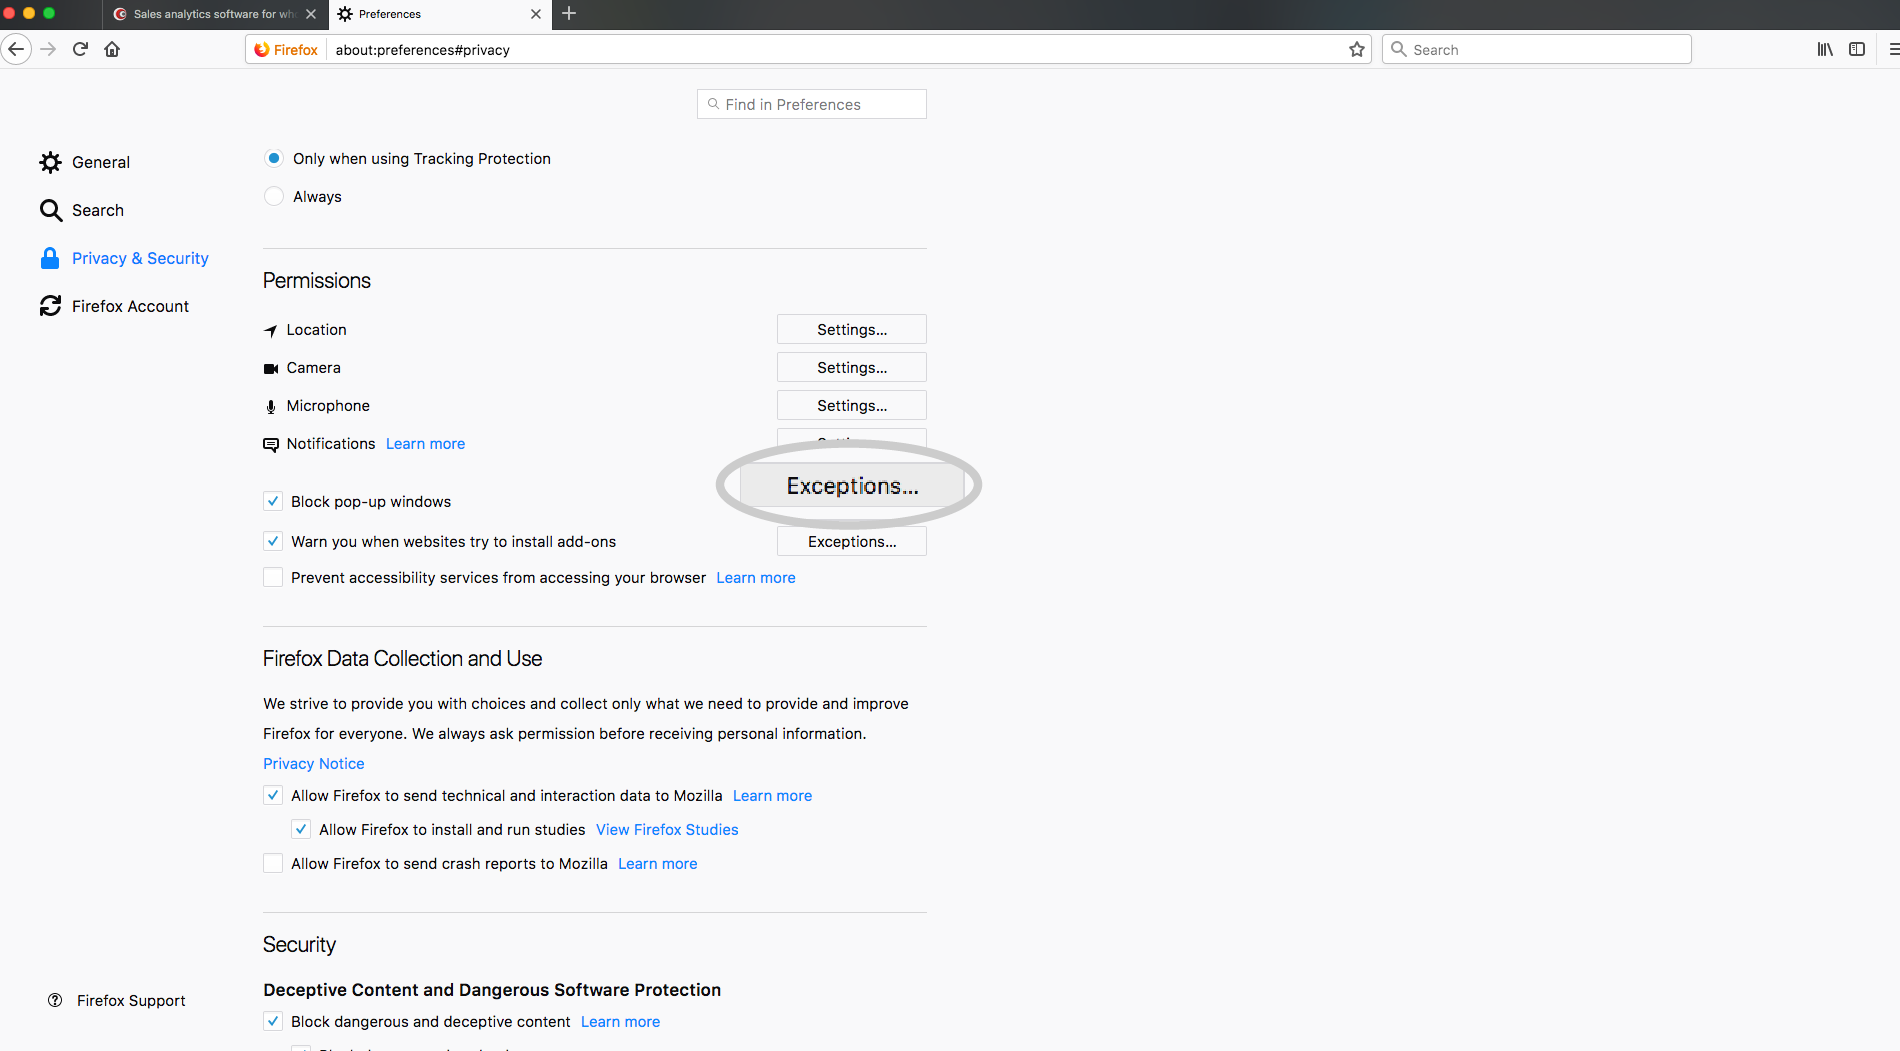
From the options on the left, click Privacy & Security.
Step 4
Under the Permissions section, find the Block pop-ip windows button and click on the Exceptions… button.
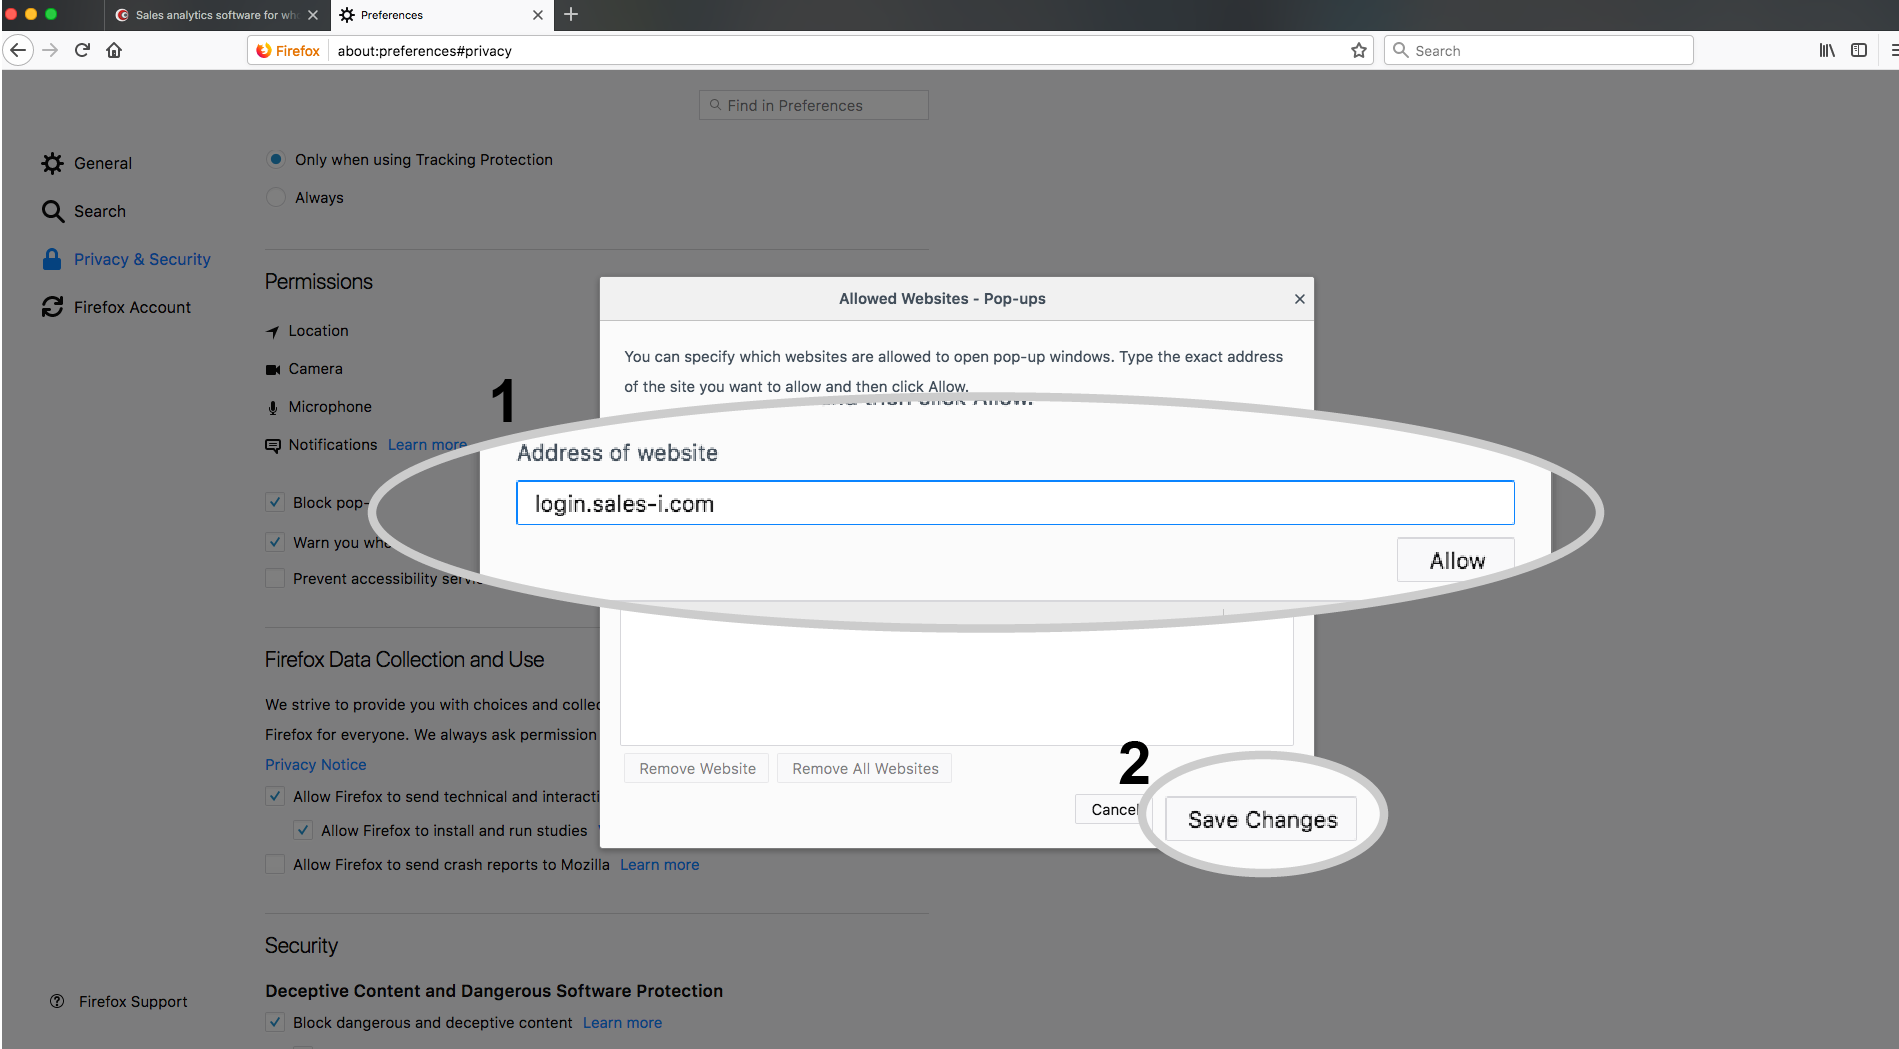
Step 5
In the text box that opens, enter login.sales-i.com and click Allow. Then hit Save Changes when you’re done. All pop-ups from www.sales-i.com will now be enabled.
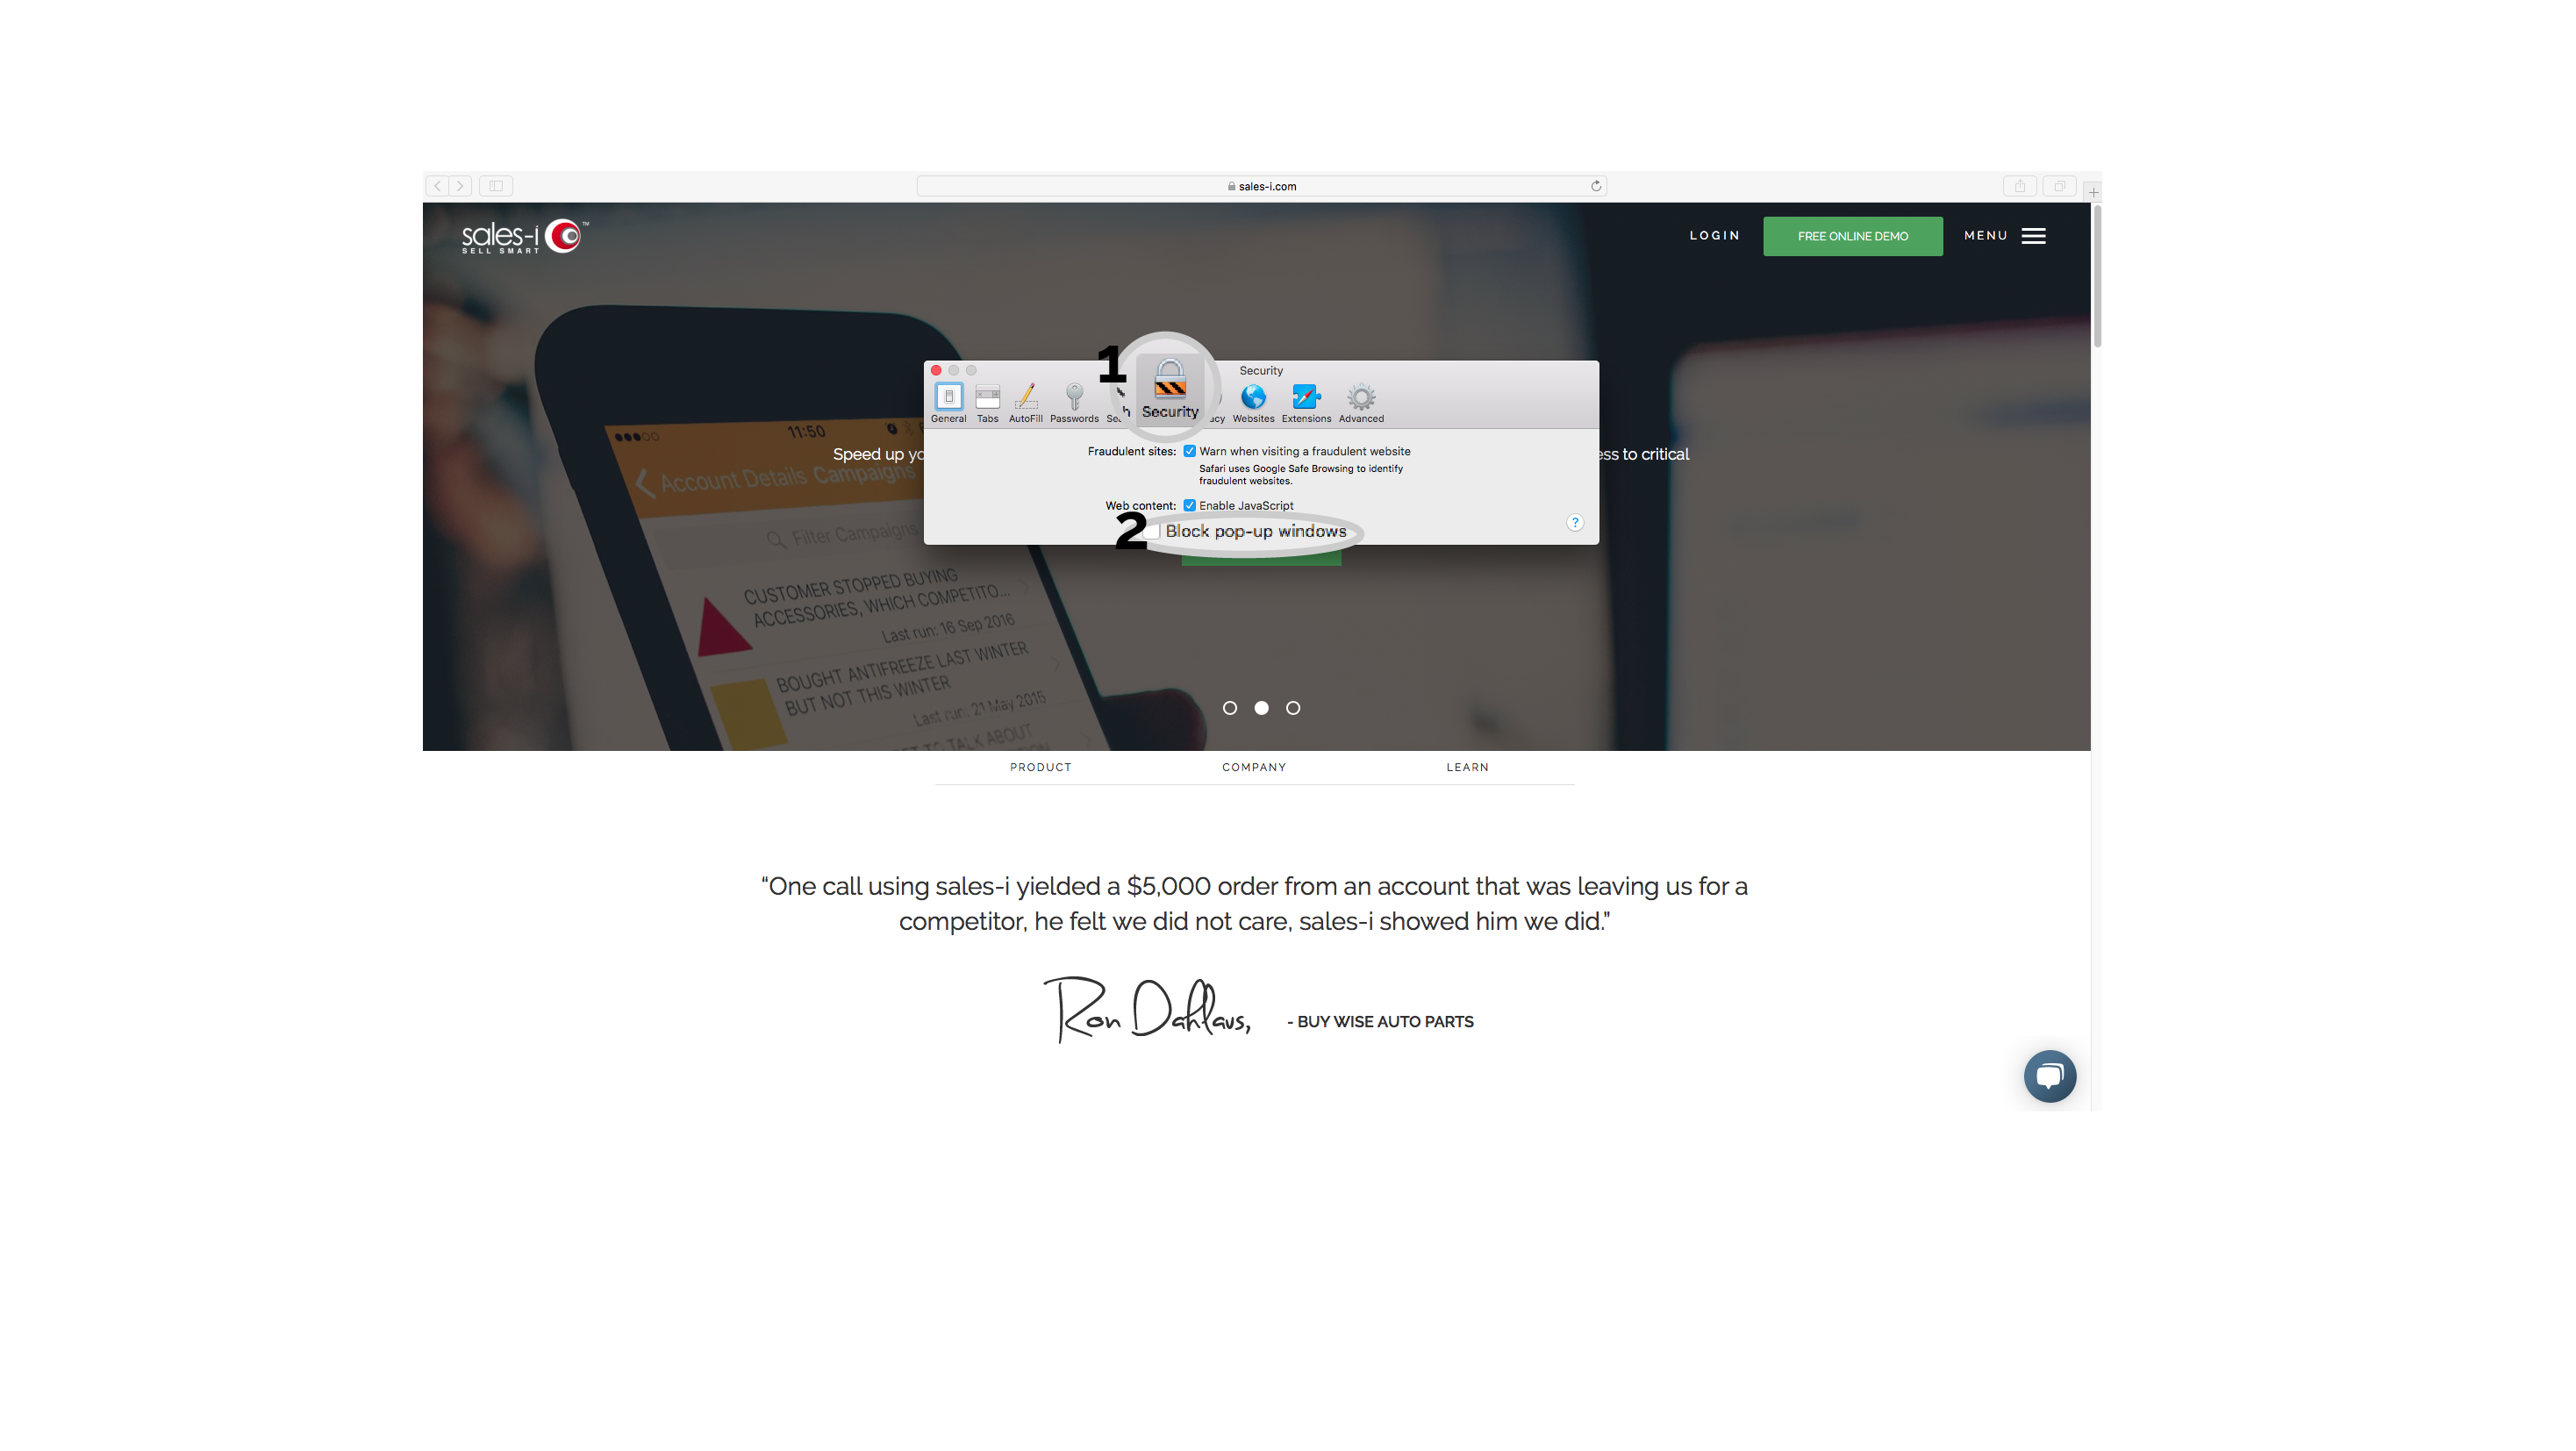
Safari
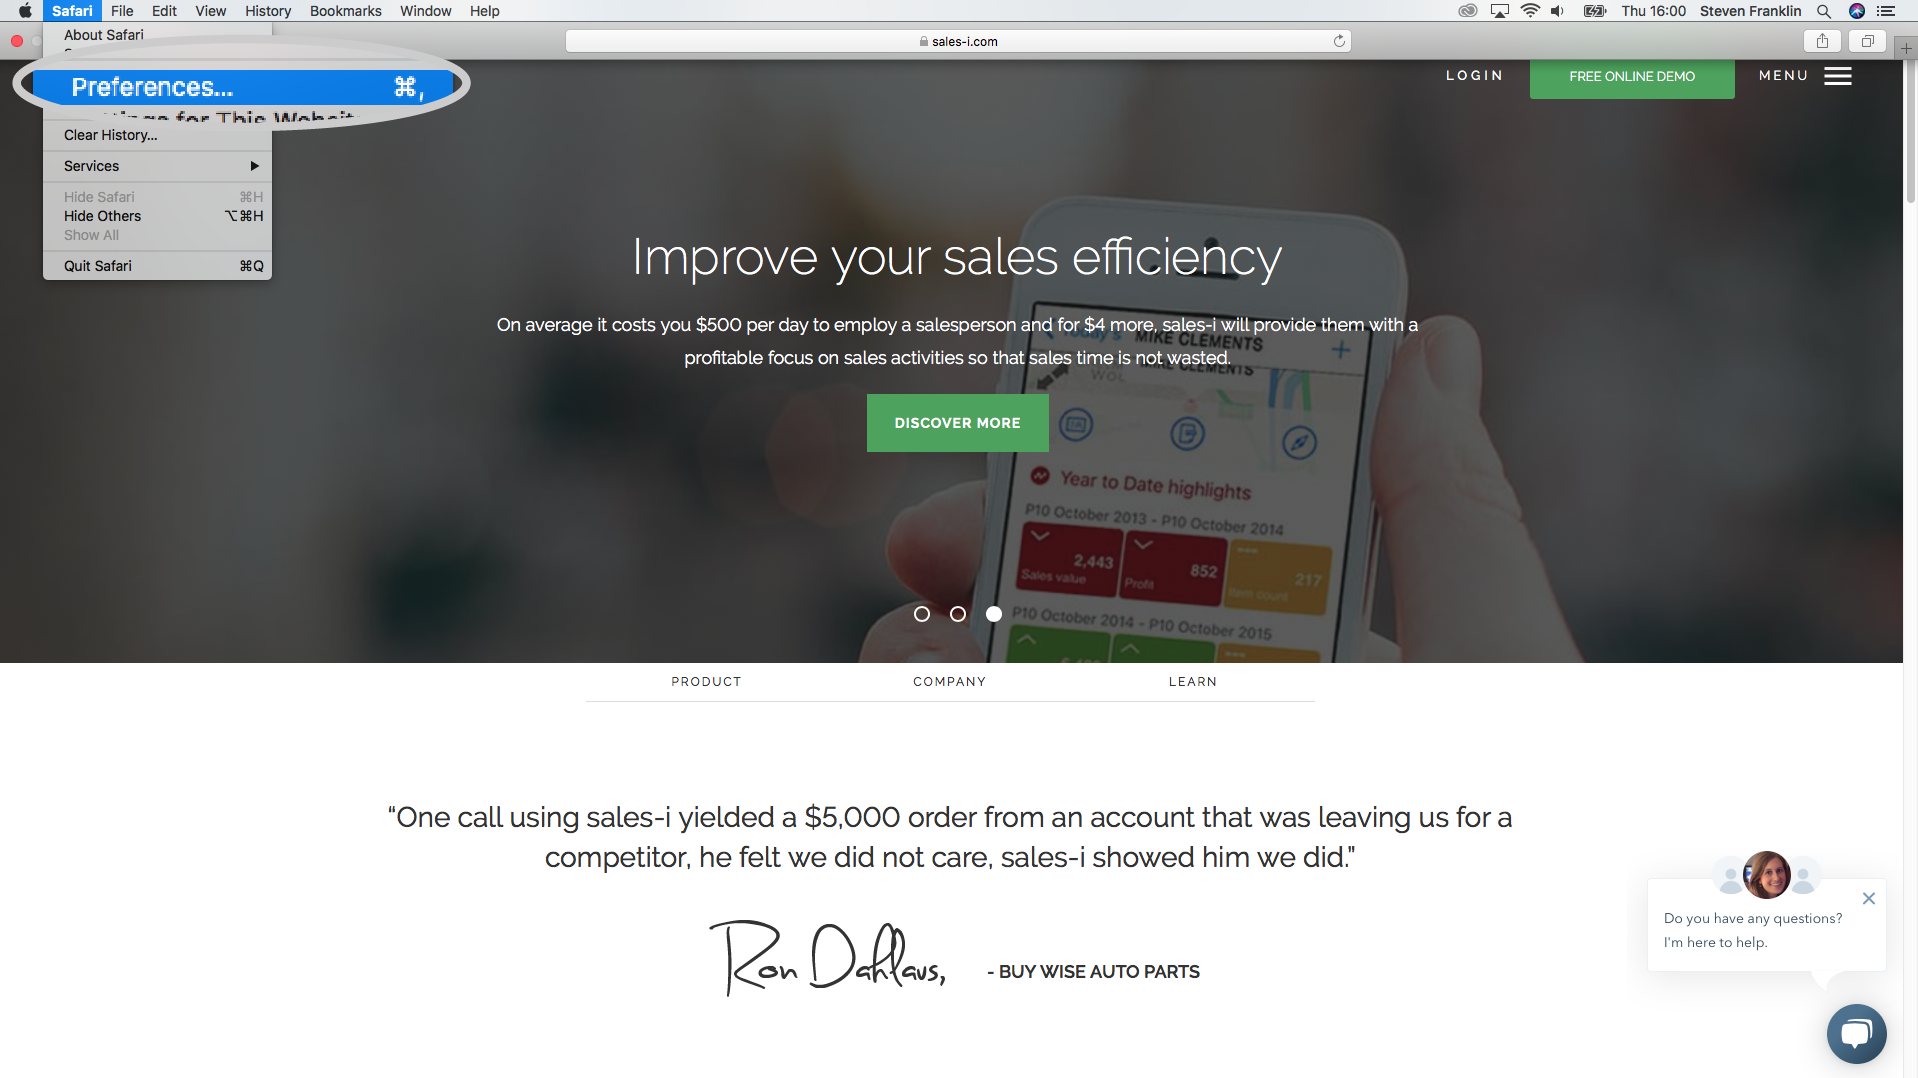
As Safari is standard on Apple products, this guide is written for Mac users. Please get in touch with us for further help if you’re not.
Step 1
Open Safari and, from the menu bar at the top of the screen, click Safari. Then, from the dropdown menu that appears, click preferences.
Step 2
Head into Security and either tick or untick Block pop-up windows.
Unfortunately, Safari doesn’t give you the option to allow certain websites but not others. If you need this function, simply install another browser by searching for it on Google and following the instructions.