A new feature to sales-i enquiries is the ability to add a second dimension to your reports. This allows users to add an extra informational field to the reports that are created.
Select a device
Desktop
Step 1: Go to Enquiries
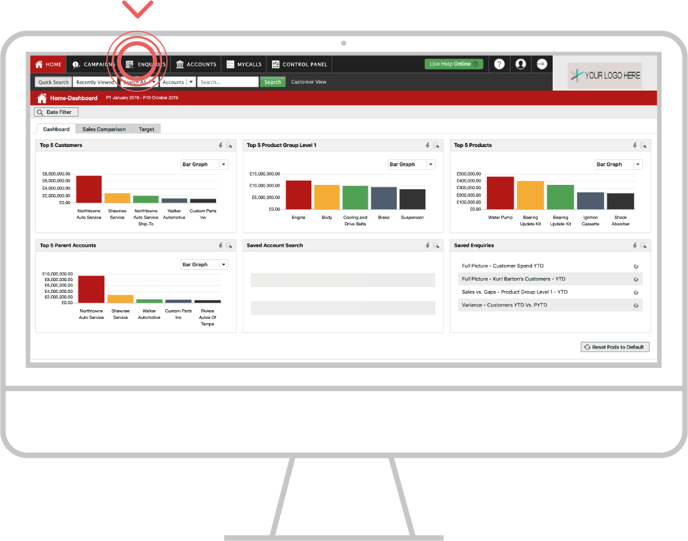
Click Enquiries from the top black navigation menu.
Step 2: Choose Enquiry
Select your desired Enquiry type from the dropdown Full Picture, Variance or Sales Vs Gaps. In this example, click in Full Picture.
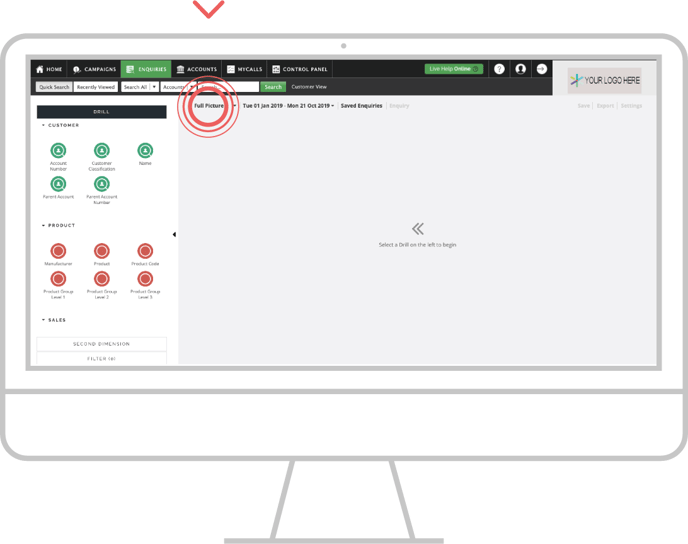
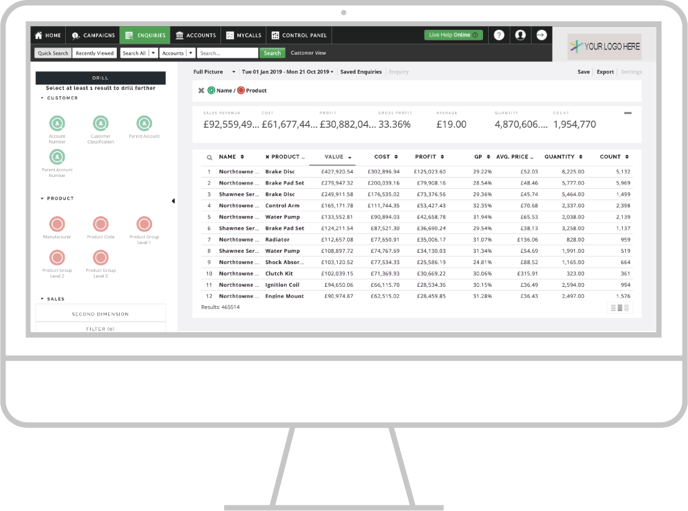
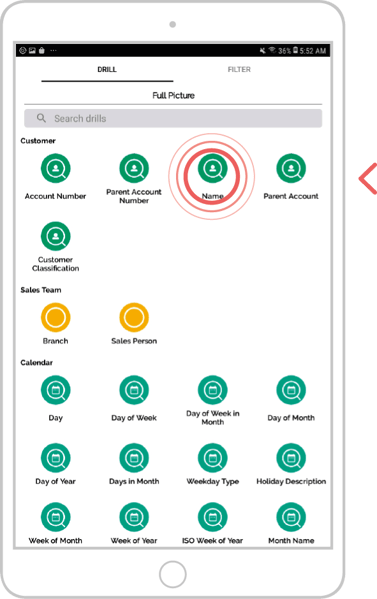
Step 3: Drill
Click on a bubble to drill into your data. In this example, we have clicked on the Name bubble.
Pro tip: There is a magnifying glass above the first rows of your enquiry. This is a search bar that will let easily locate the customer, product, or other search criteria that you’d like to select without having to scroll down to find it.
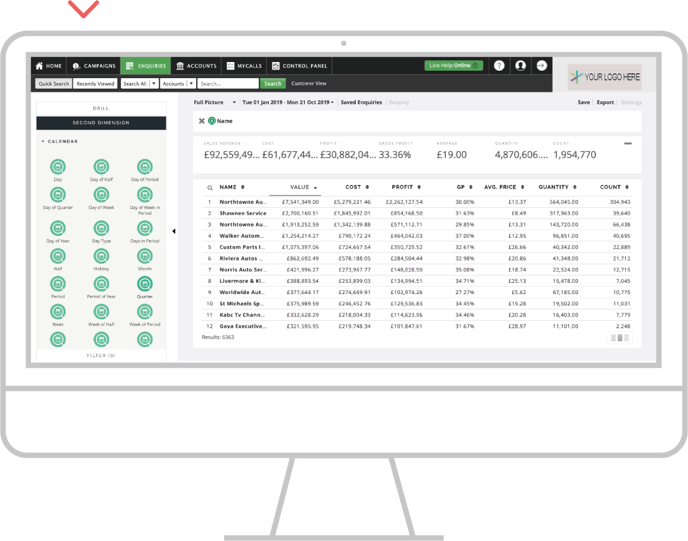
Step 4: Second dimension
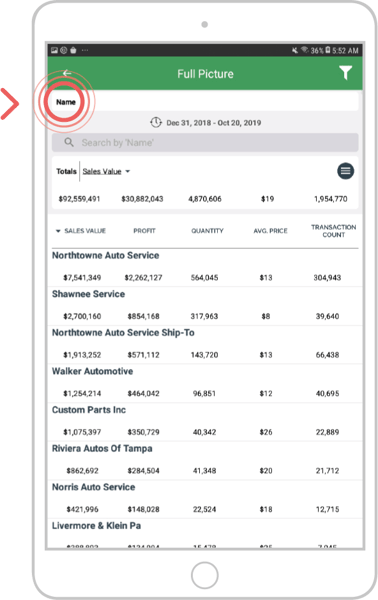
To add a second dimension to your enquiry select an additional bubble without clicking on any of the data. In this example we are searching for which products are the top sellers for my list of customers. To find this out, click on the Product bubble. This will now show you the results of the second dimension.
Apple
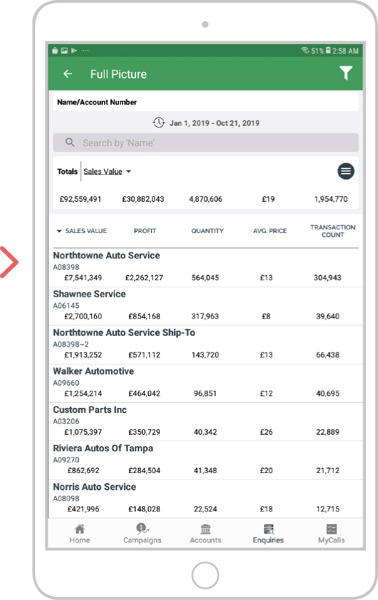
Step 1: Drill
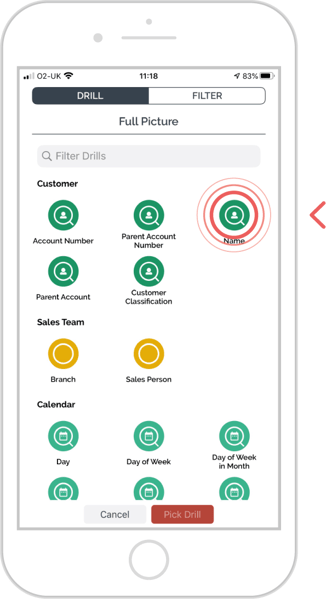
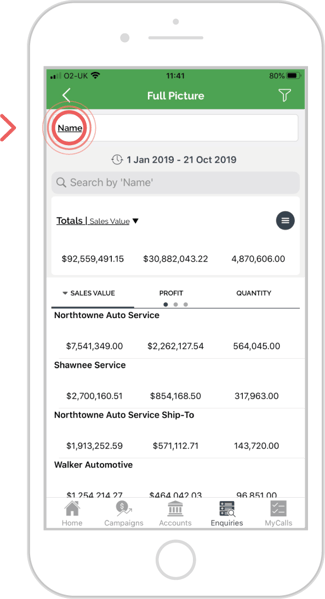
To add a second dimension, you must drill into the first part of your report. In this example, tap on the Name bubble.
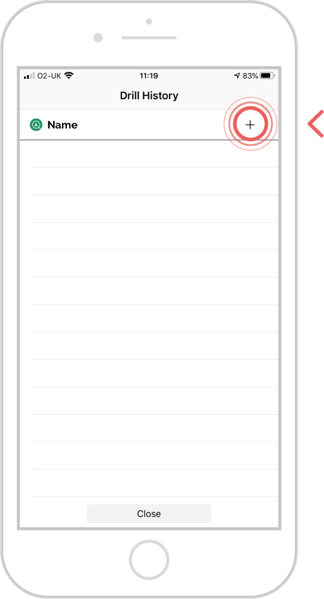
Step 2: Drill trail
From your Name bubble results page, tap on the drill trail box (just above the date).
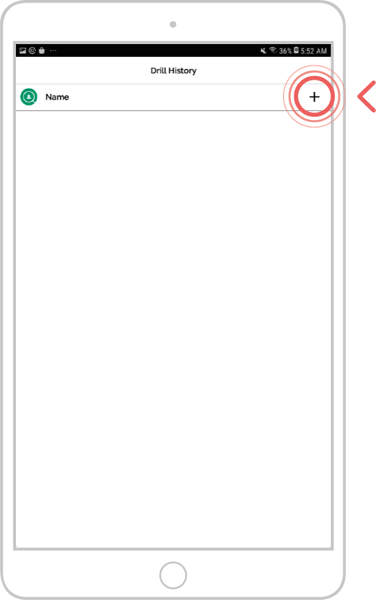
Step 3: Go to second dimension
Tap on ‘+’ symbol to view available Second Dimension bubbles.
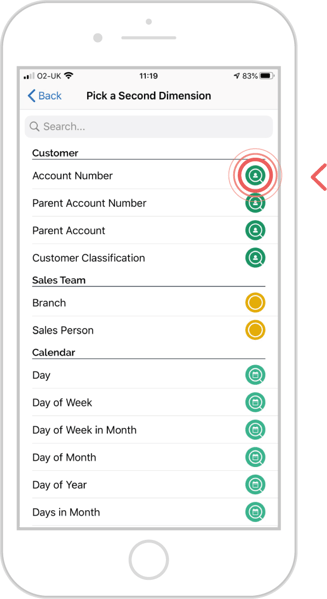
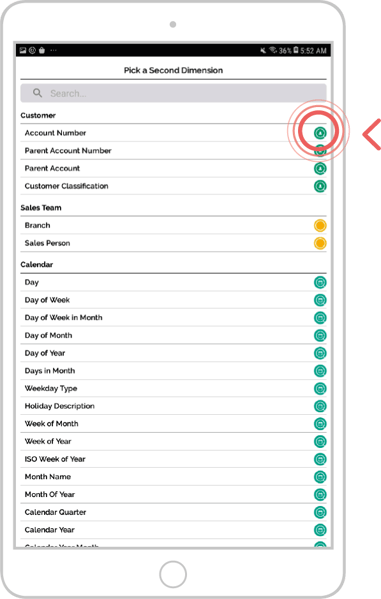
Step 4: Select bubble
Scroll down the list to find the bubble you need, or you can search the name of the bubble by tapping in search box above the bubble titles and type the name of the bubble you need.
Tap on the Second Dimension you want to apply to your data.
In this example, tap on the Account Number bubble.
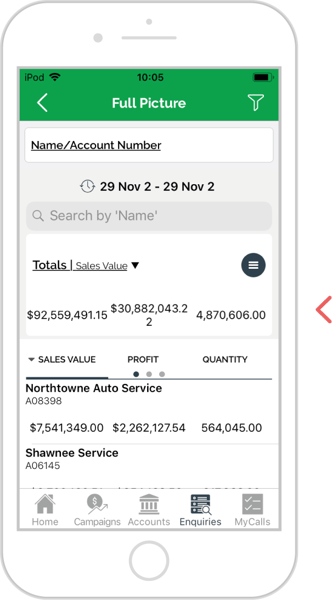
Step 5: Results
You will be delivered your data with the Second Dimension included.
Android
Step 1: Drill
To add a second dimension, you must drill into the first part of your report.
In this example, tap on the Name bubble.
Step 2: Drill trail
From your Name bubble results page, tap on the drill trail box (just above the date).
Step 3: Go to second dimension
Tap on ‘+’ symbol to view available Second Dimension bubbles.
Step 4: Select bubble
Scroll down the list to find the bubble you need, or you can search the name of the bubble by tapping in search box above the bubble titles and type the name of the bubble you need.
Tap on the Second Dimension you want to apply to your data.
In this example, tap on the Account Number bubble.
Step 5: Results
You will be delivered your data with the Second Dimension included.