You can save time by creating and saving Account searches, so that each time you log in to sales-i you can find key accounts that match a certain criteria, without having to do repeat searches.
For the purposes of this example, we will search for all of a particular Sales Rep’s accounts and save it - You could select yourself as the sales rep if you want to see all of your Accounts.
Desktop
Step 1: Click Accounts
From the home screen, click on the Accounts tab.

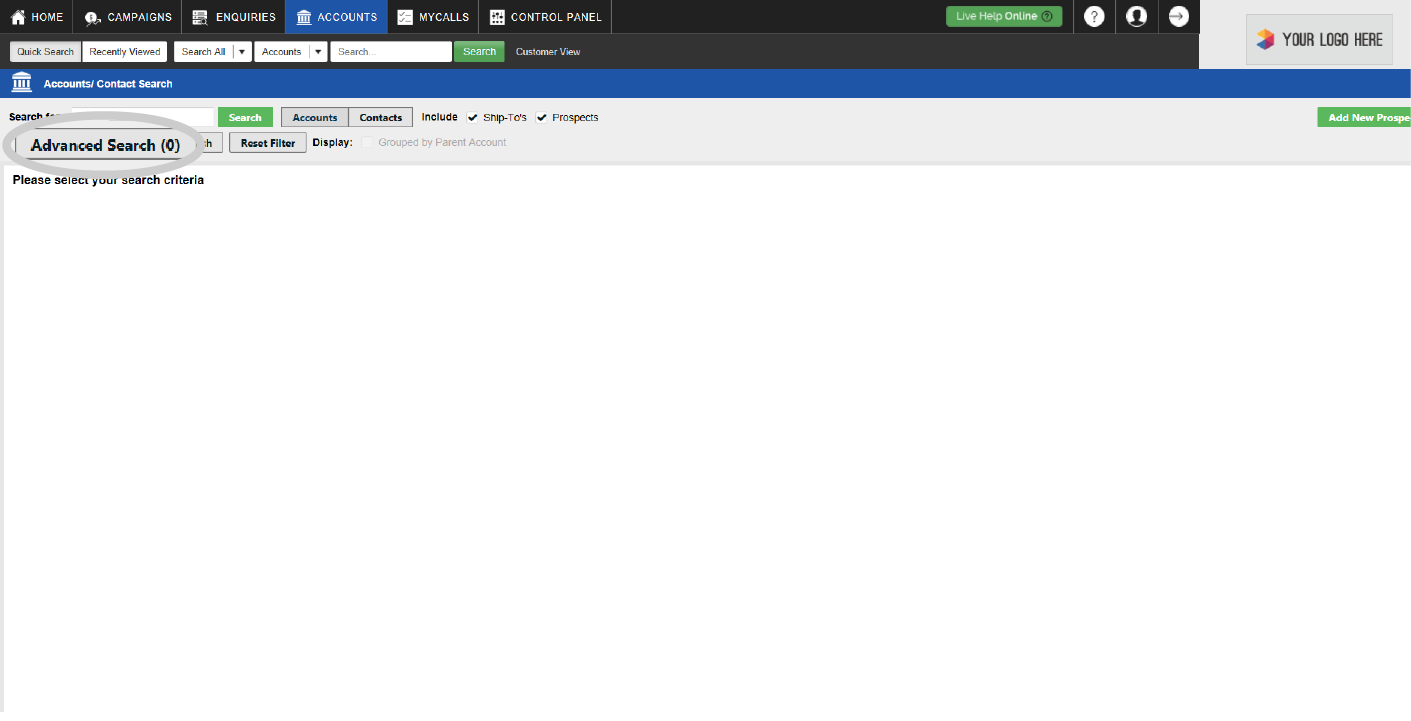
Step 2: Click Advanced Search
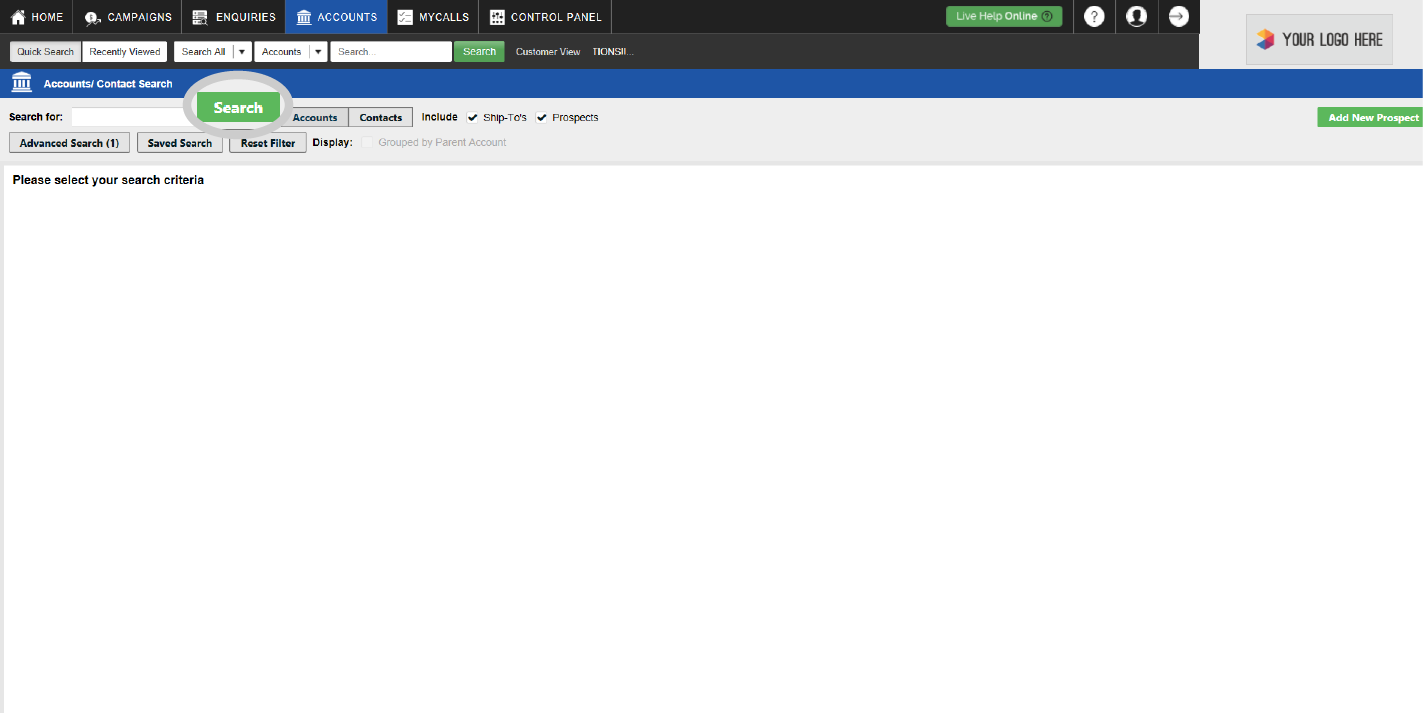
If you wanted to list all of the accounts that are visible to you, you can simply click on Search.
If you wanted to limit your search to customer accounts or prospects, you can use the check boxes labelled Ship-To’s and Prospects to remove either account type from your search. Please note that Ship-To’s may be called something different in your cube, for instance, Customer.
For this example, we are listing all accounts assigned to a particular Sales Rep, so we will tick Ships-To's/customers and Prospects and click on Advanced Search.
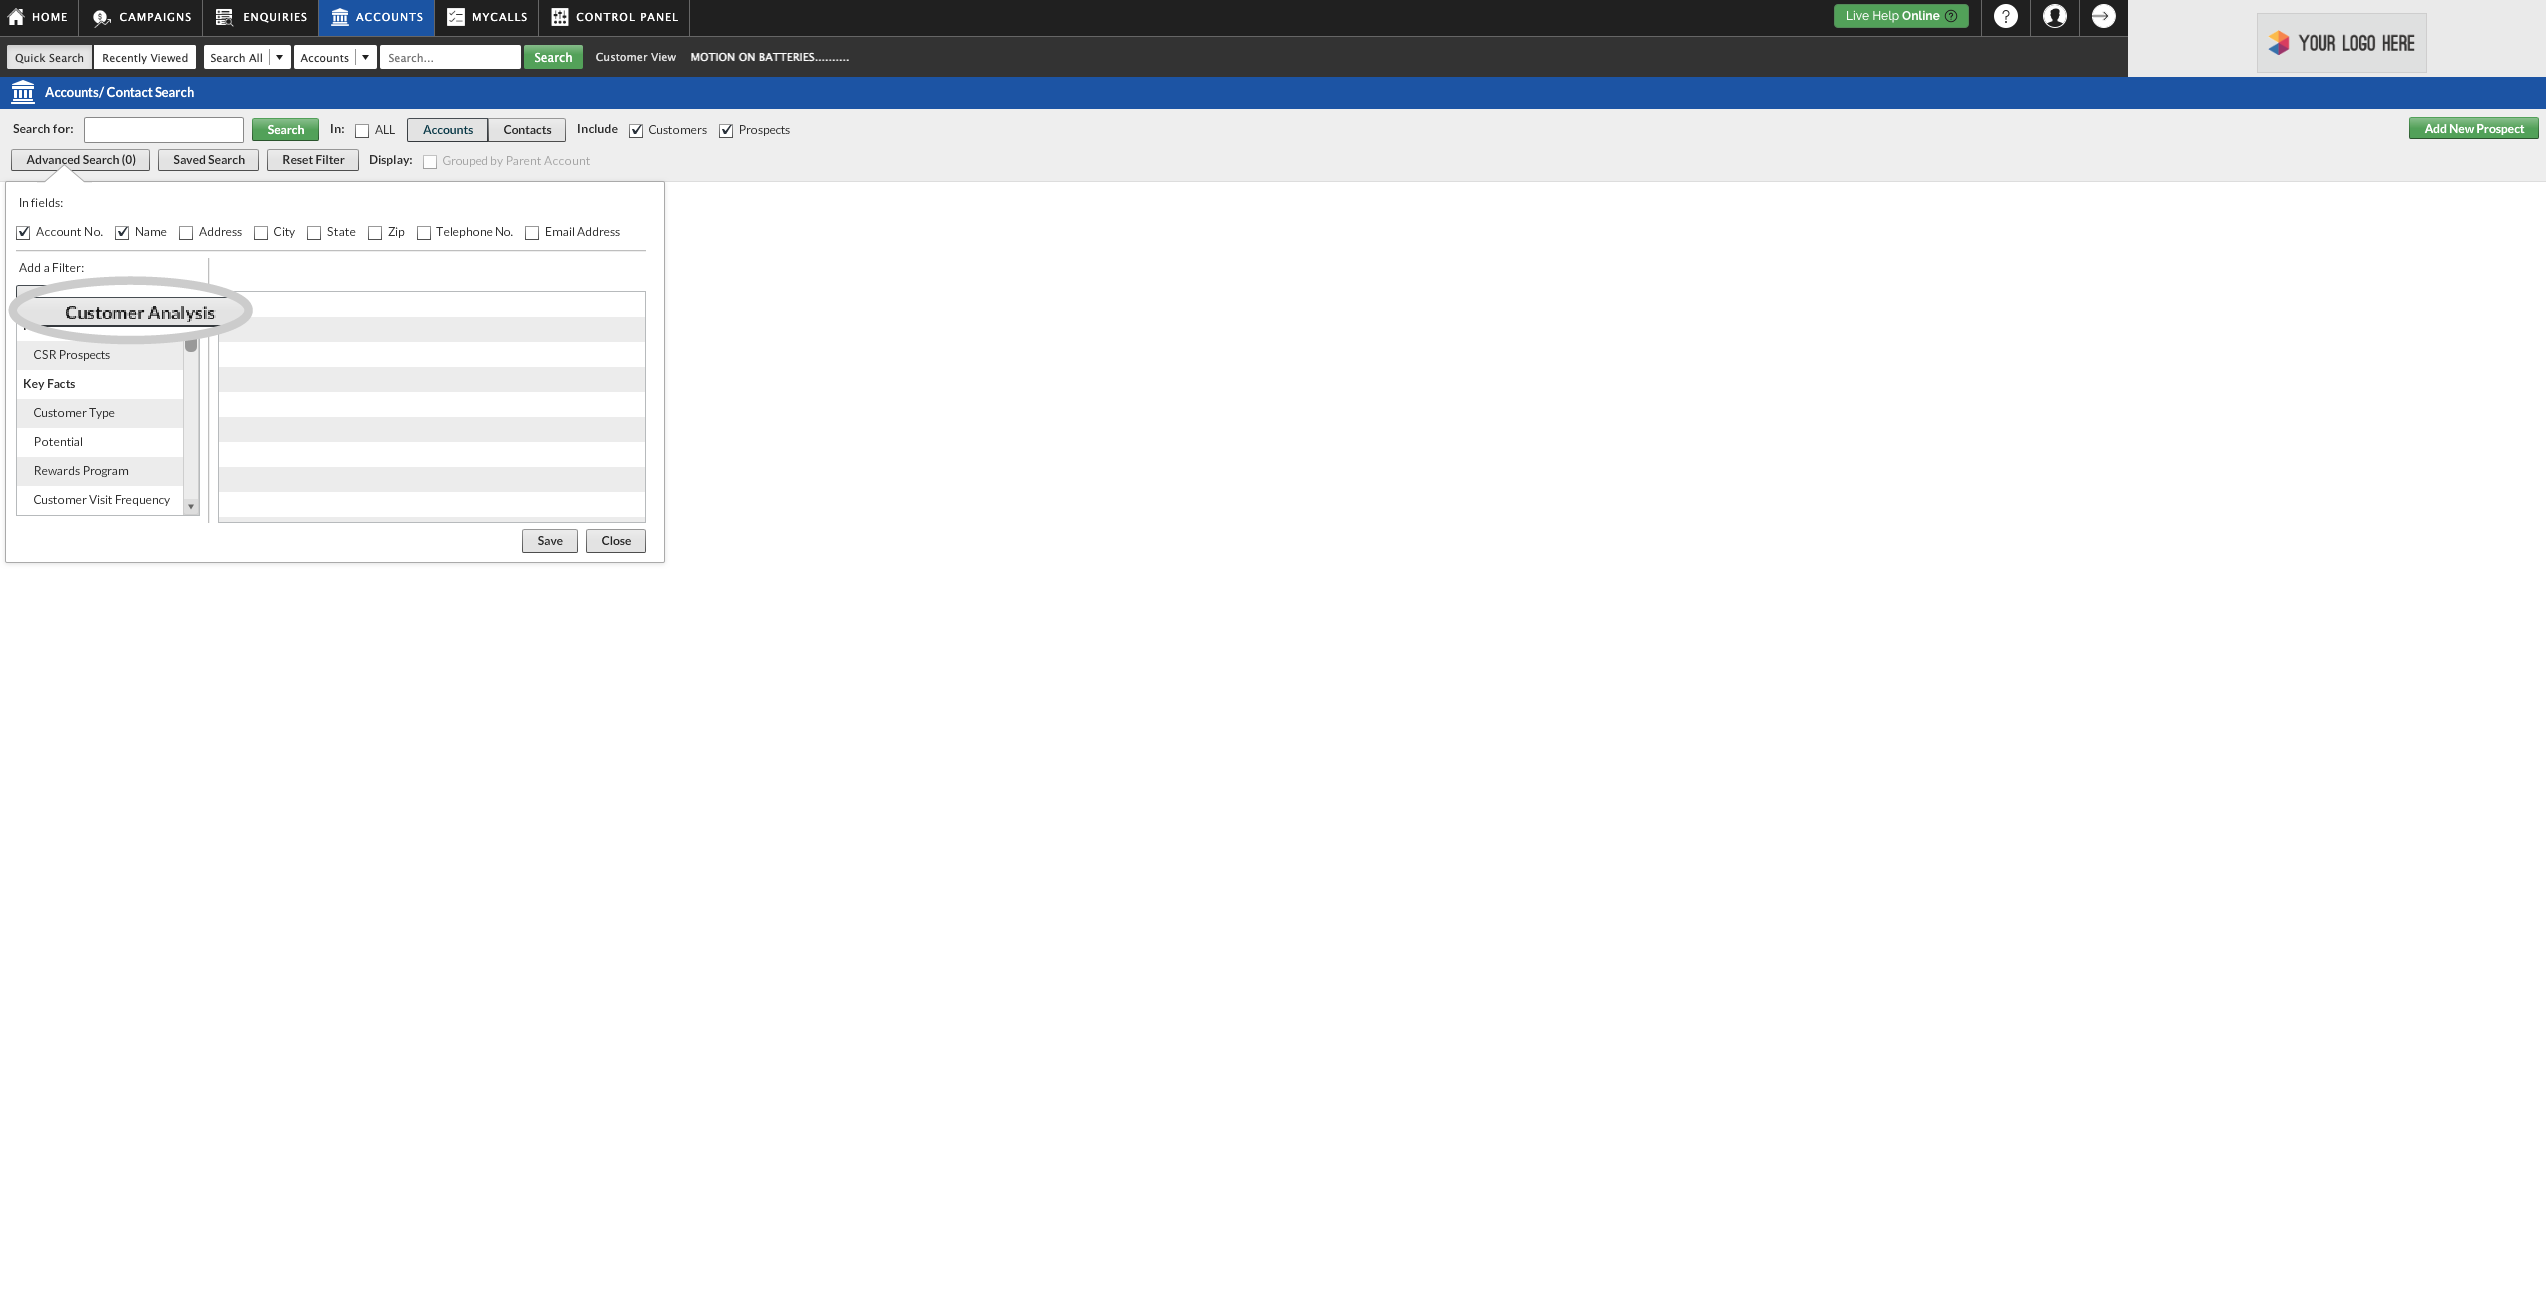
Step 3: Click Customer Analysis
You now to need to select your analysis type. To do so, tap where it says Customer Analysis.
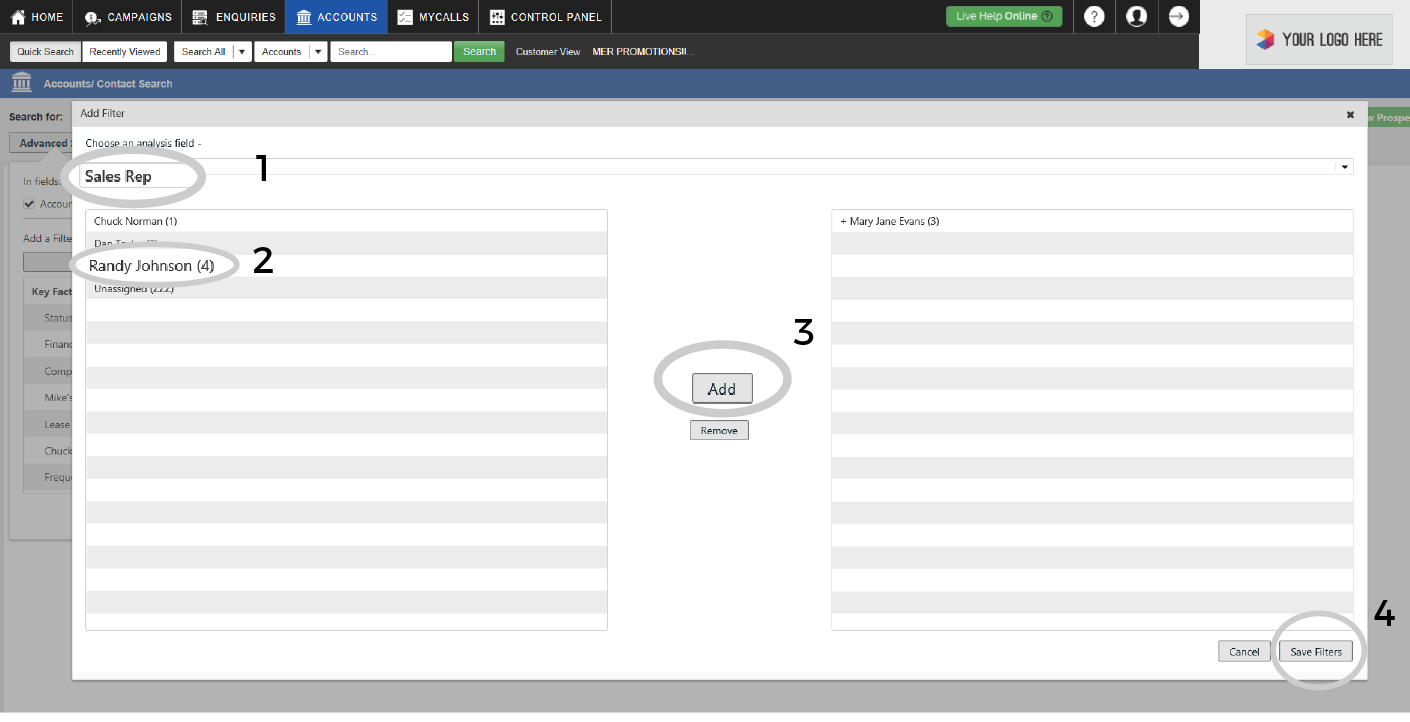
Step 4: Add and Save Filters
At this stage you need to click an analysis field, options you will see here will depend on the customer analysis fields (green bubbles) you have had set up. This could include Branch, Sales Rep, Territory, Parent Account or Customer to name just a few.
For this example, we will click on Choose an analysis field and select Sales Rep.
Next, click on the Sales Rep who's accounts you would like to view, so they highlight green and click Add.
Finally, click Save Filters.
Please note: You can select yourself as the sales rep if you want to see all of your Accounts.
Step 5: Click Save.
Next, click Save.

Step 6: Click Search
We are now ready to search, to do so click the green Search button.
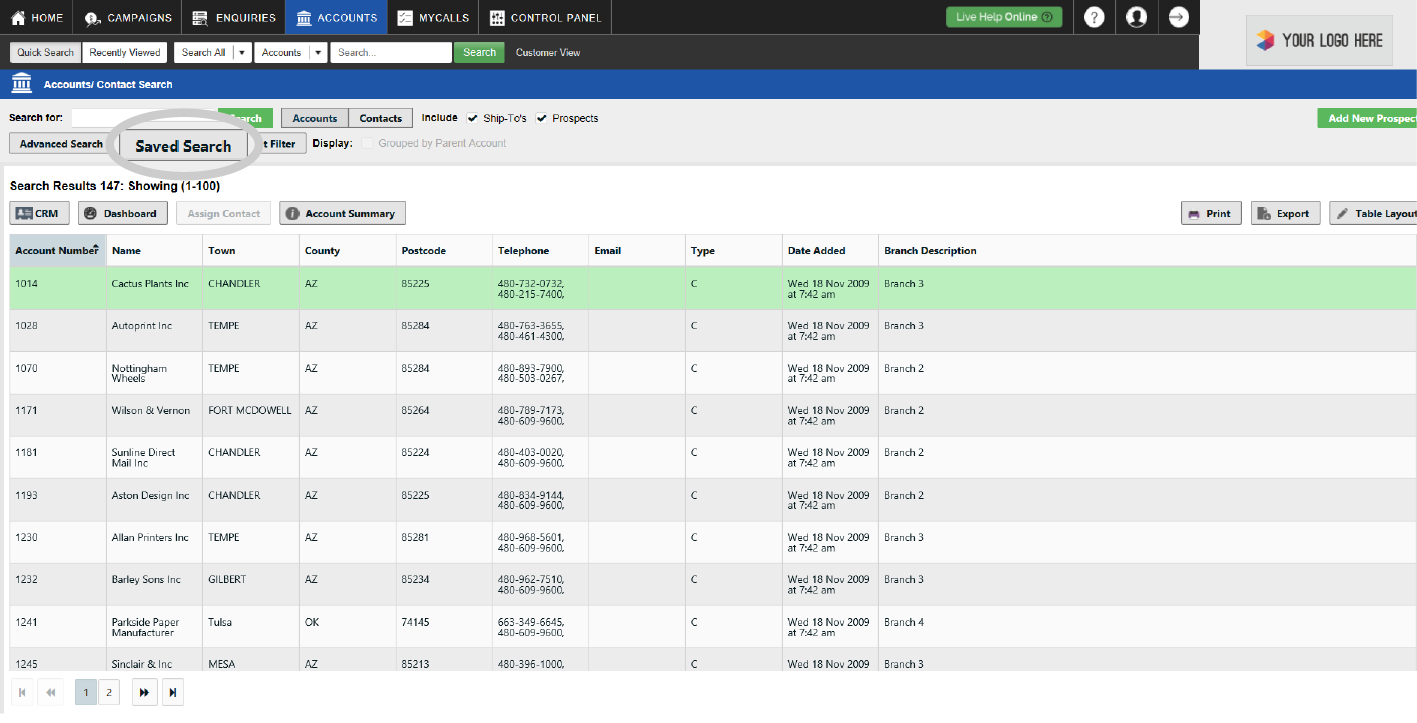
Step 7: Click Saved Search
You will now see a list of accounts matching your search criteria.
You can save this by clicking on the Saved Search button.
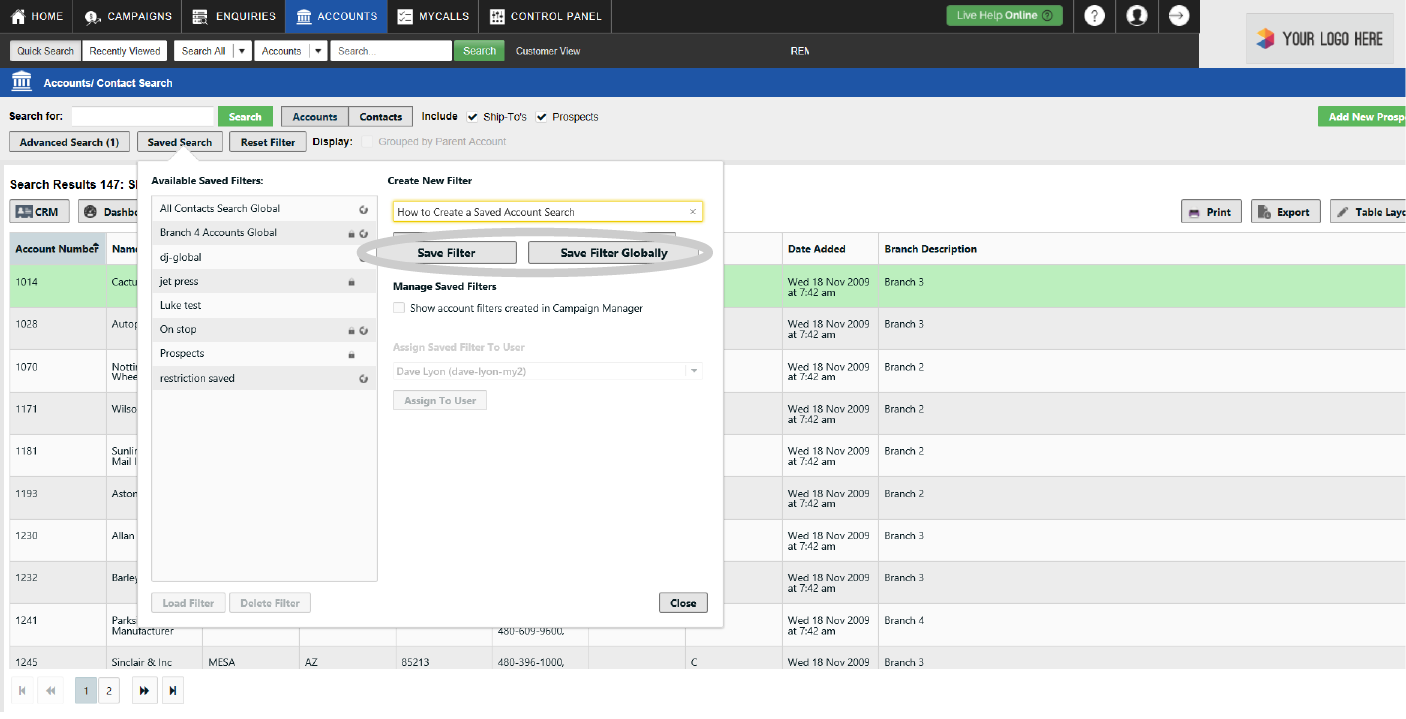
Step 8: Name and saving options
You now need to enter a name for your saved search. To do so, enter a name in the box that says Please enter a filter description.
Please Note: The name should be something that will make sense when you or someone else looks for at a later date. In this example we will enter 'Mary Jane Evans Accounts'
If you want to ensure only you can see and access this search, click Save Filter.
If you want to allow others to be able to see and access this saved search click Save Filter Globally.
If you want to assign the filter to a specific user, use the drop down list under where it says Assign Saved Filter To User to select the user, then click the Assign To User button.
Step 9: How to view your saved search
Now that you have saved your search, you can access it easily any time you need to.
Simply, Click Accounts, followed by the Saved Search button. click on your Saved Search so that it highlights green and then click on Load Filter.
Your Saved Search will now be displayed.
Apple
Download a PDF version
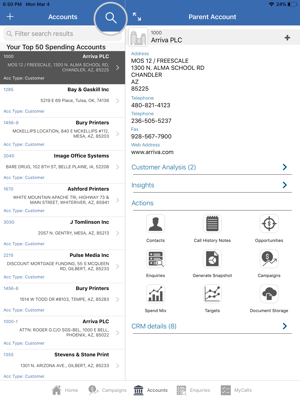
Step 1: Tap Accounts
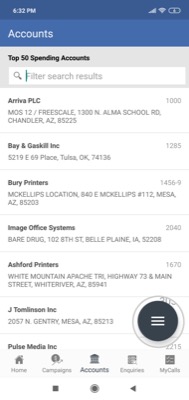
From the home screen, tap on Accounts.
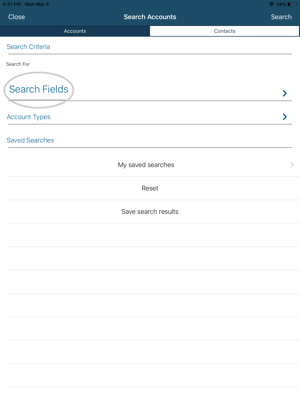
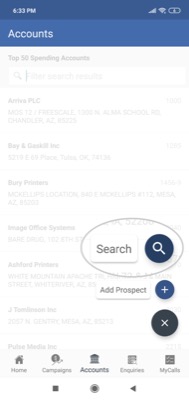
Step 2: Tap the magnifying glass icon
Tap on the Magnifying Glass icon.
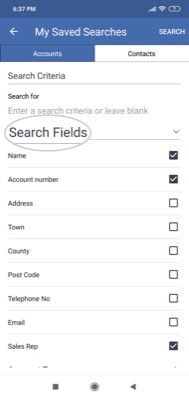
Step 3: Tap Search Fields
Tap Search Fields to open up a list of search options.
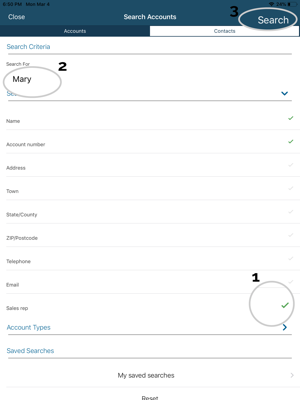
Step 4: Add filters and search
For our example we will check the Sales Rep box, then search for our Sales Rep by typing their name in underneath the Search For field.
Once you are ready, tap Search in the top right of the window.
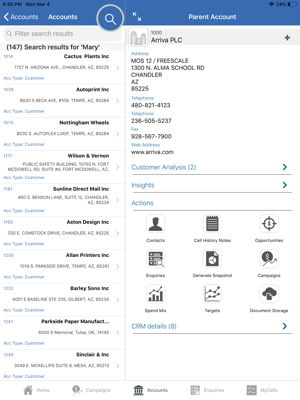
Step 5: Tap the magnifying glass icon
You will now see your results.
To save your results tap the magnifying icon.
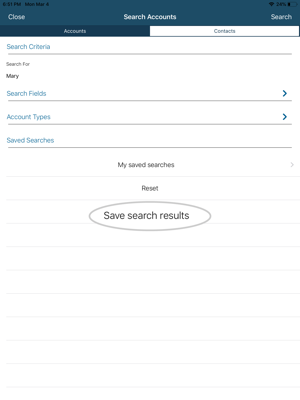
Step 6: Click Save search results
Next, click Save search results.
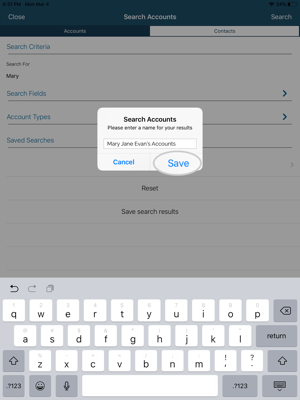
Step 7: Name and Save
You now need to enter a name for your saved search. To do so, enter a name in the box that says Please enter a name for your results.
Please Note: The name should be something that will make sense when you or someone else looks for at a later date. In this example we will enter 'Mary Jane Evan's Accounts'
Next, click Save.
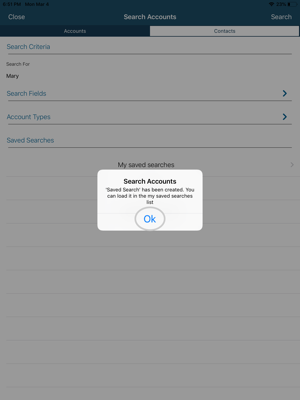
Step 8: Tap Ok
A box will now pop up to let you know your search has been created.
Tap OK.
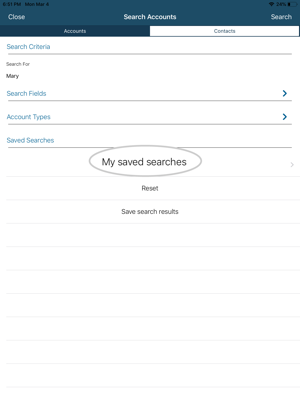
Step 9: How to view your saved search
Now that you have saved your search, you can access it easily any time you need to.
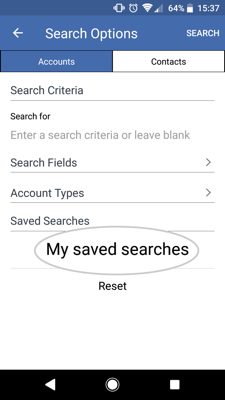
Simply, Click Accounts, followed by the magnifying icon and finally click My saved searches.
Select your Saved Search to display it.
Android
Download a PDF version
Step 1: Tap Accounts
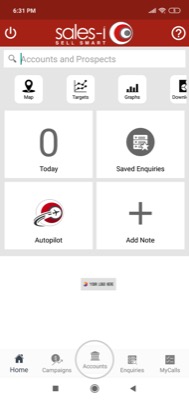
From the home screen, tap Accounts.
Step 2: Tap the three lines icon
Tap on the three lines icon.
Step 3: Tap Search
Tap Search to open up a list of search options.
Step 4: Tap Search Fields
Next, tap Search Fields to open up a further list of search options.
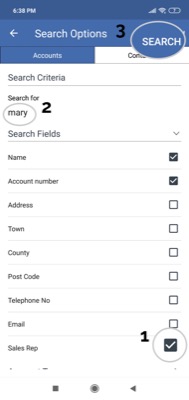
Step 5: Add filters and search
For our example we will check the Sales Rep box, then search for our Sales Rep by typing their name underneath the Search For field.
Once you are ready, tap Search in the top right of the window.
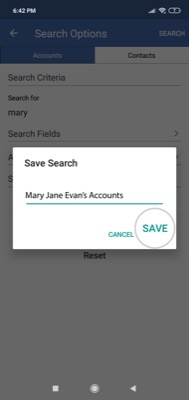
Step 6: Name and Save
You now need to enter a name for your saved search.
Please Note: The name should be something that will make sense when you or someone else looks for at a later date. In this example we will enter 'Mary Jane Evan's Accounts'
Next, click Save.
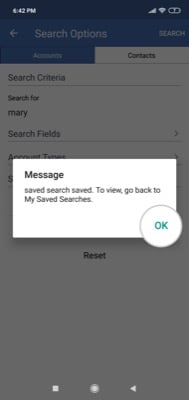
Step 7: Tap OK
A box will now pop up to let you know your search has been created.
Tap OK.
Step 8: How to view your saved search
Now that you have saved your search, you can access it easily any time you need to.
Simply, Click Accounts, followed by the magnifying icon and finally click My saved searches.
Select your Saved Search to display it.