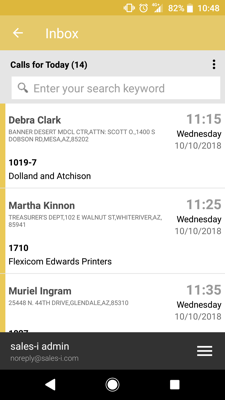
Let sales-i fill in your diary for you. At the click of a few buttons you can send calls to your diary. Say goodbye to admin and hello to having more time to sell.
Select your device:
Desktop
Download a PDF version
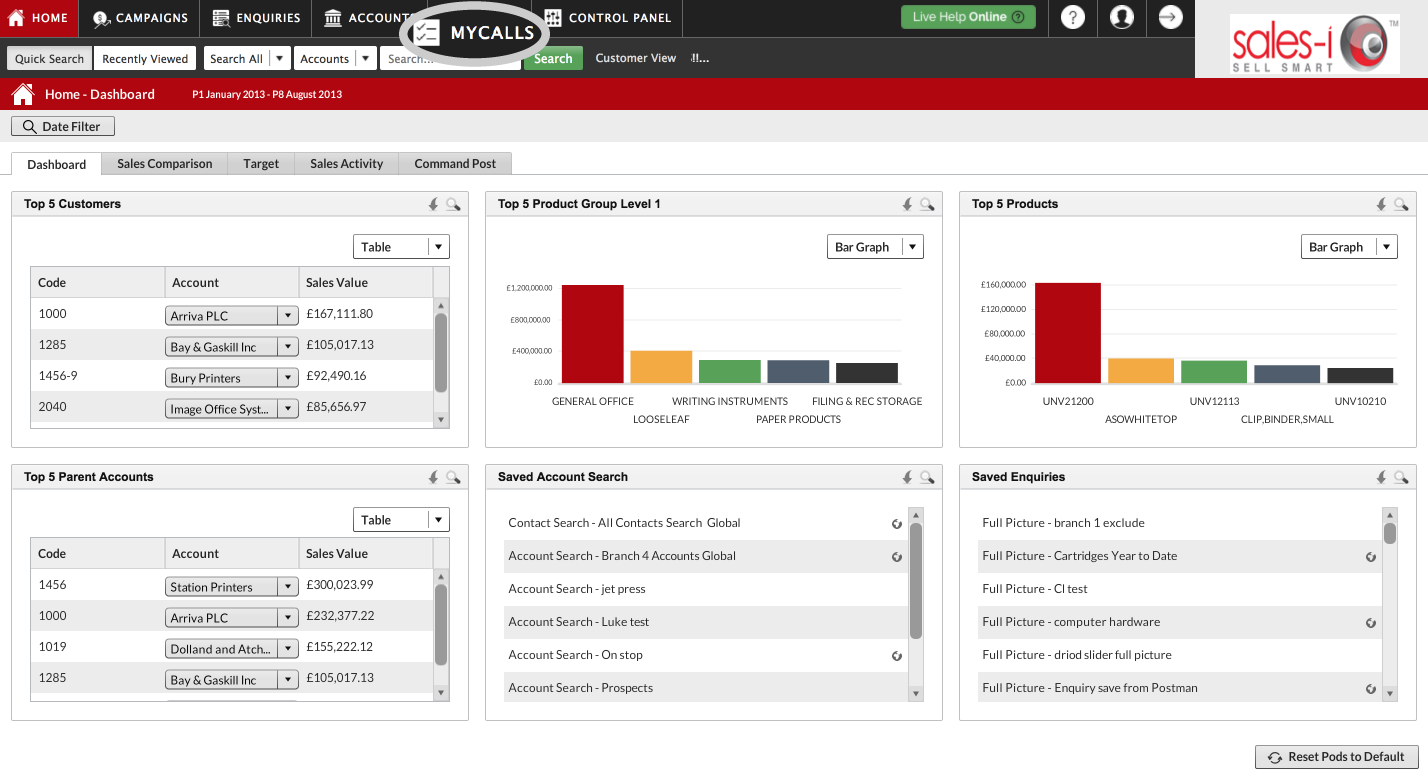
Step 1: Select MyCalls
Select MyCalls from the navigation menu at the top of the screen.
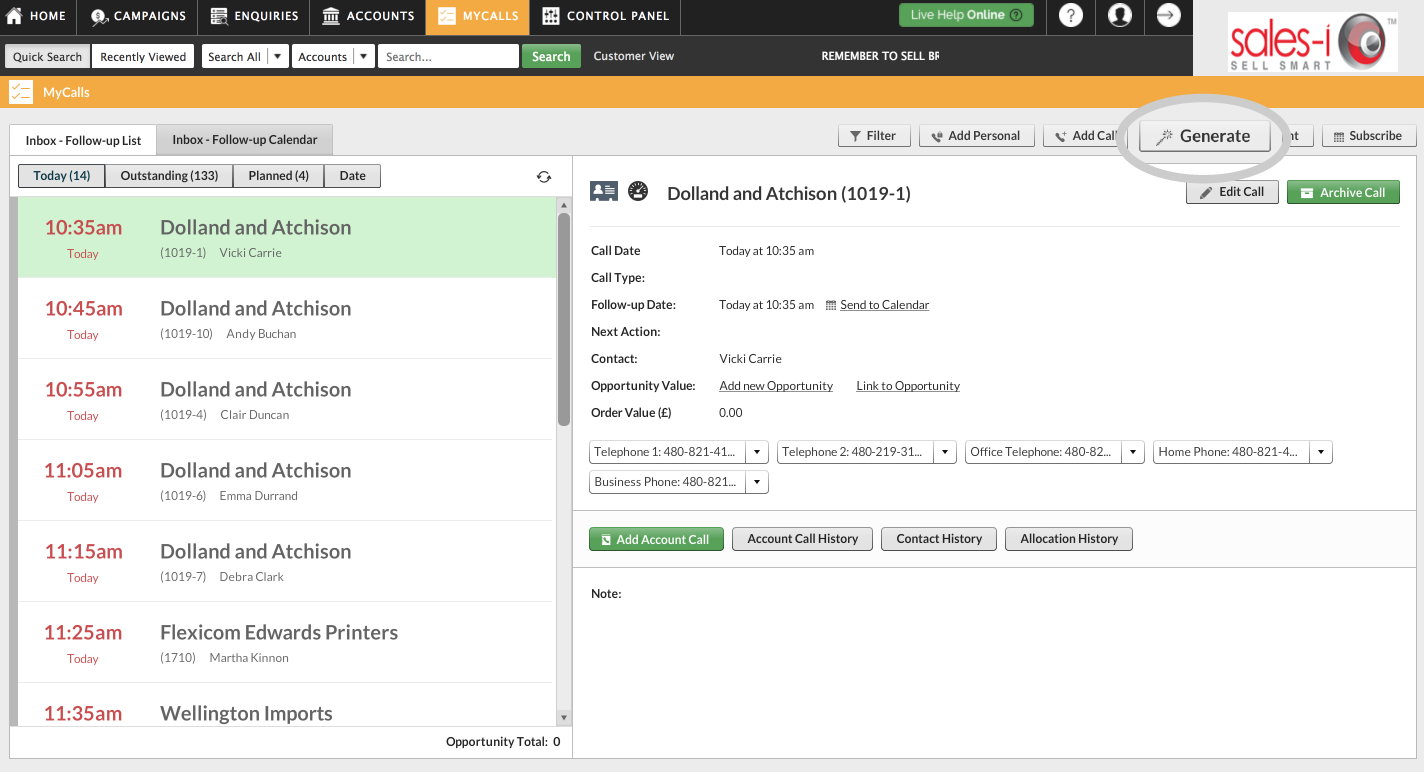
Step 2: Click Generate
To quickly add several calls to your calendar, click the Generate button in the top-right of the screen.
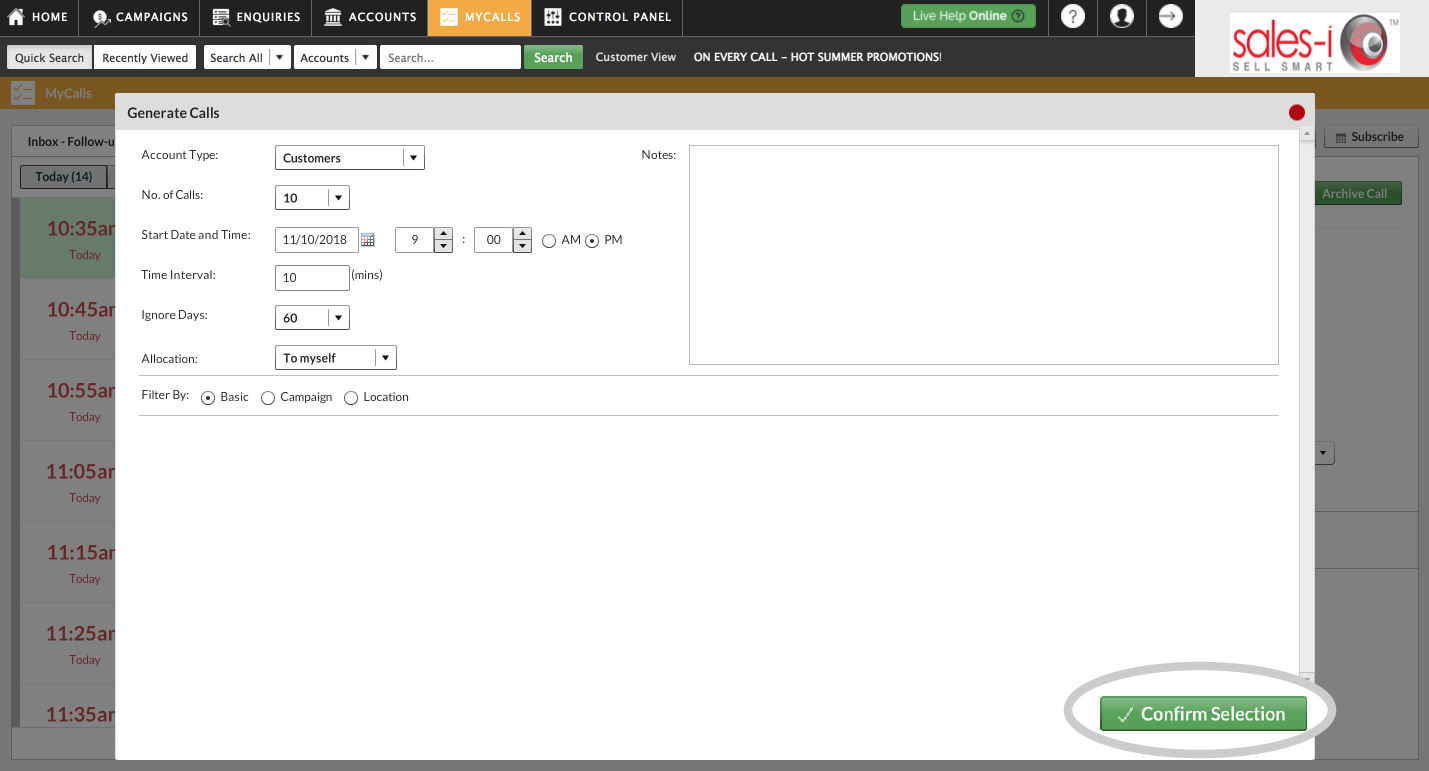
Step 3: Generate Calls options
This will open a pop-up window requesting information to be completed about the calls you are adding to your calendar.
Account Type = First, select the type of accounts you want to call; Customers or Prospects.
No. of Calls = This denotes the amount of calls you want to add on a particular day
Start Date and Time = Select the date and time you want these calls to appear in your calendar. The default setting is the current date and time, but you can change this by clicking on the calendar, selecting your date, and then updating the time.
Time Interval = This option designates the duration of each call in your calendar. Remember to account for any time you may need in-between meetings and for the possibility of a call over-running.
Ignore Days = To avoid scheduling calls to customers too often, activate the Ignore Days feature by selecting a number of days you wish to ‘ignore’ from the drop down list. This will omit customers that have received a call, for example, in the last 7 days, when it generates your new call list for your calendar. If you want to include recently contacted customers select 0 to deactivate Ignore Days.
Filter by = This option enables you to focus in on a particular set of customers when generating a call list. There are three filter options; Basic, Campaign, and Location.
- Basic selects customers from your entire customer base, defaulting to prioritise those with the biggest year-on-year decline in sales.
- The Campaign option filters customers based on a Campaign criteria. This is a great example of using sales-i to set the topic and clarify the purpose of the conversation before you make the call.
- Lastly, you can use Location to narrow your calls down to a particular area. You can filter your calls by zip or post code, or a city or town.
With all of your fields completed as required, click Confirm Selection.
Step 4: Preview and Edit
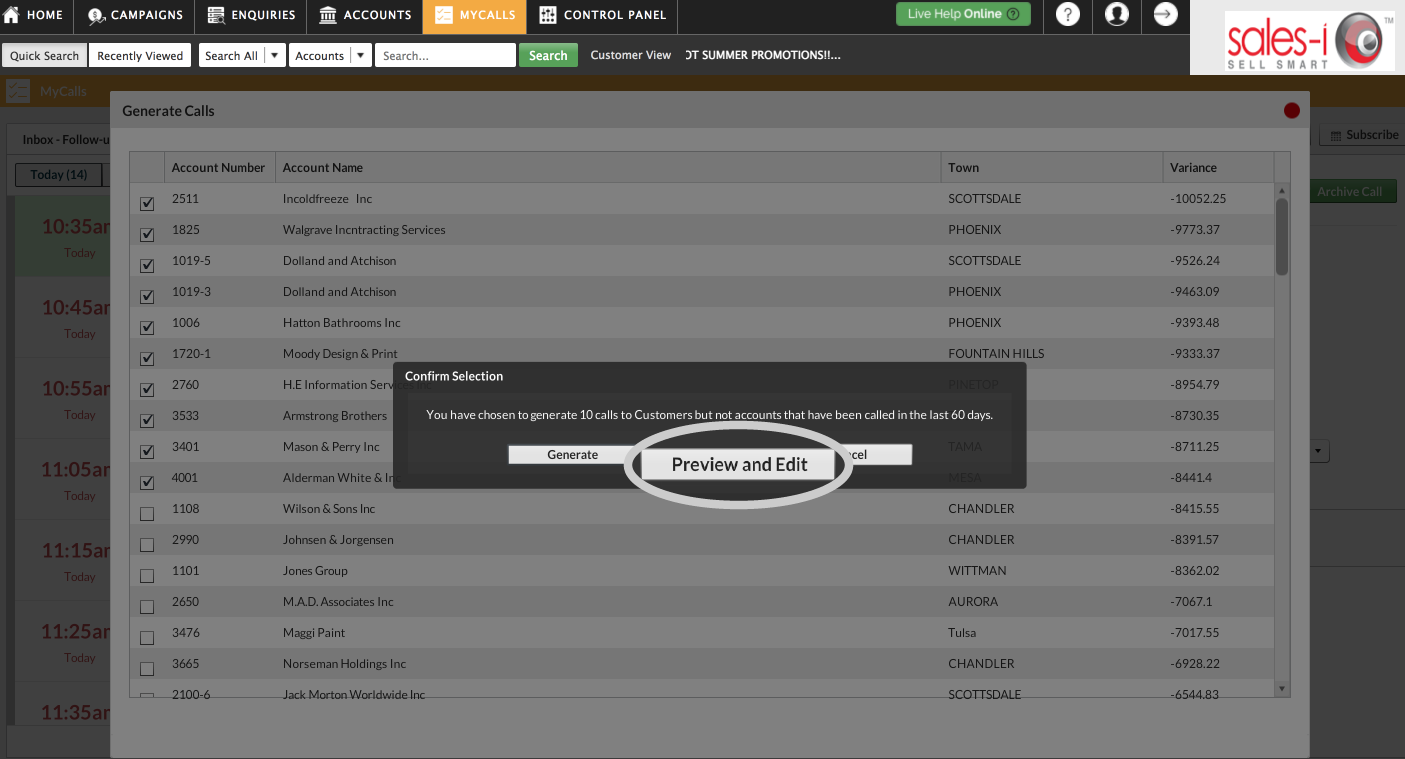
A new dialogue window will open and present 3 choices; Generate, Preview and Edit, and Cancel.
Clicking the Generate button would use the default selection made by sales-i and add them to your calendar without review.
The Cancel button cancels the selection and returns you to the previous screen.
The Preview and Edit button allows you to review and update the default selection of customers. This provides greater control over the calls added to your calendar.
Select Preview and Edit.
Step 5: Select Calls & Generate
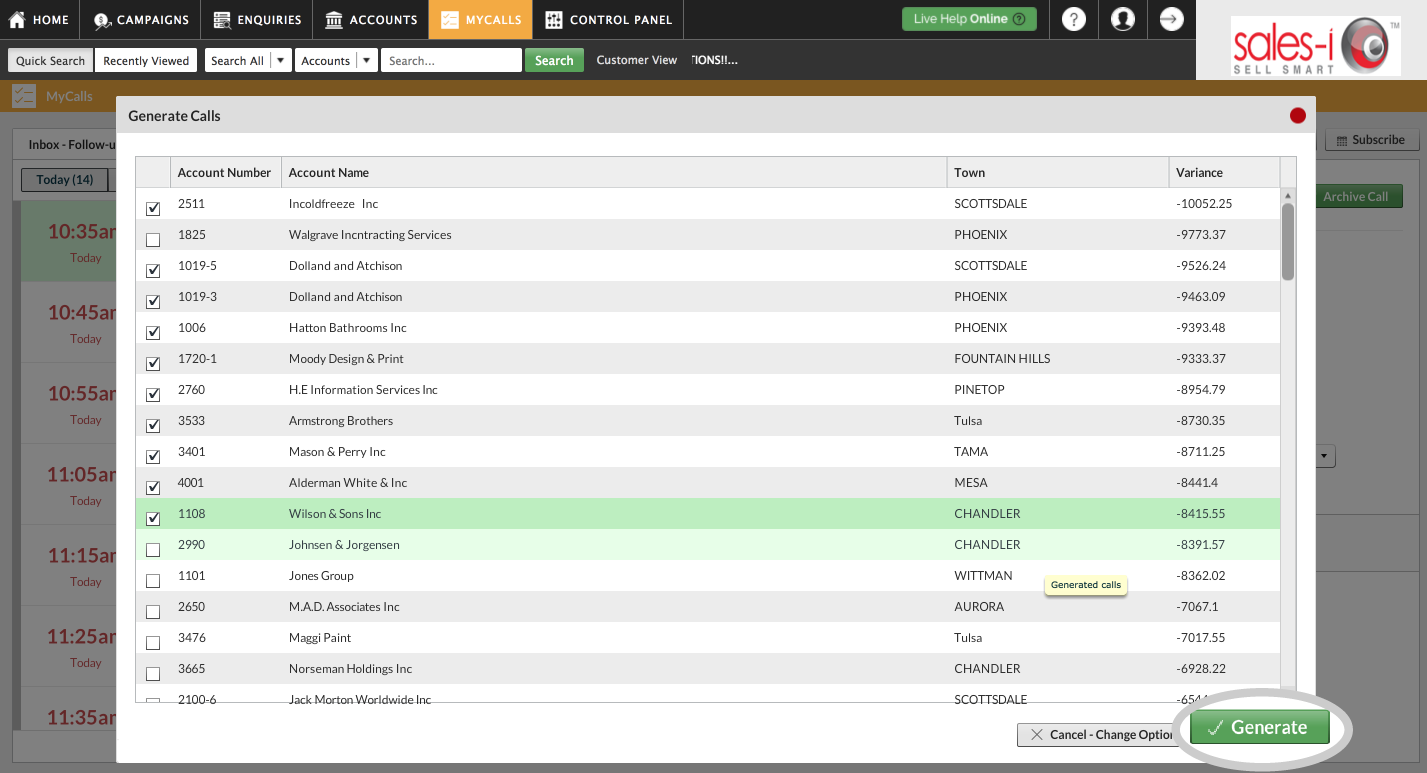
On the next screen we can preview the default selection of customers. To edit the default selection, click the checkbox on the left-hand side to select or deselect a customer.
When you are happy with your choices, click the green Generate button in the bottom right to add the calls to your MyCalls calendar.
Step 6: View list
You will now see a message informing you that calls were generated successfully.
Click OK.
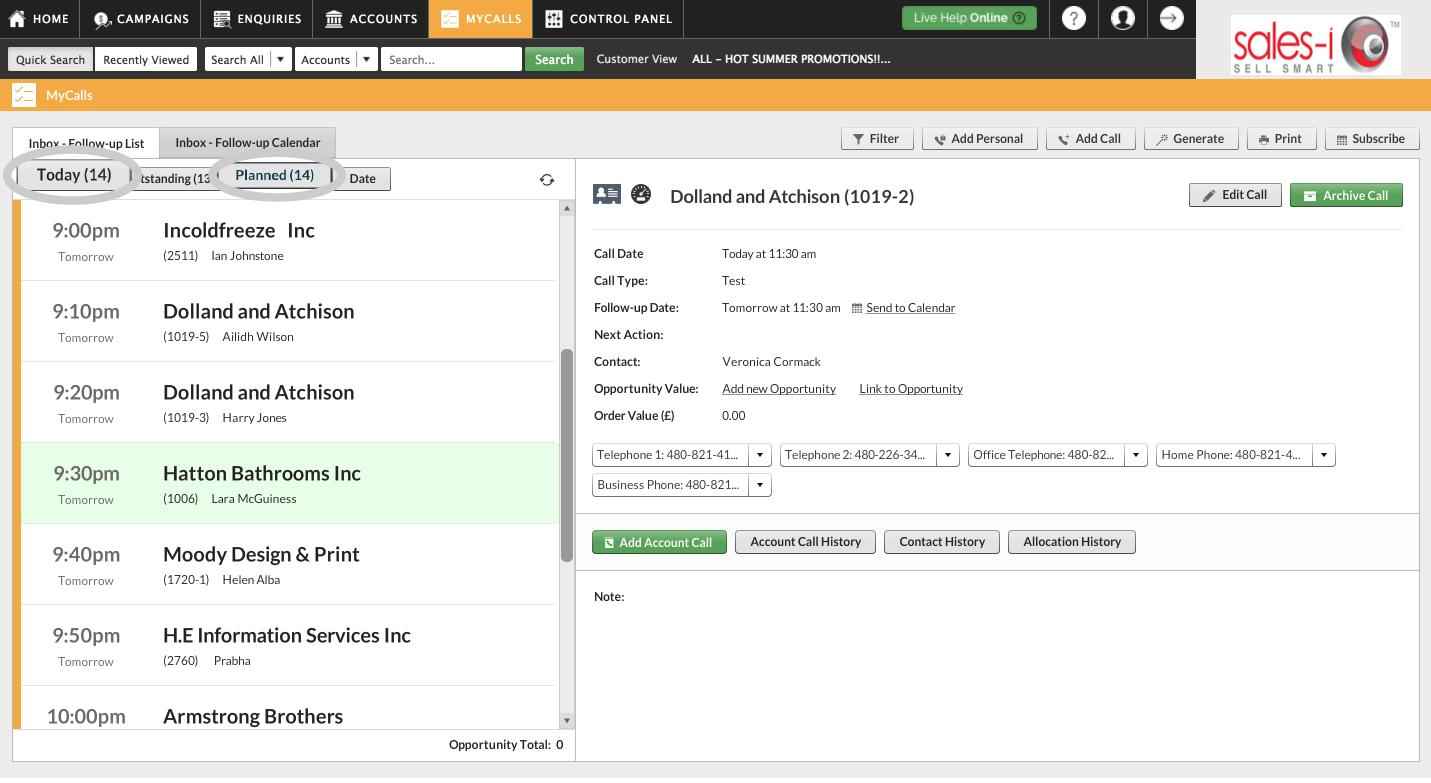
To view the generated calls, from your MyCalls inbox select Today to see calls scheduled for today or Planned to see calls you have scheduled for the future.
With your MyCalls calendar populated with calls you have selected, you will be better placed to have strategic and profitable conversations with your customers.
Apple
Download a PDF version
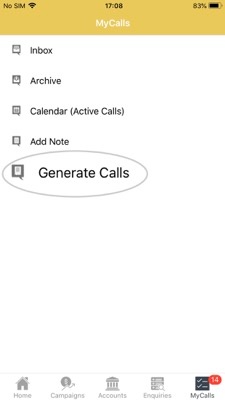
Step 1: Select MyCalls
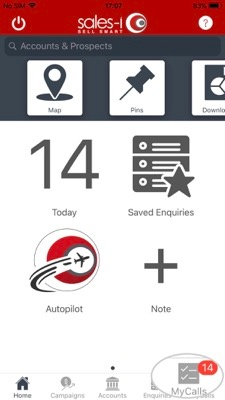
Select MyCalls from the navigation menu at the bottom of the screen.
Step 2: Tap Generate Calls
Next, tap Generate Calls.
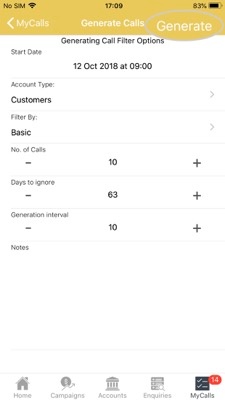
Step 3: Generate Calls options
Start Date = Select what day and time you would like to start making these calls.
Account Type = Select Customers or Prospects.
Filter by = Filtering your results to ‘basic’ will let you pull from your entire customer base, but you can also filter your calls to only customers in a campaign or location of your choosing.
No. of Calls = Select the amount of calls you want to make.
Days to ignore = refers to the number of days* since your last point of contact with an account. e.g. Selecting 63 days (9 weeks) will ignore anyone who has been contacted in the last 63 days.
*Please note: Days to ignore can only be changed in increments of a week on mobile
Generation Interval = How often do you want to make these calls.
Finally, tap the Generate button.
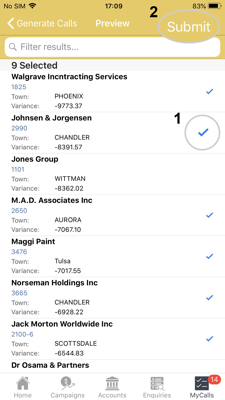
Step 4: Preview and Edit
You will now see a preview of your results.
They are in order of the accounts who have had the biggest decrease in spend (year on year).
You can untick any which you don't want to contact.
Once you are happy with your selection, click the Submit button in the top right hand corner.
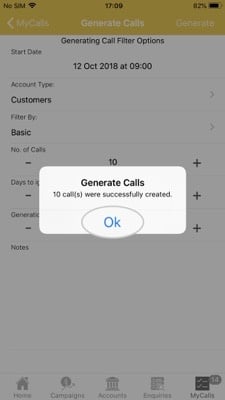
Step 5: Generate
You will now see a message informing you that calls were successfully created.
Tap Ok.
Step 6: View list
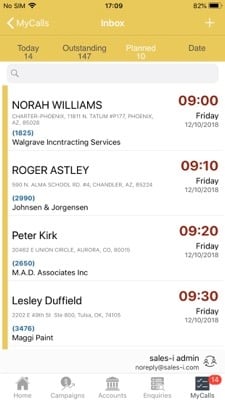
Your list of calls has been created and sent to your diary.
To see them tap either Today (to see calls scheduled for today) or Planned (to see calls you have scheduled for the future).
Android
Download a PDF version
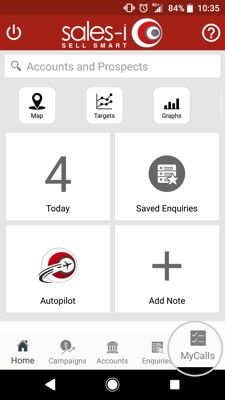
Step 1: Tap MyCalls
From the navigation bar at the bottom of the screen, tap MyCalls.
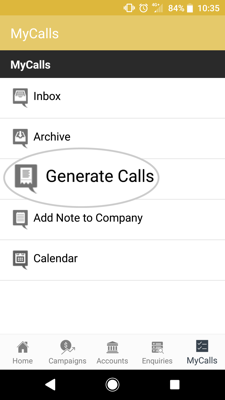
Step 2: Tap Generate Calls
Next, tap Generate Calls.
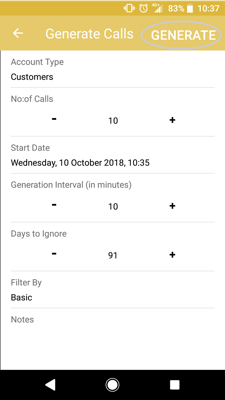
Step 3: Generate Calls options
Account Type = Select Customers or Prospects.
No. of Calls = Select the amount of calls you want to make.
Start Date = Select what day and time you would like to start making these calls.
Generation Interval = How often do you want to make these calls.
Days to ignore = refers to the number of days* since your last point of contact with an account. e.g. Selecting 63 days (9 weeks) will ignore anyone who has been contacted in the last 63 days.
*Please note: Days to ignore can only be changed in increments of a week on mobile.
Filter by = Filtering your results to ‘basic’ will let you pull from your entire customer base, but you can also filter your calls to only customers in a campaign or location of your choosing.
Finally, tap the Generate button.
Step 4: Preview and Edit
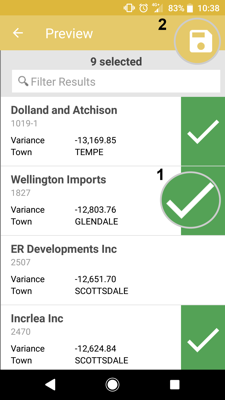
You will now see a preview of your results.
They are in order of the accounts who have had the biggest decrease in spend (year on year).
You can untick any which you don't want to contact.
Once you are happy with your selection, click the Save icon button in the top right hand corner.
Step 5: Tap OK
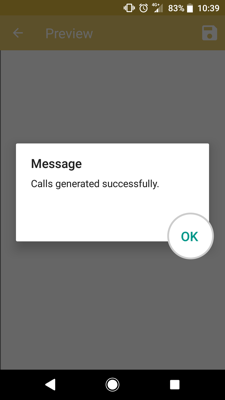
You will now see a message informing you that calls were generated successfully.
Tap Ok.
Step 6: View list
Your list of calls has been created and sent to your diary.
To see them tap the three dots icon in the top right hand corner and then click Calls for Today (to see calls scheduled for today) or Calls Planned (to see calls you have scheduled for the future).
