If you run an Enquiry on a regular basis, it may be useful to save it for future reference.
Saved Enquiries can automatically update to display the latest sales data – this is especially useful when you have an Enquiry with more complex parameters, such as multiple filters (i.e. three different products).
Your saved enquiries can be accessed and loaded from your Home page, saving you valuable time.
Select a device
Desktop
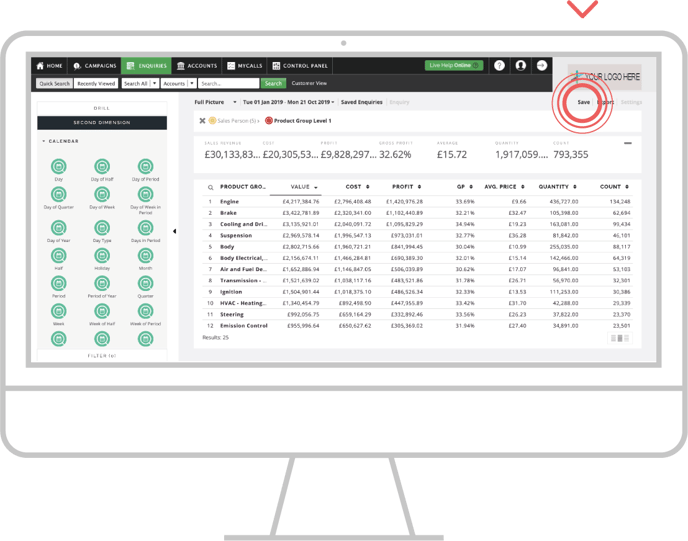
Step 1: Generate report
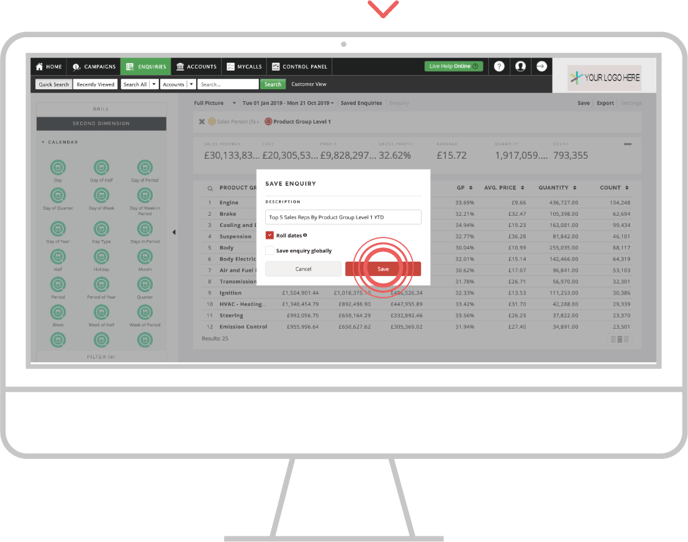
Once you have the Enquiry built how you require, click the Save button in the top right corner of the screen.
Step 2: Name Enquiry
Simply name the Enquiry you wish to save, ensuring this is something meaningful to the enquiry and explains what’s included. For example, Top 5 Sales Reps By Product Group Level 1 YTD.
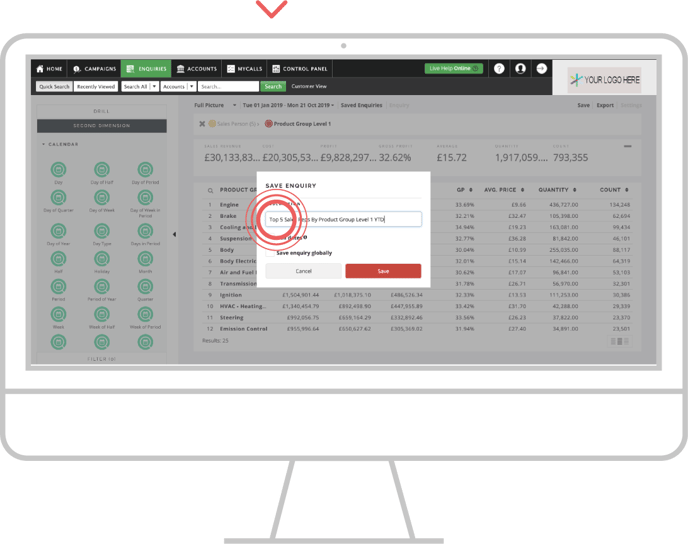
Step 3: Permissions
Select the Roll dates option should you want the report to be dynamic and the data kept up to date.
If you are a Power User, you will have the Save enquiry globally option to allow all other users to see and load the relevant results based on restrictions.
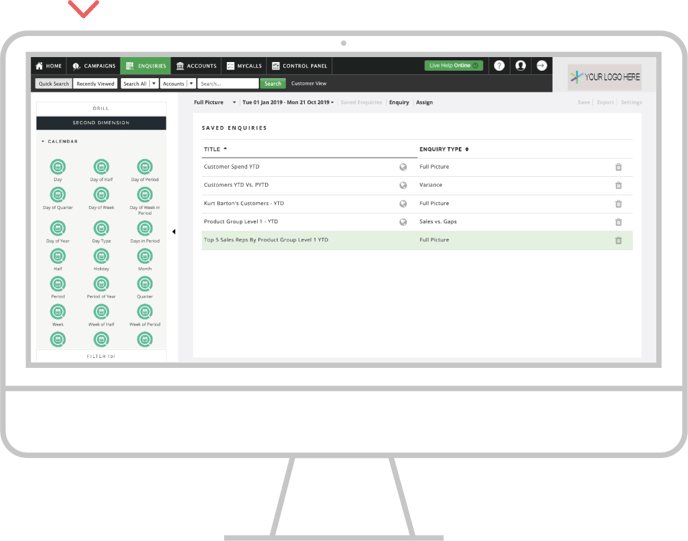
Step 4: Save
Once set, click the Save button and your report is all saved, you can find this on the Home Page or within the Saved Enquires at the top of the page.
Apple
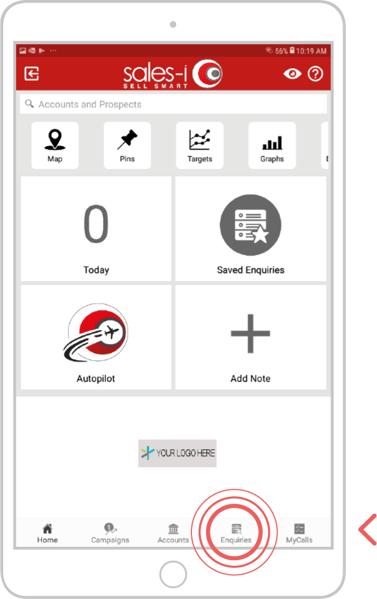
Step 1: Go to Enquiries
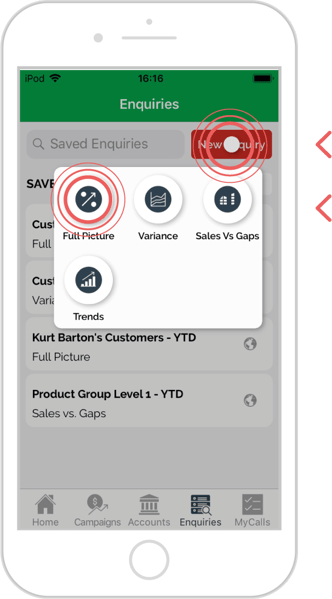
Choose the Enquiries feature from the navigation at the bottom of the screen.

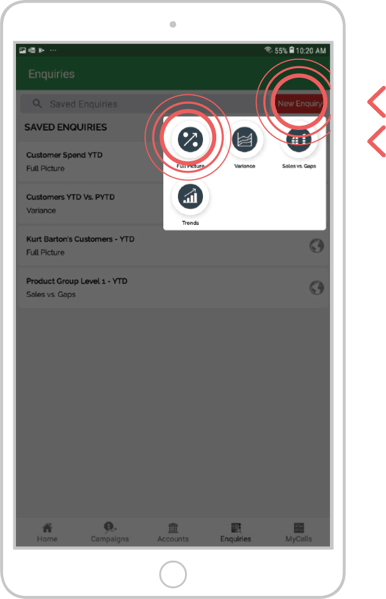
Step 2: New Enquiry
Click the New Enquiry button in the top right-hand corner of the screen and choose from the options, which enquiry you’d like to run.
In this example, tap on Full Picture.
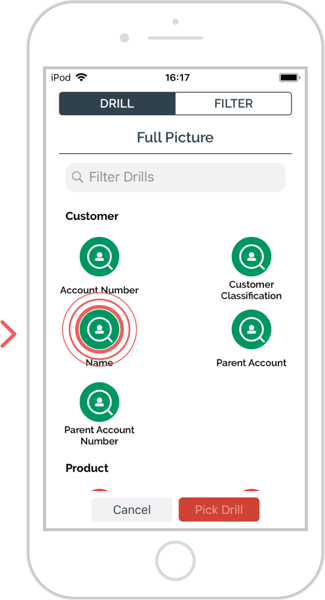
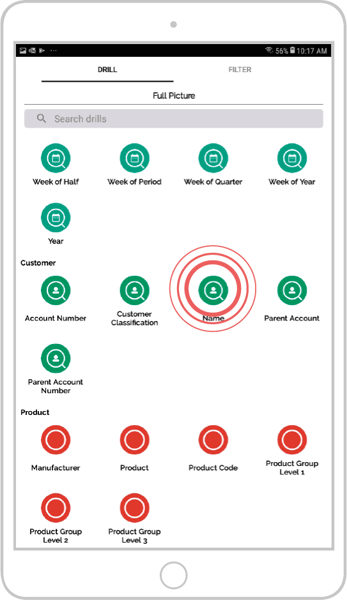
Step 3: Gather data
From the available bubbles select the option you wish to run, in this example we are using the Name bubble.
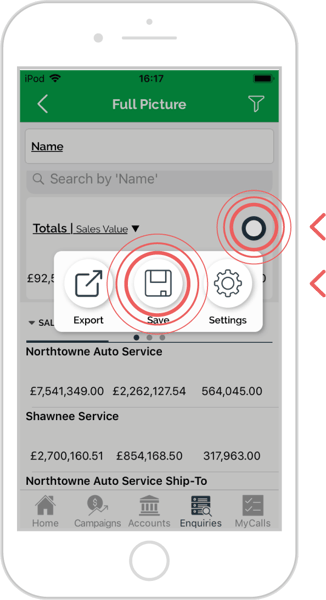
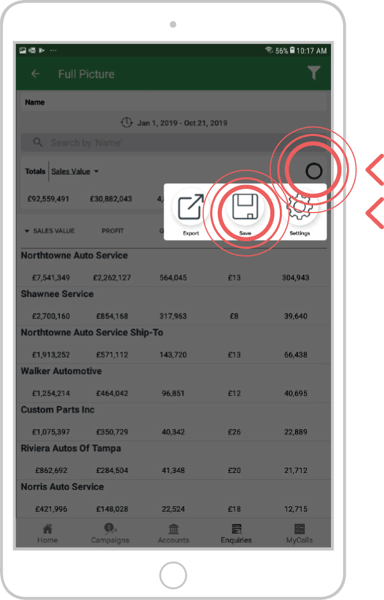
Step 4: Save Enquiry
To save your enquiry tap on the ‘Options’ icon with 3 lines on the right-hand side, just under you set date range.
When tapping this button, it will show 3 additional option buttons.
Tap on the Save Enquiry button.
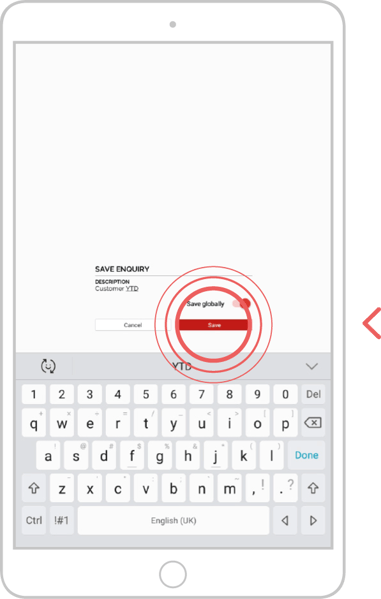
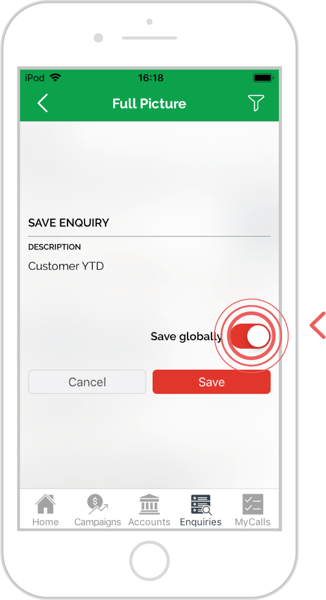
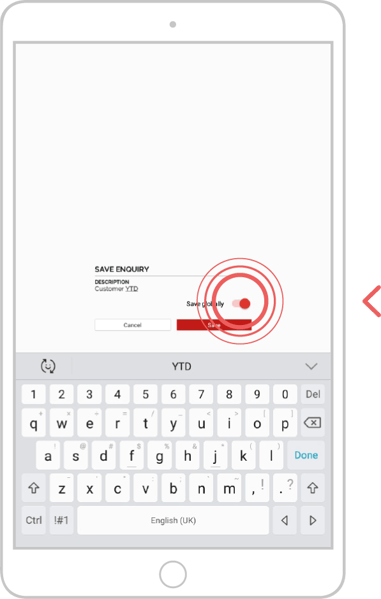
Step 5: Name enquiry
Here you can name your Enquiry and choose if you want to save the enquiry ‘Globally’ (Power users only can save globally) by sliding the switch to the right.
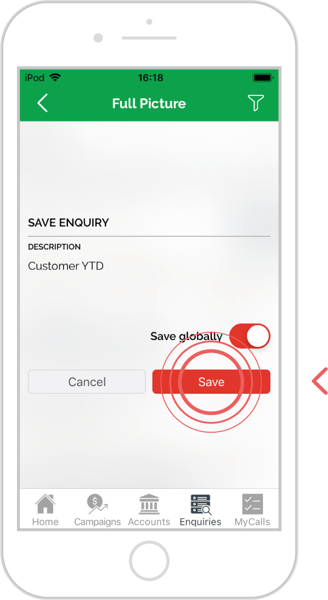
Step 6: Save
When you have named your enquiry tap the red ‘Save’ button.
Android
Step 1: Go to Enquiries
Choose the Enquiries feature from the navigation at the bottom of the screen.
Step 2: New Enquiry
Click the New Enquiry button in the top right-hand corner of the screen and choose from the options, which enquiry you’d like to run.
In this example, tap on Full Picture.
Step 3: Gather data
From the available bubbles select the option you wish to run, in this example we are using the Name bubble.
Step 4: Save Enquiry
To save your enquiry tap on the ‘Options’ icon with 3 lines on the right-hand side, just under you set date range.
When tapping this button, it will show 3 additional option buttons.
Tap on the Save Enquiry button.
Step 5: Name Enquiry
Here you can name your Enquiry and choose if you want to save the enquiry ‘Globally’ (Power users only can save globally) by sliding the switch to the right.
Step 6: Save
When you have named your enquiry tap the Save button.