This guide will show you how to save time by using the dictation option on your Apple device to dictate information rather than typing it in.
Apple
Download a PDF version
Firstly, you need to ensure that the dictation function is turned on. To do this follow these 4 steps:
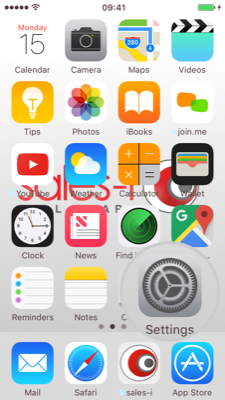
Step 1: Go to settings
Tap the Settings icon on your Apple device.
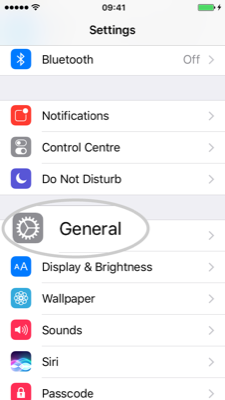
Step 2: Select General
Scroll down and tap the General option.
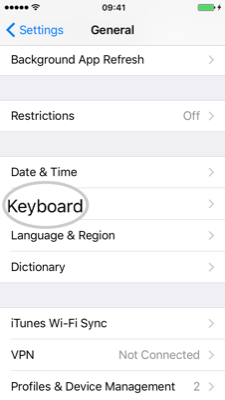
Step 3: Select Keyboard
Now find and tap the Keyboard option.
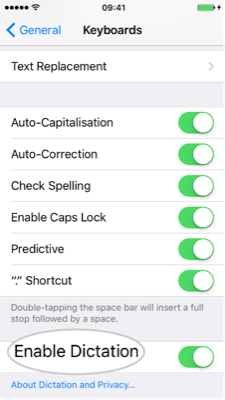
Step 4: Select Enable Dictation
Tap Enable Dictation*
* Please note: If the button space is green then dictation is already turned on.
You are now ready to use the dictation button on your Apple device.
The below scenario is based on dictating a note for a follow up action.
Step 5: Load sales-i and select Today
Load the sales-i app and from the home screen, tap on Today.

Step 6: Select an Account
Select the account you wish to add a note to.

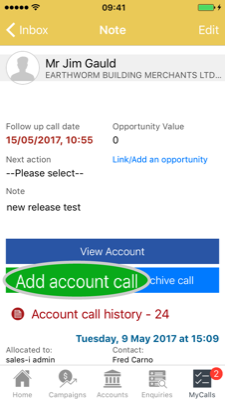
Step 7: Tap Add Account call
Tap the green Add account call button.
Step 8: Fill out relevant fields
Fill out the required fields* e.g. Call Type and Call Outcome and then tap Note.
*For a detailed guide on how to add notes, read this article
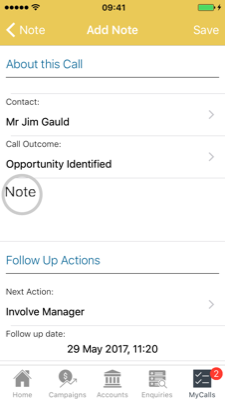
Step 9: Press the Microphone icon
Press the Microphone icon to begin dictation and speak into your device in a normal speed and tone.

Step 10: Tap Done
Once you have finished speaking, tap Done to complete dictation.
The words spoken will be shown as standard text on the screen.
You can now save the note and continue as normal.

Remember:
You will need a Wi-Fi or (at least) a 3G connection for this to work successfully!
Any time you see the small microphone icon next to the spacebar on the keyboard, dictation is available.