This guide shows you how MyCalls can make customer contact more successful and easier to manage.
Desktop
Download a PDF version
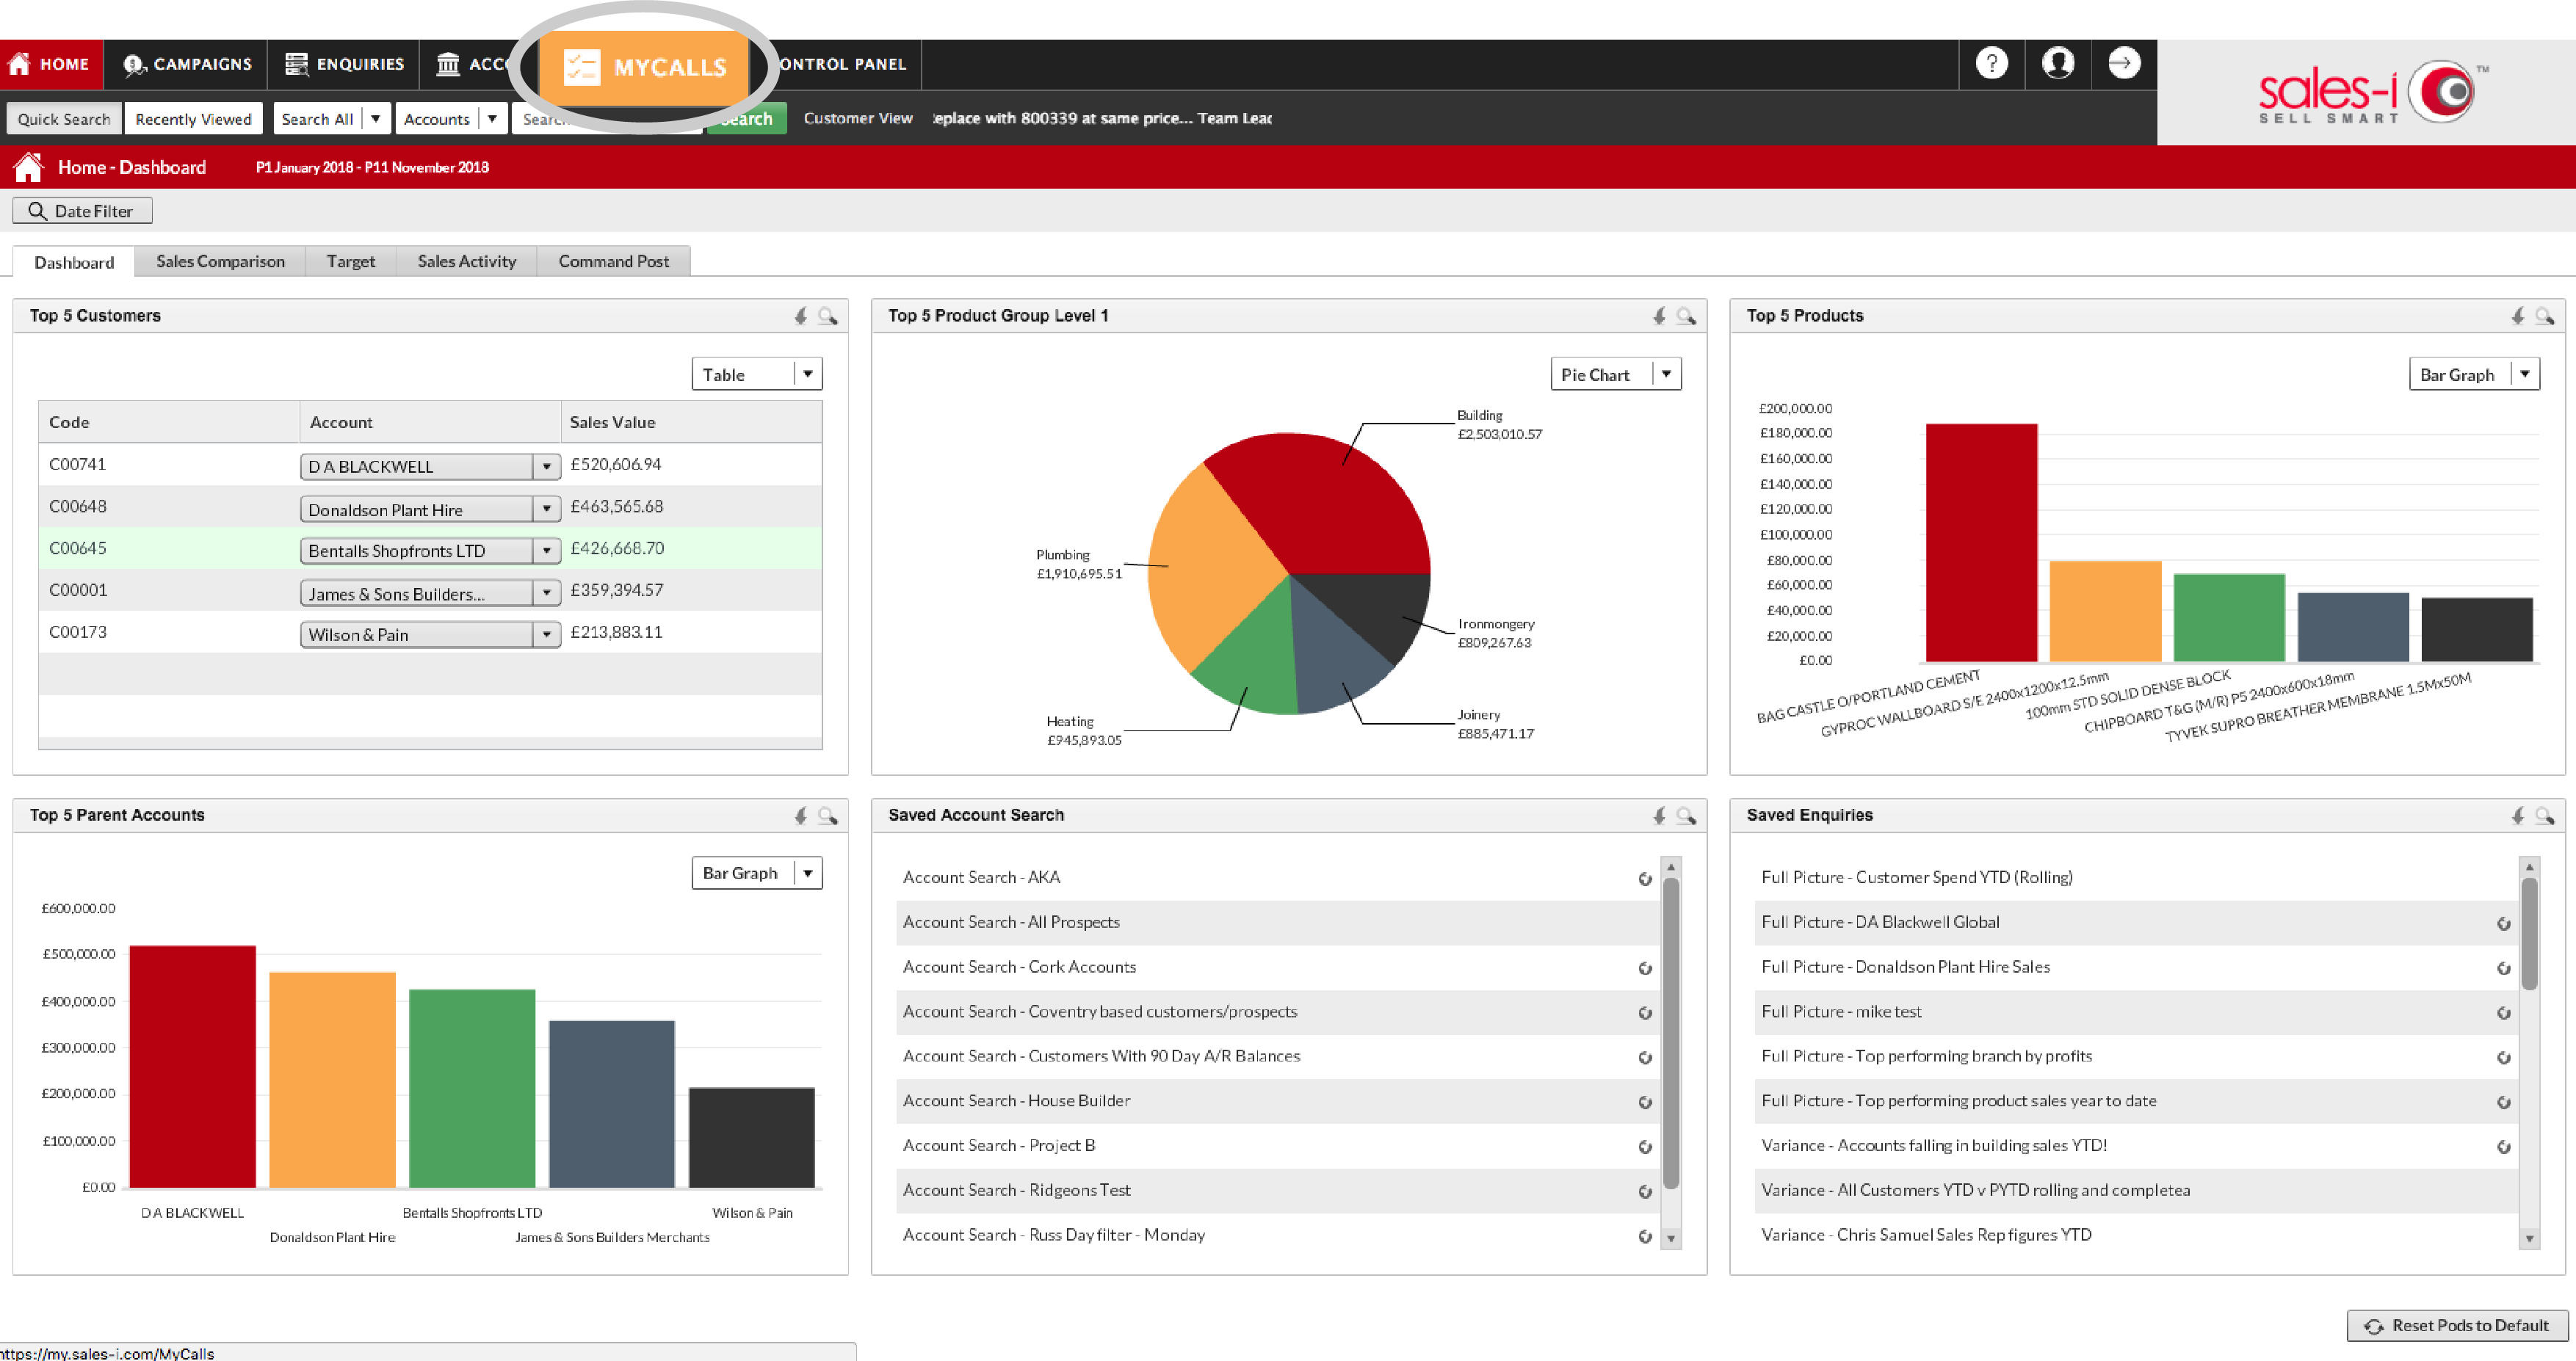
Step 1: Go to MyCalls
From the top navigation, click MyCalls.
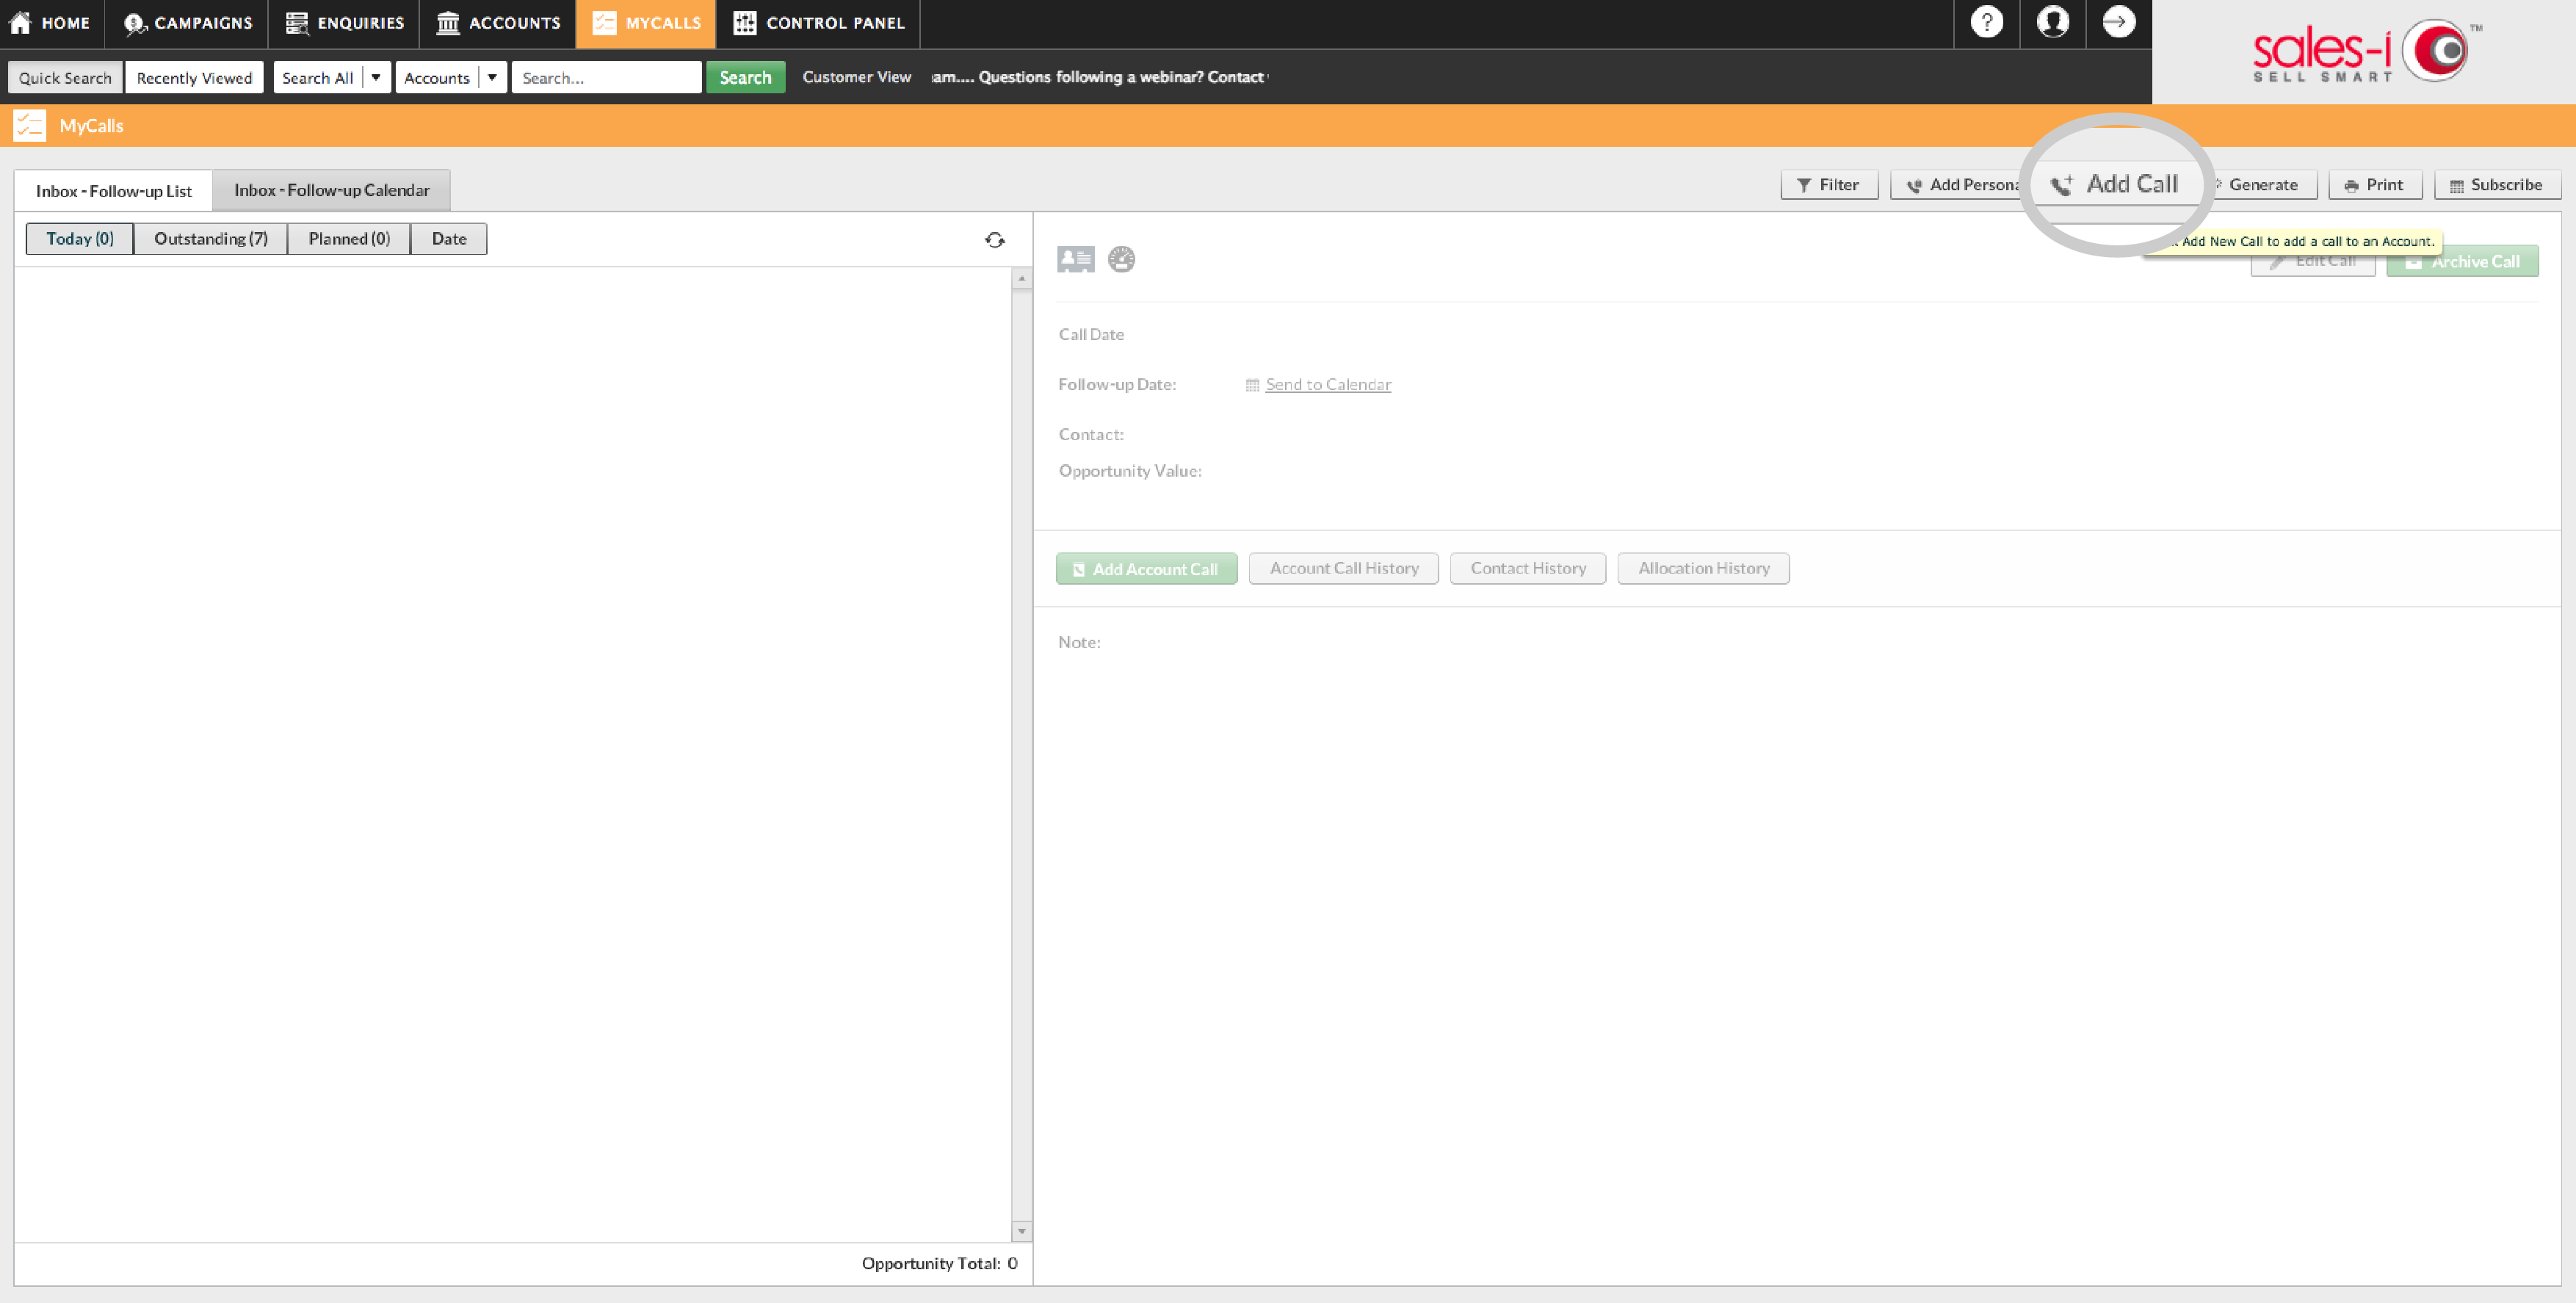
Step 2: Click Add Call
Click Add Call to search for an existing account.
*Accounts need to pre-exist prior to booking an interaction.
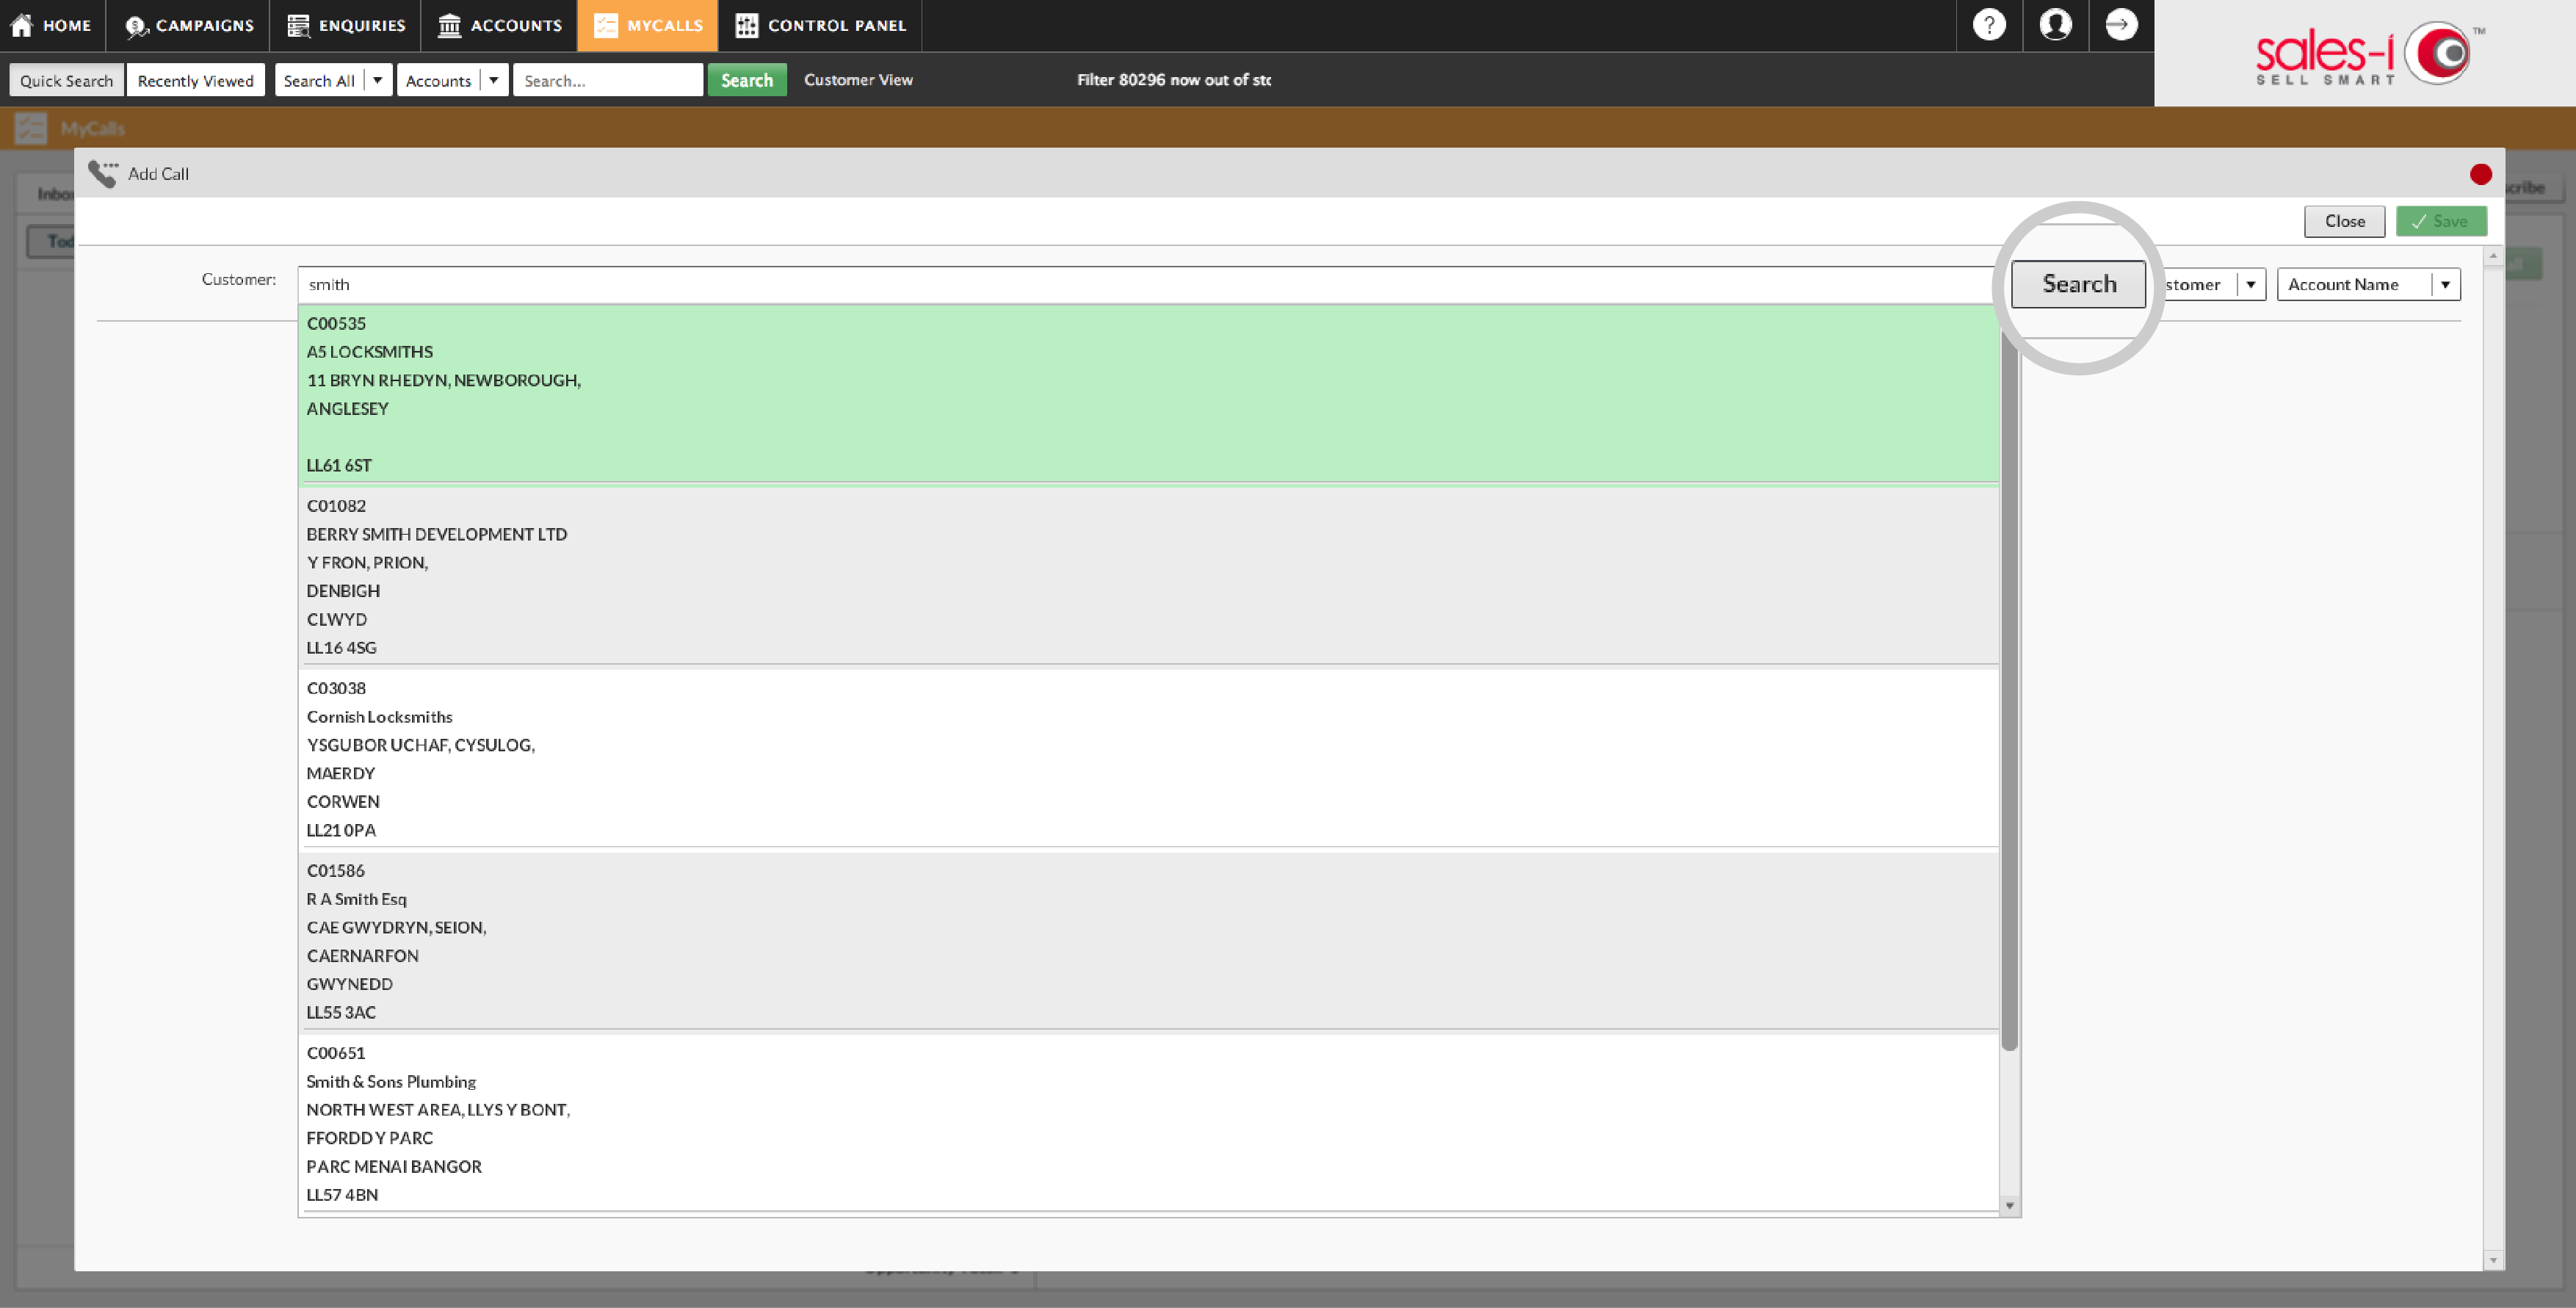
Step 3: Search Options
Search for your customer or prospect by full / partial account name or via the account number using the drop-down options and the Search field.
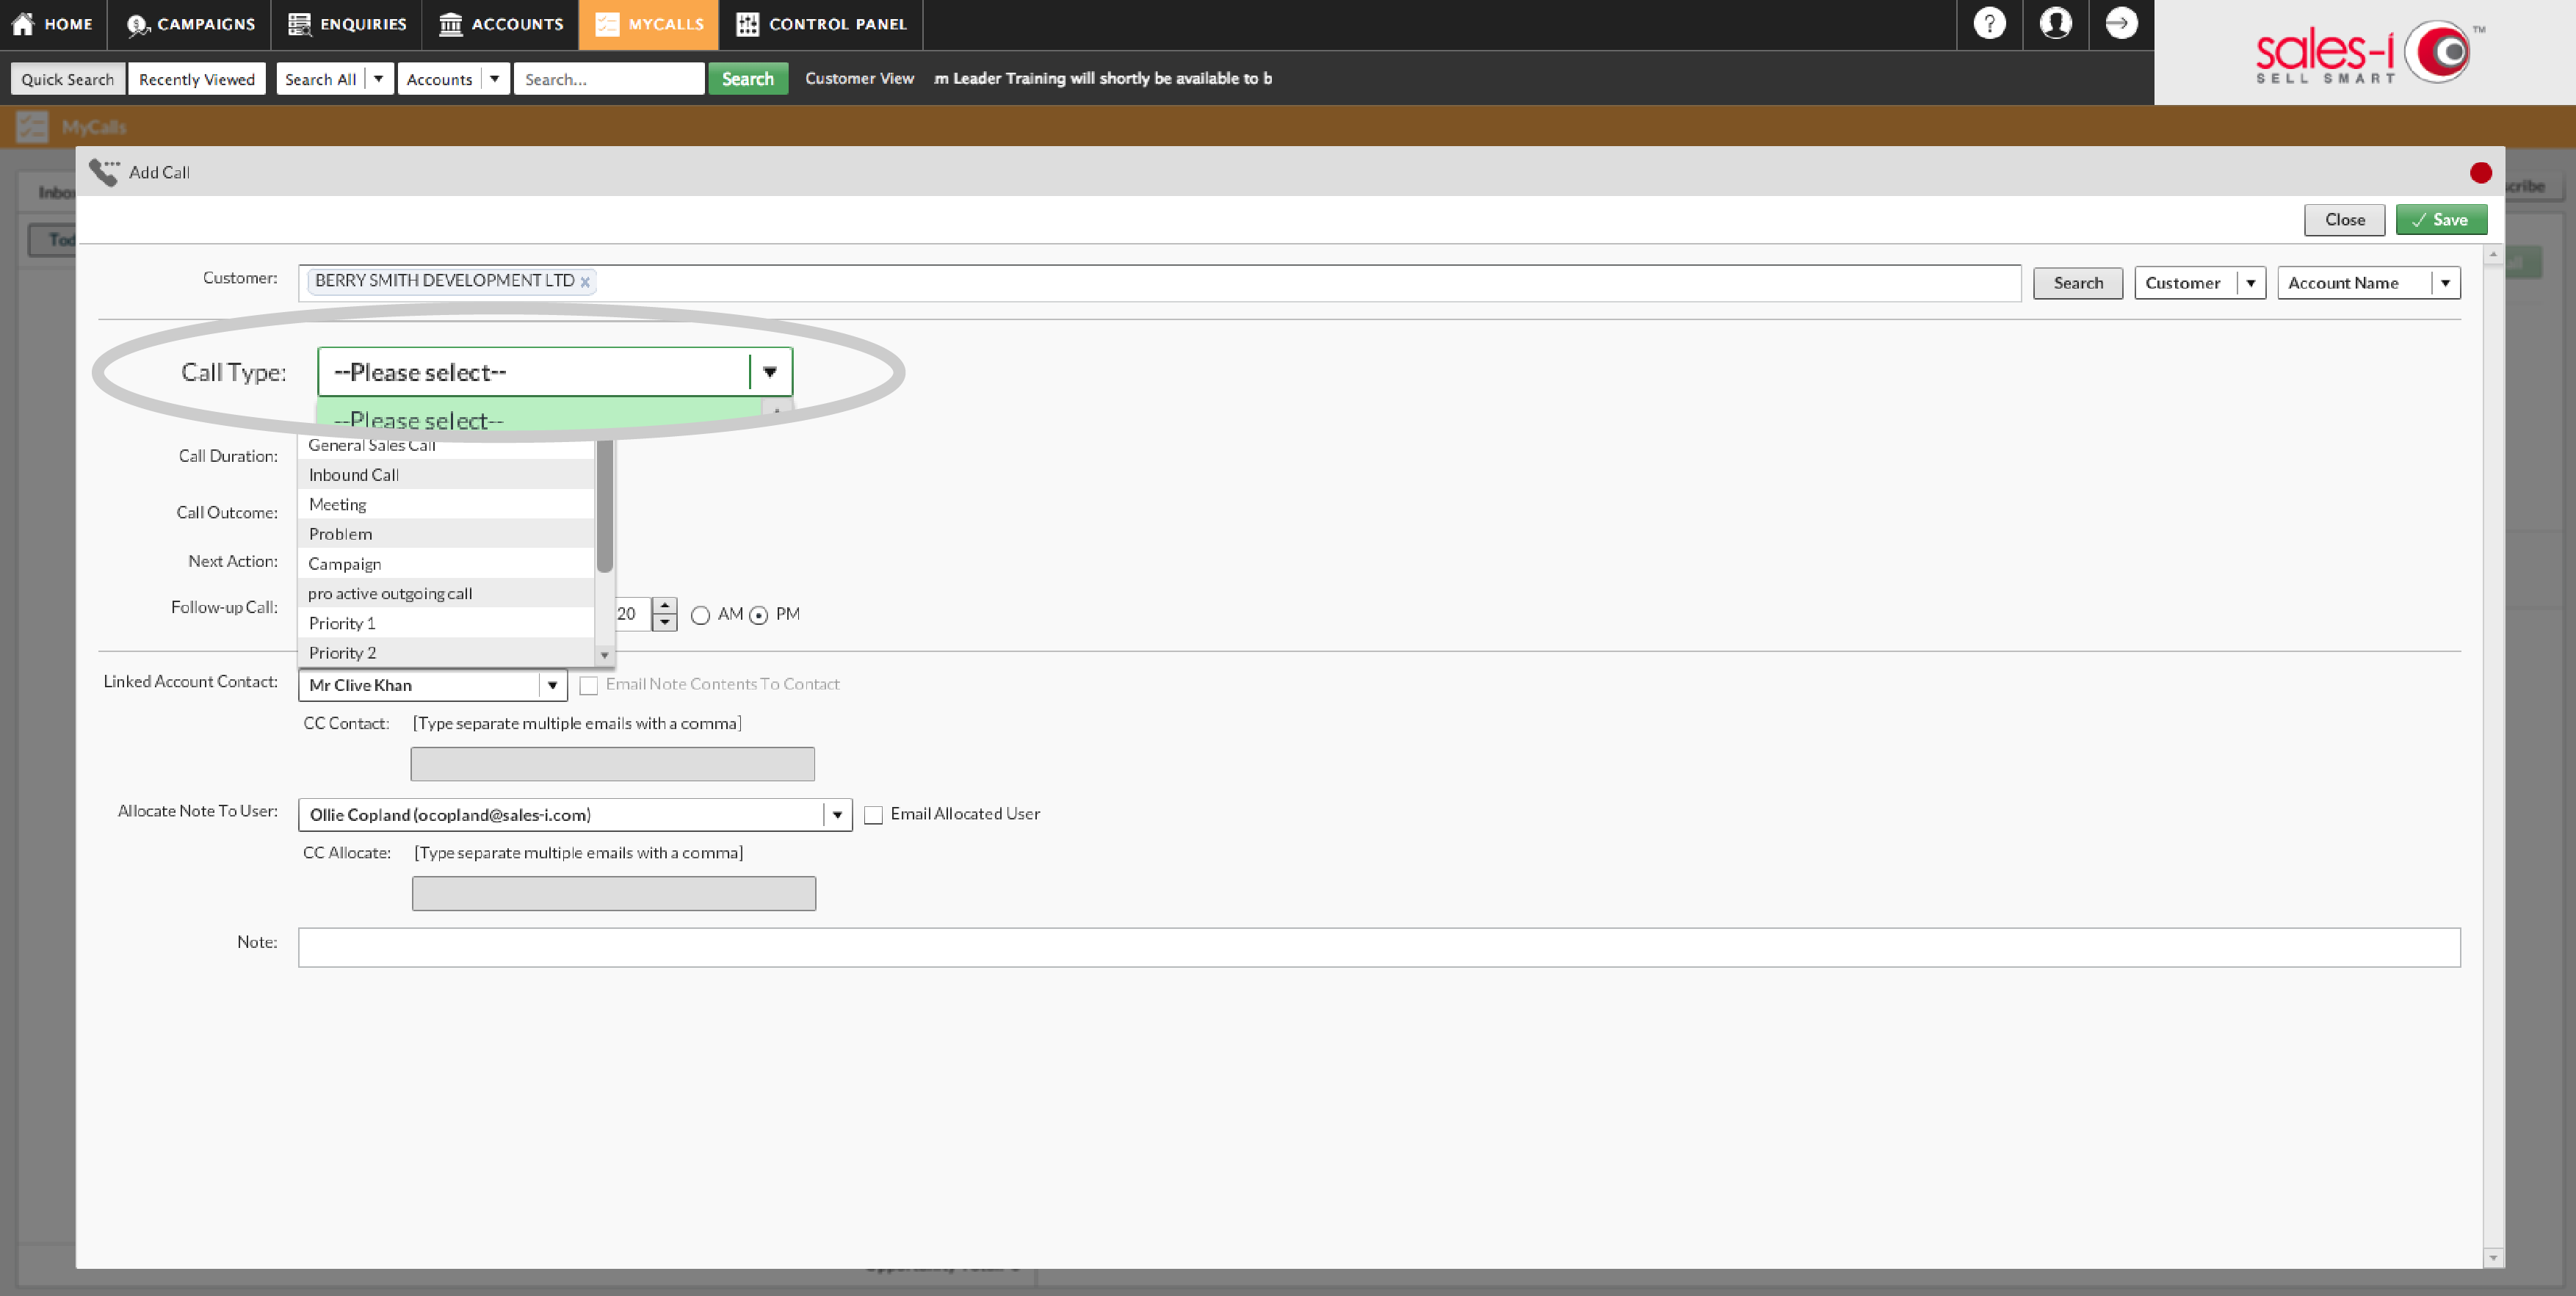
Step 4: Select Meeting Type
Use the Call Type drop down list to select the overview of the meeting you are going to have with this account, i.e. Account Visit, Sales Call, Meeting.
*Please note these can be customized to suit your needs by the Power User of your system.
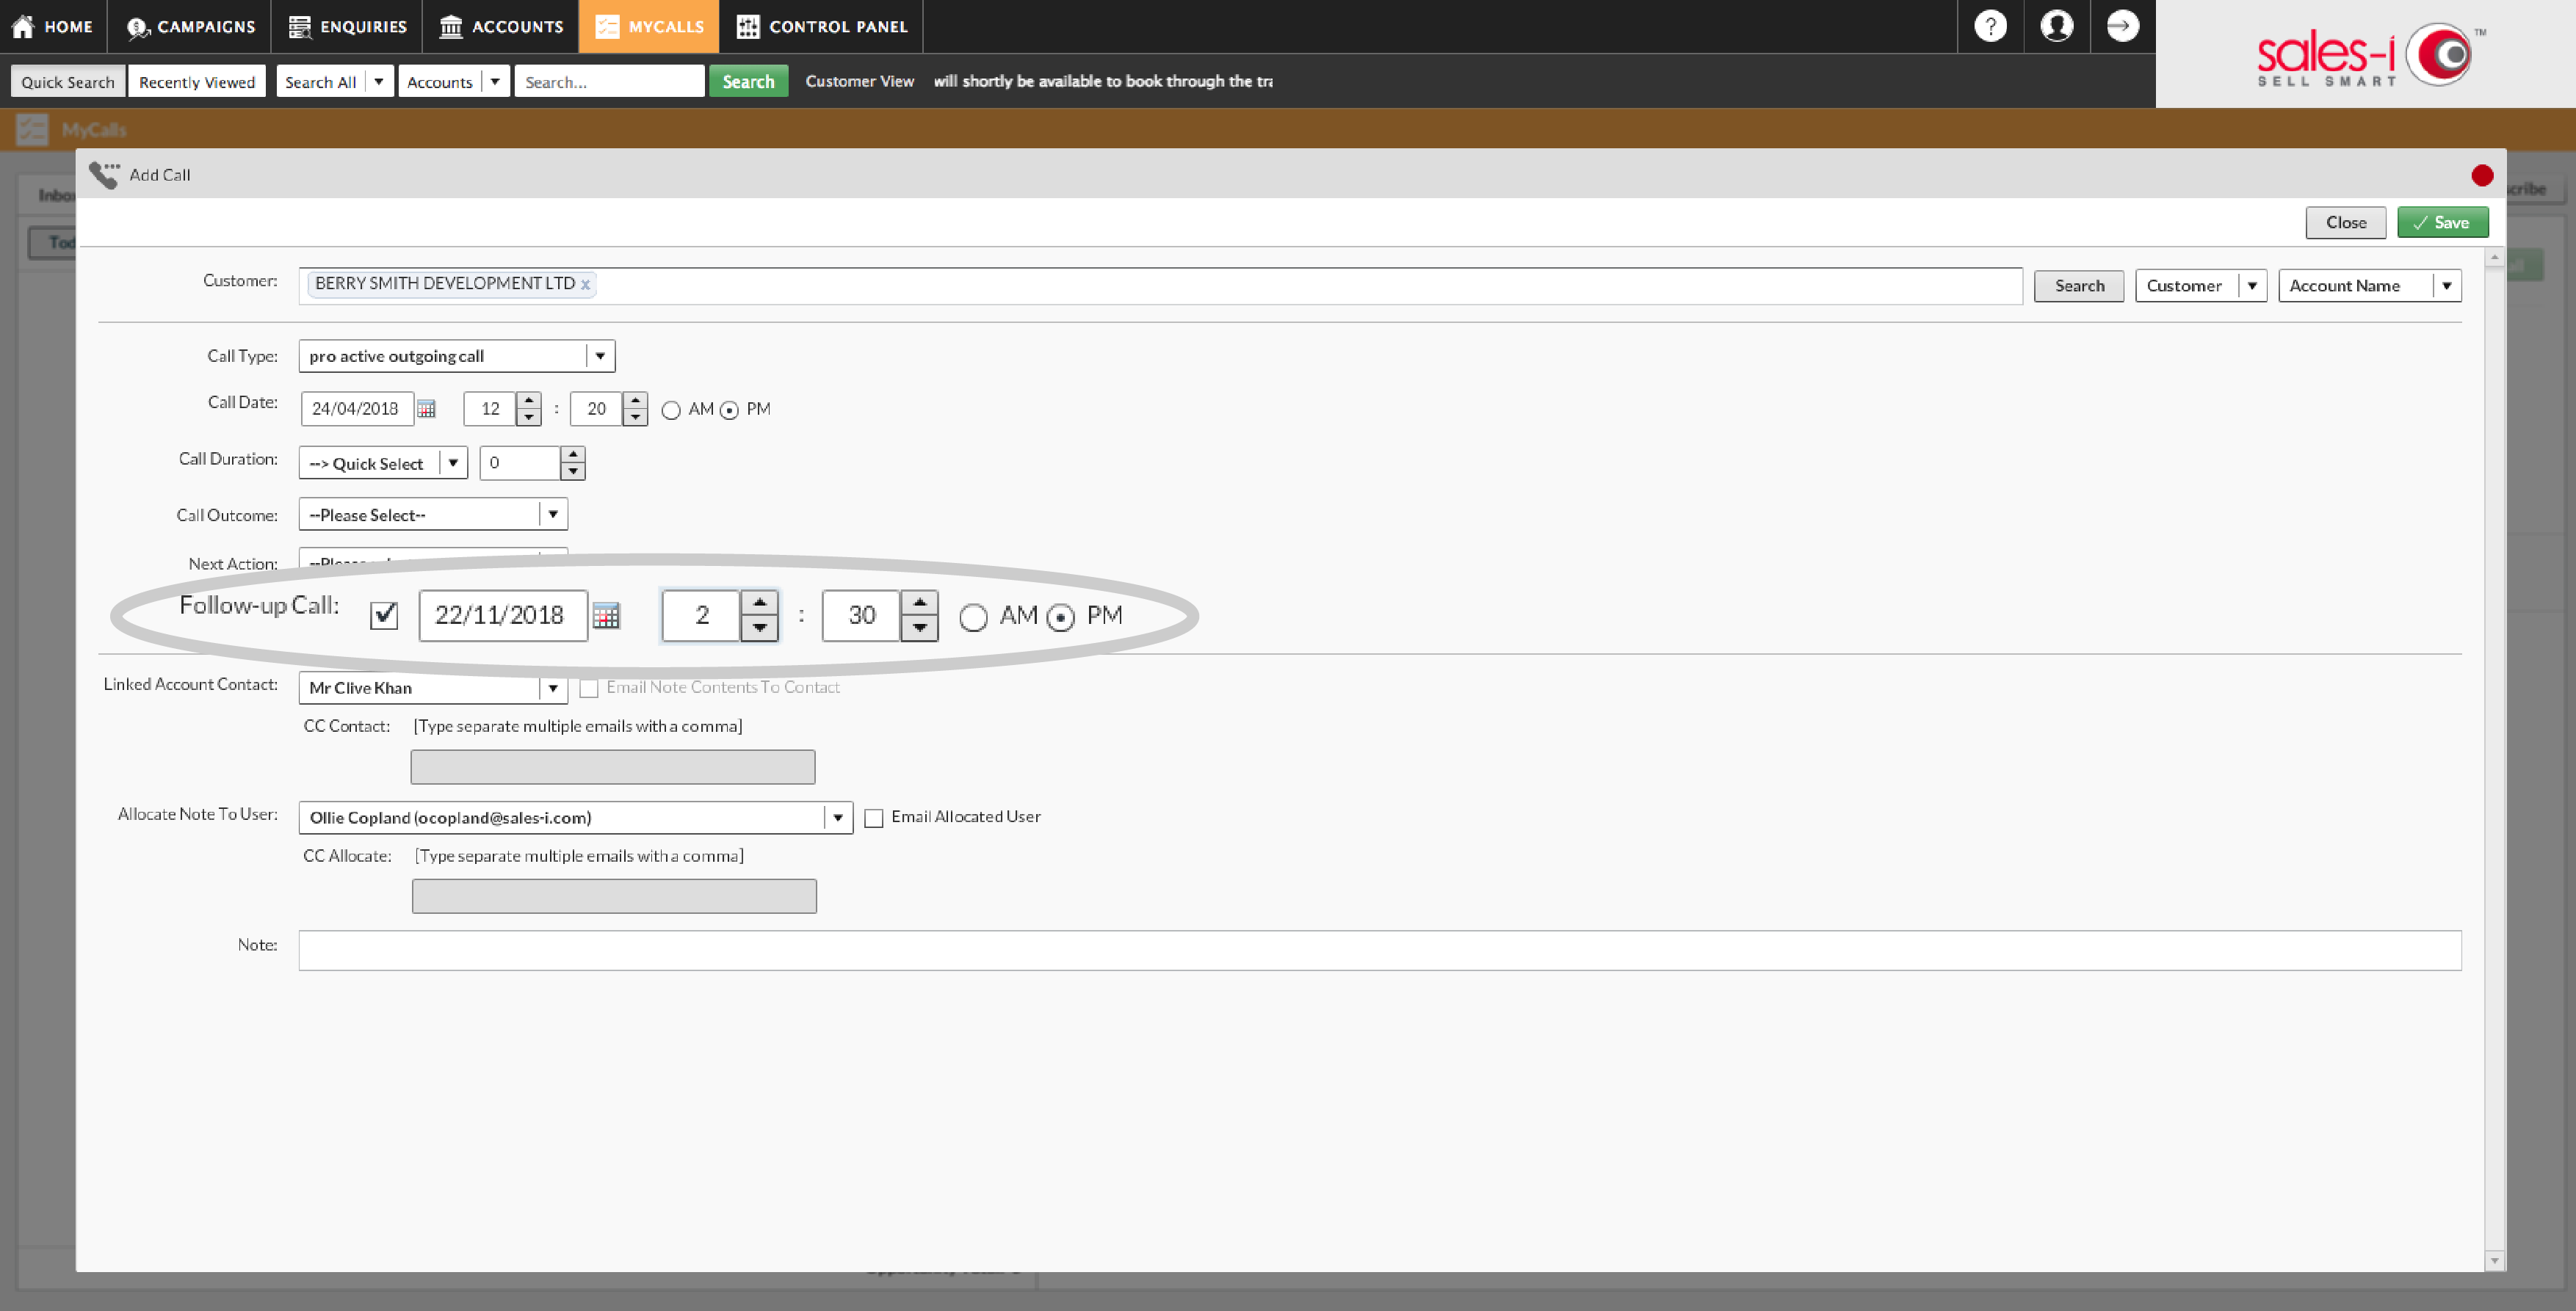
Step 5: Follow-up Call
Use the Follow-up call time & date selector to drive your diary and schedule this interaction with the account, you may need to tick the box next to Follow-up call to enable this selector.
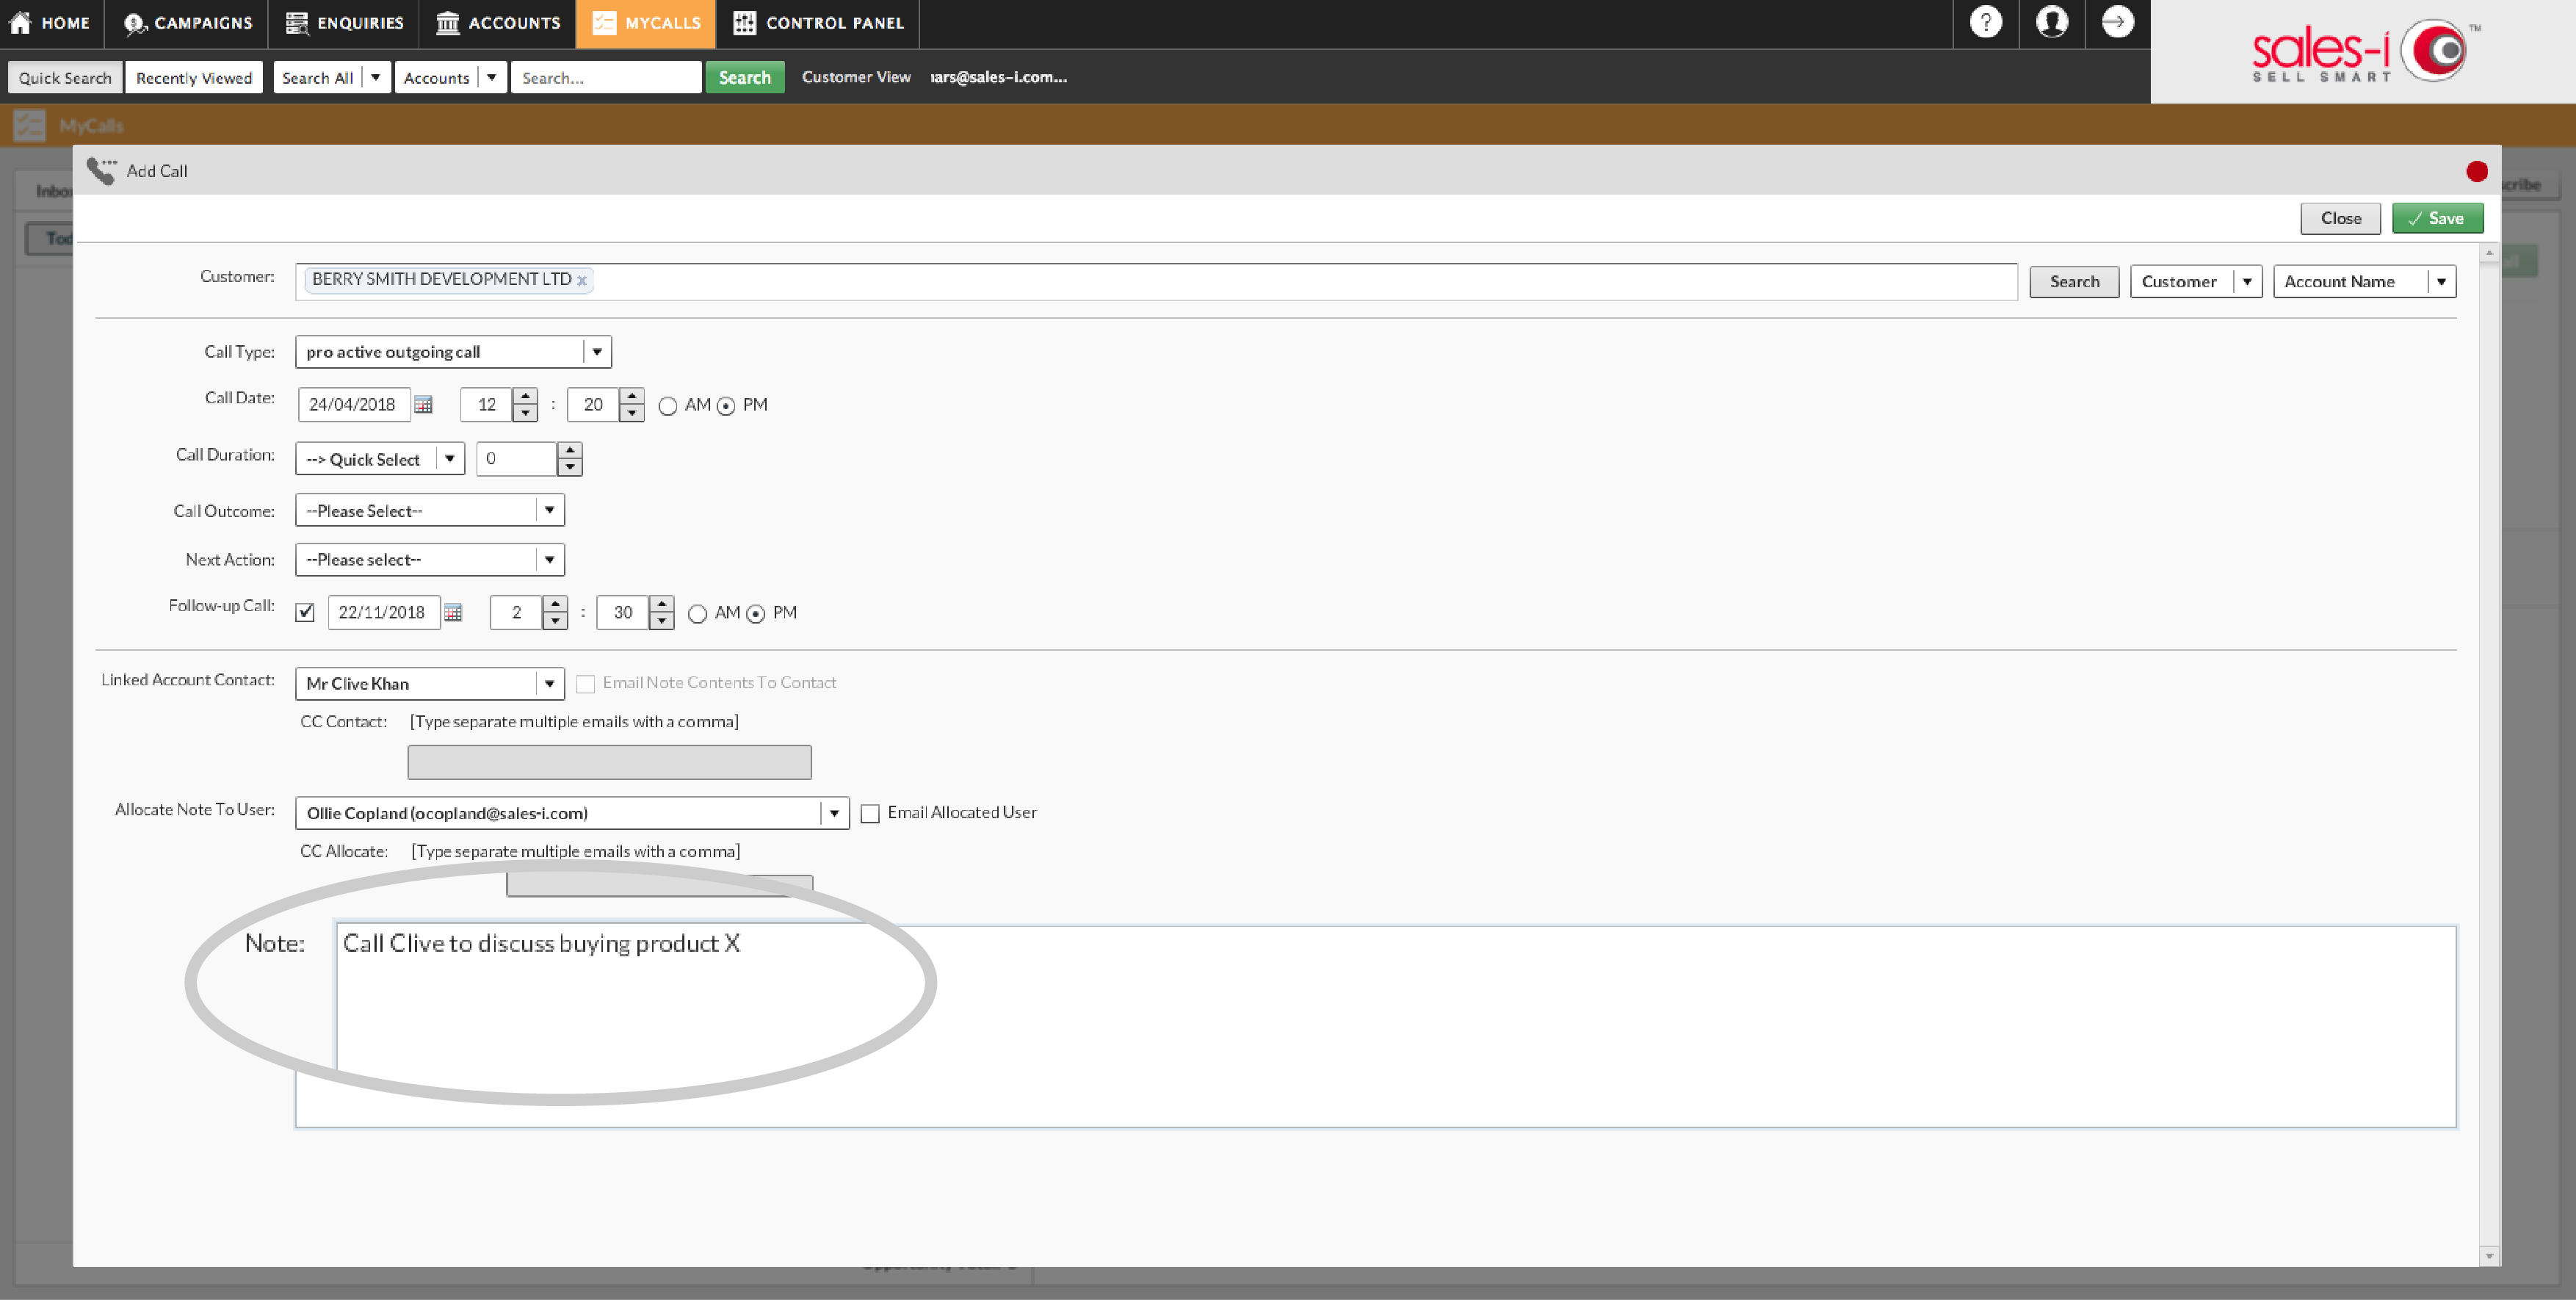
Step 6: Add a Note
Add a Note into the mandatory note field to outline the objectives and discussion points of this interaction.
Step 7: Save
Back at the top right hand corner, click onto the Save button.

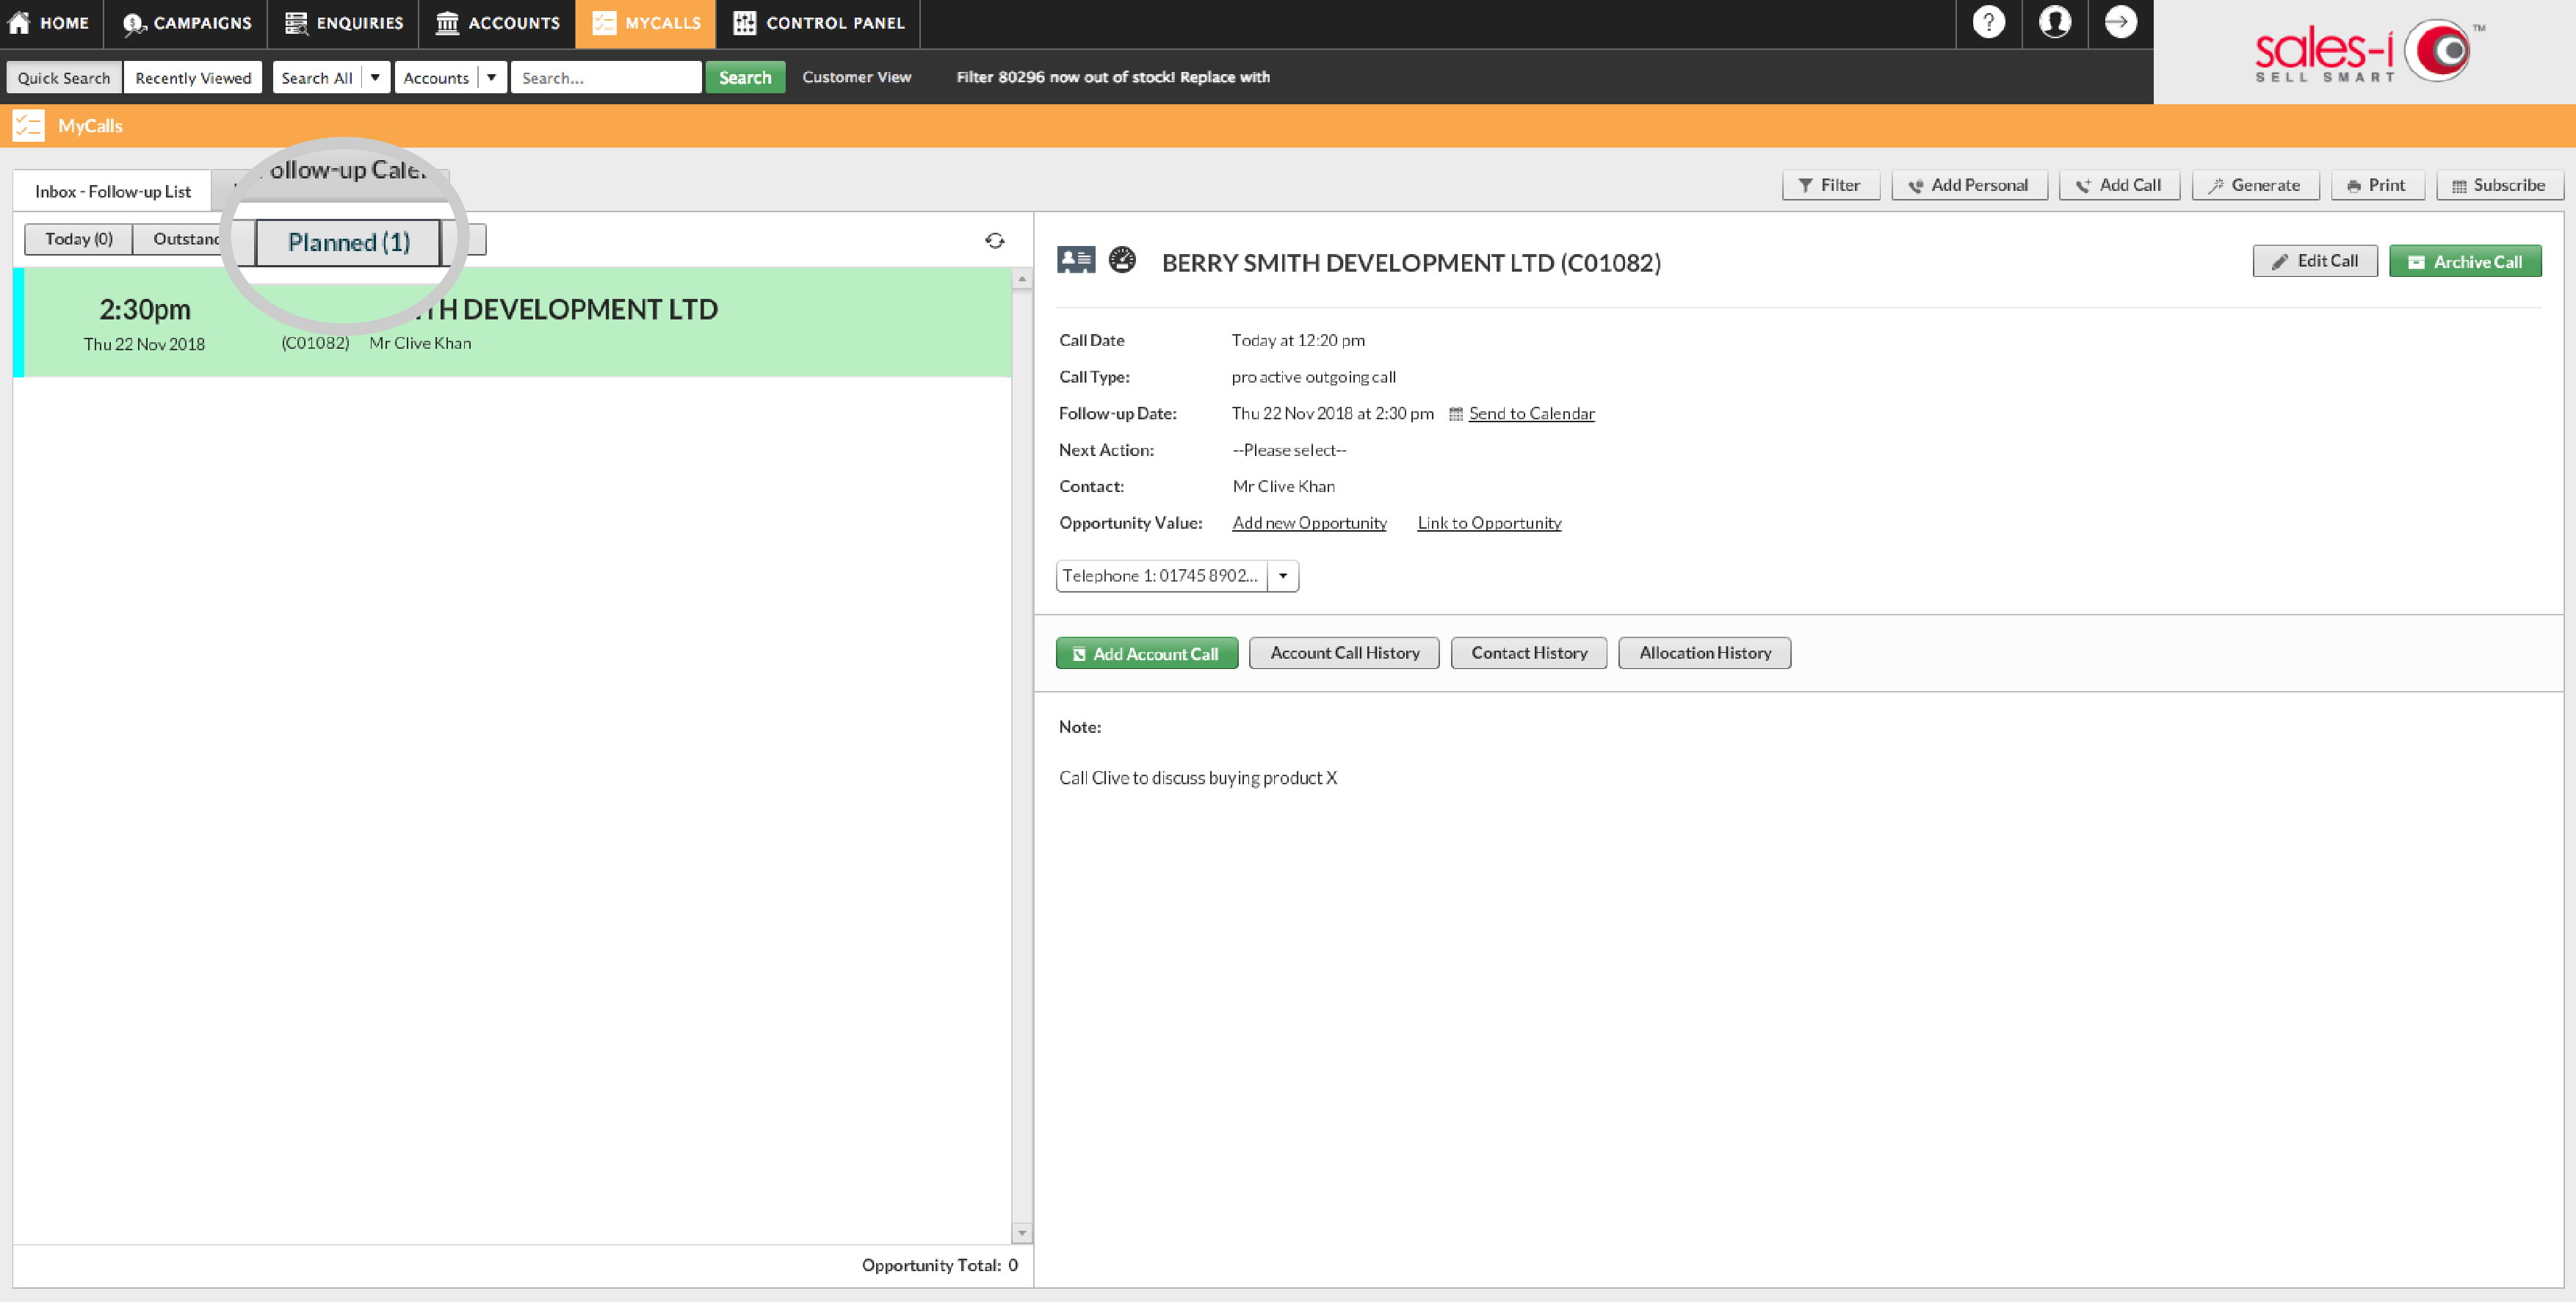
Step 8: Check Booking
You can view your booked interaction in the Inbox – Follow-up List view, in the relevant section.
Step 9: Optional
If you haven’t already you can Sync your MyCalls diary across multiple devices, PC, iOS or Android, click the links below to follow the simple guide for each method:
PC –https://support.sales-i.com/knowledgehub/mycalls/how-to-sync-your-mycalls-calendar-with-outlook
Android –https://support.sales-i.com/mycalls/how-to-guides/how-to-sync-mycalls-gmail-and-android
Apple
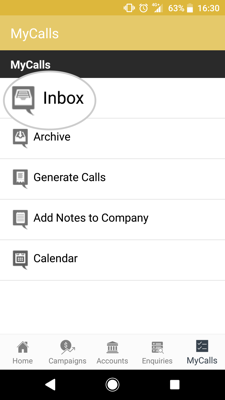
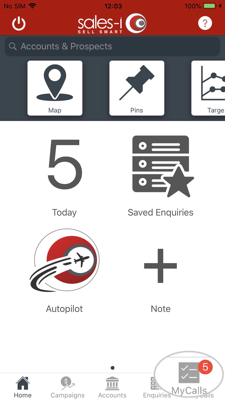
Step 1: Tap MyCalls
From the bottom navigation menu, tap MyCalls.
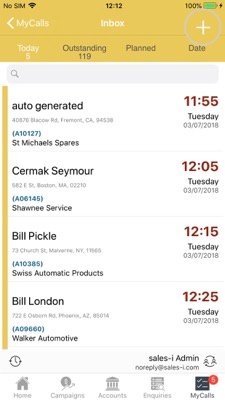
Step 2: Tap the +
Tap the + at the top of the screen.
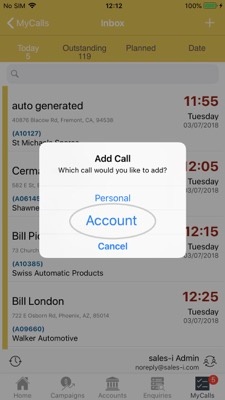
Step 3: Tap Account
Tap Account to search for an existing account.
*Accounts need to pre-exist prior to booking an interaction.
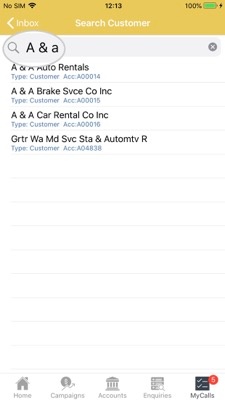
Search for your customer or prospect by full / partial account name or via the account number.
Step 4: Search for your customer
Search for your customer or prospect by full / partial account name or via the account number.
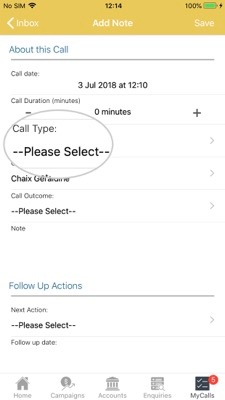
Step 5: Select Call Type
Use the Call Type drop down list to select the overview of the meeting you are going to have with this account, i.e. Account Visit, Sales Call, Meeting.
*Please note: These can be customized to suit your needs by the Power User of your system.
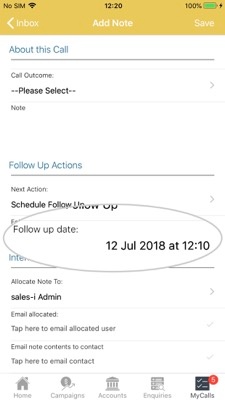
Step 6: Tap the Follow-up call time & date selector box
You will now need to tap the Follow-up call time & date selector box to schedule the next interaction with this account.
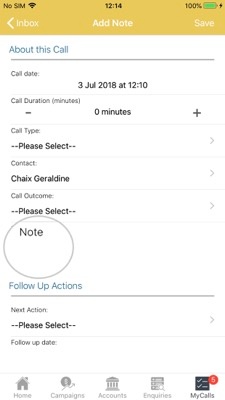
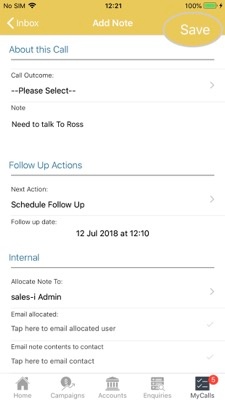
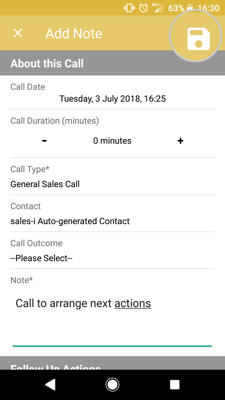
Step 7: Tap Note
Tap Note.
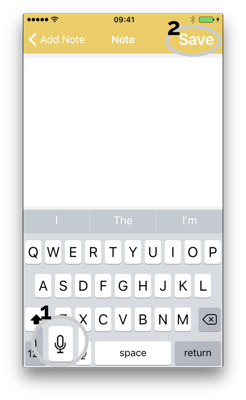
Step 8: Record details
You can now type your details or alternatively, tap the mic icon to dictate your notes using Siri.
When you’re done, tap the save icon in the top right corner to save the text.
Step 9: Tap Save
When you are ready, tap Save the top right hand corner to save.
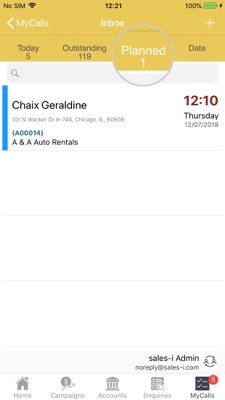
Step 10: Tap Planned
Tap Planned in the Inbox menu to view your booked interactions. You can also view your planned calls as a Calendar View to see calls on a specific date.
Android
Download a PDF version
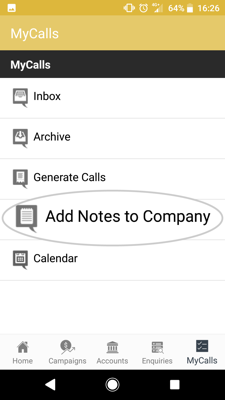
Step 1: Tap MyCalls
From the bottom navigation menu, tap MyCalls.
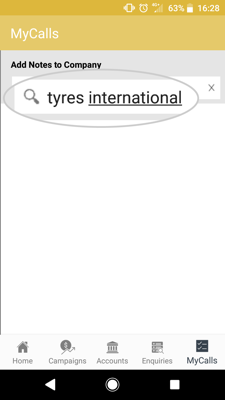
Step 2: Tap add Notes to Company
Tap Add Notes to Company to search for an existing account.
*Accounts need to pre-exist prior to booking an interaction.
Step 3: Search for your customer
Search for your customer or prospect by full / partial account name or via the account number.
Tap on the account from the results list to add a note against them.
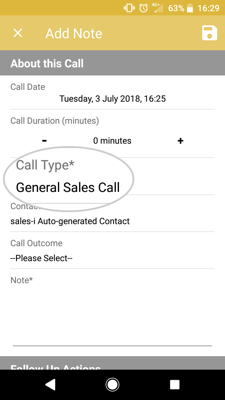
Step 4: Select Call Type
Use the Call Type drop down list to select the overview of the meeting you are going to have with this account, i.e. Account Visit, Sales Call, Meeting.
*Please note: These can be customized to suit your needs by the Power User of your system.
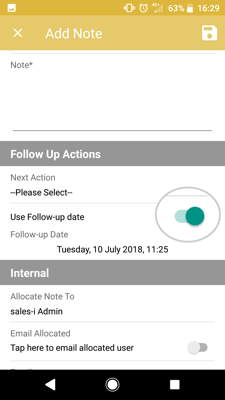
Step 5: Select the Follow-up call time & date selector box
You will now need to tap the Follow-up call time & date selector box to schedule the next interaction with this account.
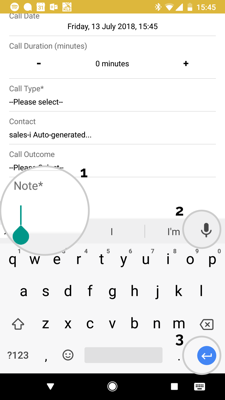
Step 6: Tap Note and enter call details
Tap Note to type in the details of your call.
You can also tap the mic icon to dictate your notes using Google Voice Typing.
When you’re done, tap your keyboards save icon to to save the text.
Step 7: Tap the save icon
When you are ready, tap the save icon in the top right hand corner.
Step 8: Tap Inbox
Tap Inbox to view your planned interactions. You can also view your planned calls as a Calendar to see calls on a specific date.